Edible
How to Grow Hops at Home for Homebrewing
Grow hops at home from rhizomes with this complete guide — trellis height, soil, sun, watering, fertilizing, and when to harvest cones for homebrewing.
On this page
- Quick answer
- What are hops and why grow your own?
- Choosing a variety
- Site and soil requirements
- Building the trellis: the most important prep step
- Planting hop rhizomes
- Training bines upward
- Watering
- Fertilizing: hops are heavy nitrogen feeders
- First-year vs. subsequent-year harvests
- Harvesting hops: timing and technique
- Common problems and fixes
- Watch: growing hops at home video guide
- Tazart app tip
- Related guides
Watch the visual walkthrough
GROWING, HARVESTING AND USING HOPS MEDICINALLY
Hops are a wonderful perennial plant to grow and use for multiple medicinal purposes. Not only do hops grow up and create a ...
Hops (Humulus lupulus) are the climbing perennial behind every floral IPA, piney stout, and citrusy pale ale in your homebrew rotation. Unlike most garden crops, a single hop plant can live for decades, reach 7.5 m (25 ft) in one season, and deliver hundreds of grams of fragrant cones year after year — all from a rhizome the size of your thumb.
This guide covers everything a first-time hop grower needs: choosing a variety, planting rhizomes, building a trellis, training bines, feeding the heavy nitrogen demand, and knowing the exact moment to harvest cones for peak brewing quality.
Quick answer
Plant hop rhizomes 5 cm (2 in) deep in full sun, well-drained soil (pH 6.0–7.5), after your last frost date. Set up a sturdy trellis at least 5.5 m (18 ft) tall — ideally 7.5 m (25 ft). Train two to three bines clockwise up natural-fibre rope. Water deeply 2–3 times per week, feed monthly with a high-nitrogen fertilizer from spring through mid-July, and harvest papery, lupulin-yellow cones in August–September.
What are hops and why grow your own?
Hops are the strobiles (cones) of Humulus lupulus, a fast-growing herbaceous perennial in the hemp family (Cannabaceae). The cones contain lupulin glands — tiny yellow pockets loaded with alpha acids (bitterness), beta acids, and aromatic essential oils (myrcene, linalool, geraniol) that define a beer’s flavour and aroma profile.
Homegrown hops offer three advantages over commercial pellets:
- Freshness. Wet-hopped beers brewed hours after harvest have aromatics that dried or pelletized hops never match.
- Variety access. Some heritage and experimental varieties are never sold commercially.
- Perennial economics. One rhizome purchase provides harvests for 20+ years.
The trade-off: hops demand tall structure, full sun, and patient gardening across two growing seasons before they hit full production.
Choosing a variety
Beginners do best with three proven aroma varieties:
| Variety | Alpha acid | Aroma character | Best for |
|---|---|---|---|
| Cascade | 4–7% | Grapefruit, floral, citrus | American pale ale, IPA |
| Centennial | 9–12% | Floral, citrus, slight pine | IPA, porter, bittering |
| Chinook | 12–14% | Pine, spice, subtle grapefruit | IPA, stout, bittering |
All three are widely available as spring rhizomes, vigorous in USDA zones 3–8, and tolerant of beginner mistakes. Cascade is the most forgiving and produces the most recognisable homebrewing aroma — a solid first-plant choice for most growers.
Avoid starting from seed. Hop seeds produce mostly male plants (which don’t form cones), germination is slow, and the resulting genetics are wildly unpredictable. Rhizomes from a named female variety are the only reliable path.
Site and soil requirements
Full sun is non-negotiable
Hops need at least 6–8 hours of direct sun per day, but thrive with 10–12 hours. South or west-facing exposures against a wall, fence, or open garden are ideal. Partial shade significantly reduces cone yield and increases susceptibility to powdery mildew.
Soil: deep, loose, and well-drained
Hops develop a deep root system — lateral roots can run 1 m (3 ft) or more — and roots sitting in waterlogged soil rot quickly.
Key soil specs:
- pH: 6.0–7.5 (slightly acidic to neutral)
- Structure: loose, loamy, and deeply cultivated — till or dig at least 30–40 cm (12–16 in)
- Drainage: excellent — raised beds or mounded planting stations help in heavy clay
- Organic matter: generous — work in 8–10 cm (3–4 in) of compost before planting
If your soil is heavy clay, build the planting station into a mound 20–25 cm (8–10 in) tall, or plant in a raised bed with a custom sandy loam mix.
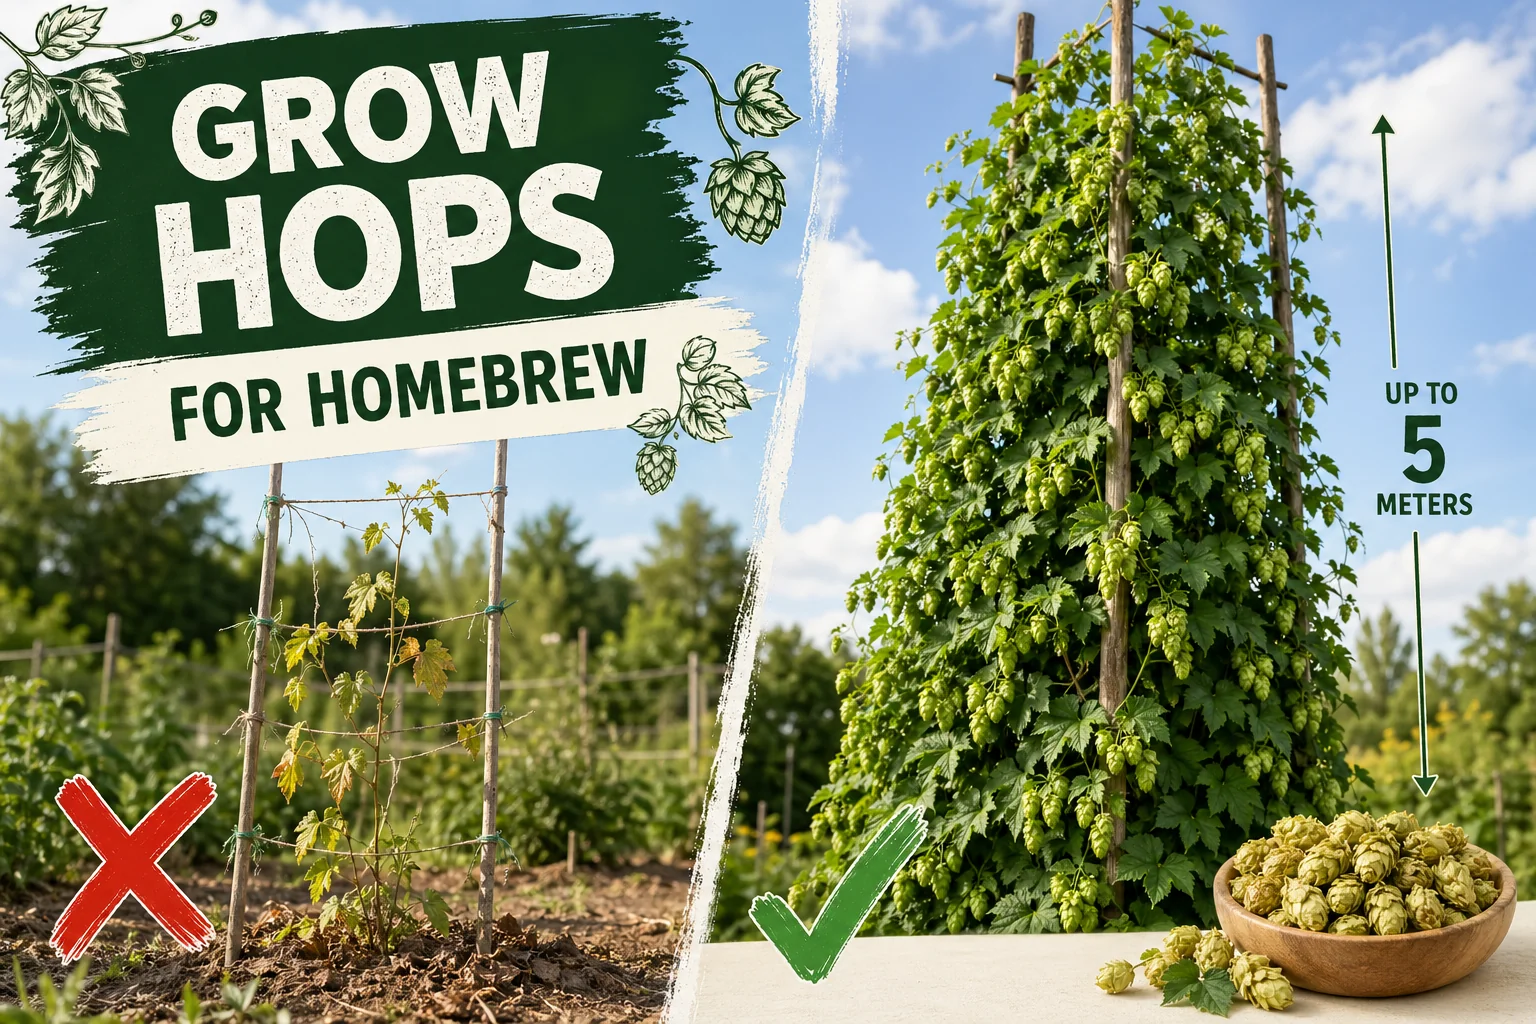
Building the trellis: the most important prep step
This is where most first-time hop growers under-invest. A 1.5 m (5 ft) garden fence will yield a fraction of what a proper tall trellis delivers. Hop bines need height to produce cones — the top third of the plant is where the heaviest cone clusters form.
Minimum trellis height: 5.5 m (18 ft). Ideal: 6–7.5 m (20–25 ft).
Practical trellis options:
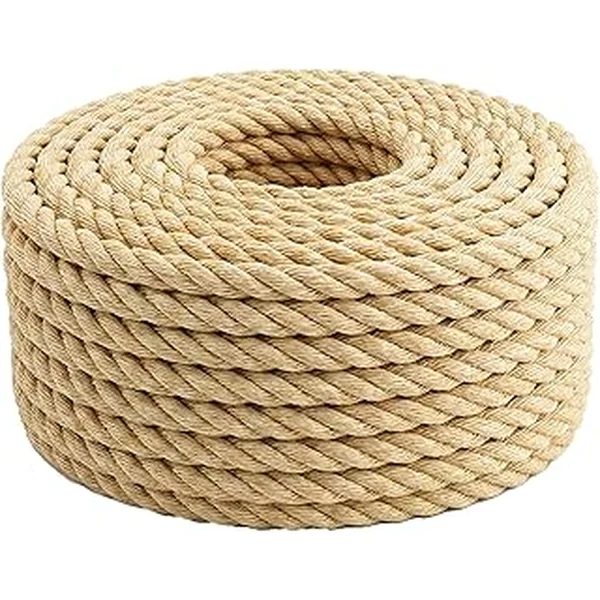
- Tall wooden post with rope: sink a 7.5 m (25 ft) treated post 60–90 cm (24–36 in) into the ground. Run natural-fibre twine (jute or coir) from anchor stakes at soil level up to the top of the post. Each plant needs 2–3 ropes, set 15 cm (6 in) apart at the base.
- Side of a house or barn: screw an eye bolt into the fascia or soffit at roofline height, then run rope down to a ground stake at the base of the wall. A three-storey house can work perfectly.
- Permanent hop yard cable: tension a 4–5 mm galvanised cable between posts at full height. Drop coir strings each spring from the cable to the crown. This is the commercial hop-yard method scaled down.
Avoid wire mesh or chain-link fencing as the primary structure — bines tangle in open mesh and are impossible to remove at season’s end without losing the whole plant.
Planting hop rhizomes
When to plant
Plant rhizomes after your last frost date when soil temperature reaches at least 7°C (45°F). In most of the northern US and UK, this means late March through May. Rhizomes planted too early in cold, wet soil rot before they sprout.
How to plant
- Dig a trench or planting hole 30–40 cm (12–16 in) deep and work in compost generously.
- Place the rhizome horizontally or at a slight upward angle, with any visible buds pointing up.
- Cover with 5 cm (2 in) of loose amended soil — do not bury deeply.
- Water thoroughly to settle the soil.
- Set a temporary bamboo stake or cane immediately to guide the first shoots toward the permanent trellis rope.
Space multiple varieties at least 90 cm (3 ft) apart — ideally 1.5–1.8 m (5–6 ft) apart — to reduce competition and make variety management easier at harvest.
Training bines upward
First shoots emerge 2–4 weeks after planting, once soil warms. Bines are aggressive: in warm weather they grow 30 cm (12 in) per day at peak.
Training rules:
- Wait until bines reach 30–45 cm (12–18 in) before selecting the strongest 2–3 shoots per plant to train upward. Rub off all others at soil level.
- Wrap selected bines clockwise (when looking up from the base) around the rope. This matches the plant’s natural twining direction. Counter-clockwise wrapping causes the bine to unwind itself.
- Check and re-guide bines every 2–3 days during the rapid-growth period in late spring. Once they get a grip, they climb on their own.
- Never force a bine to change direction sharply — they snap easily at the nodes when young.
Watering
Hops are thirsty once actively growing. In the weeks after planting they need consistent moisture to establish roots; once established they become moderately drought-tolerant but never truly dry-tolerant.
General watering guide:
| Growth stage | Frequency | Method |
|---|---|---|
| Just planted (first 4 weeks) | Every 2–3 days | Deep soak at the base |
| Active climbing (May–July) | 2–3 times per week or 2.5 cm (1 in)/week | Drip or base watering |
| Cone development (July–August) | 2 times per week | Consistent, never drought |
| Post-harvest (September on) | Reduce gradually | Allow natural die-back |
Always water at soil level. Wet foliage encourages downy mildew and powdery mildew, which are the two most common hop diseases.
Fertilizing: hops are heavy nitrogen feeders
Hops rank among the highest nitrogen-demanding crops in the home garden. Nitrogen drives bine height, leaf canopy, and ultimately cone yield.
Feeding schedule:
- At planting: incorporate a balanced slow-release granular fertilizer (e.g., 10-10-10) into the planting hole.
- April–May: side-dress with high-nitrogen granular fertilizer (e.g., 21-0-0 or blood meal) monthly as bines climb.
- June–mid-July: continue nitrogen feeding every 4 weeks, but switch to a balanced NPK to support flower and cone formation — pure nitrogen after cones set can reduce quality.
- After mid-July: stop all fertilizing. Late feeding delays cone maturity and hardening.
In the first year, go lighter with nitrogen — young roots need to establish before being pushed hard. From year two, full feeding rates produce the best results.
First-year vs. subsequent-year harvests
Set realistic expectations:
Year 1: Light harvest — typically 100–200 g (3–7 oz) dry weight per plant. The crown is still building its root mass. Many growers skip harvesting entirely in year one and let the plant focus on root development. This is not essential but does accelerate year-two production.
Year 2: Production roughly doubles or triples. Most plants yield 250–500 g (9 oz–1 lb) dry.
Year 3+: Full commercial-style harvest. A healthy crown in good soil in full sun typically delivers 0.5–1 kg (1–2 lb) of dried hops per plant per season. Exceptional plants in ideal conditions can exceed this.
The exponential ramp-up is why hop growers say “sleep, creep, leap” — year one the plant sleeps, year two it creeps, year three it leaps.
Harvesting hops: timing and technique
When to harvest
Hops typically ripen August through September in the northern hemisphere, depending on variety, latitude, and the season’s weather. Cascade and Centennial tend to ripen mid-August; Chinook often runs into September.
Three signs that cones are ready — all three must be present together:
- Papery texture. Cones feel dry and light, not moist or heavy.
- Lupulin yellow. Rub a cone between your palms and look for bright golden-yellow powder and a strong, fresh hoppy aroma. Under-ripe cones produce little powder; over-ripe cones turn brown and smell grassy.
- Spring-back test. Squeeze a cone firmly. Ripe cones spring back to shape. Unripe cones stay compressed; over-ripe cones crumble.
Do not wait for all bines to be fully ripe before picking — harvest by section as cones mature, starting from the top of the plant where ripening begins first.
How to harvest
Lower the bines to the ground by unclipping or cutting the rope at the top — do not try to pick while standing on a ladder beneath a 7.5 m (25 ft) plant. Pick cones by hand, leaving the bracteole attached. Work quickly: fresh cones begin losing aromatic oils within hours of picking.
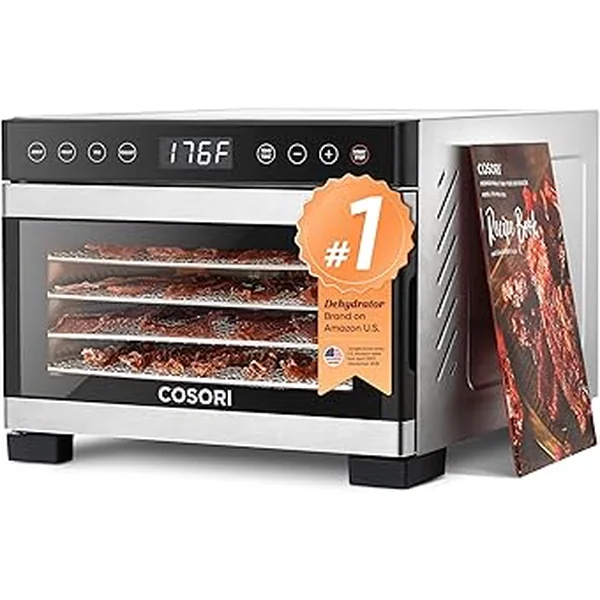
Drying harvested cones
Fresh hops are roughly 80% water by weight. For storage and brewing they must be dried to around 8–10% moisture.
- Food dehydrator: 35°C (95°F), 1–2 hours. Best method — even heat, controlled temperature.
- Oven on lowest setting: door propped open, single layer on baking trays, 30–35°C (86–95°F), 1–3 hours. Monitor closely.
- Air drying: single layer on a mesh screen in a warm, dark, well-ventilated room, 24–72 hours.
Cones are fully dry when the inner stem (the strigo) snaps cleanly instead of bending. Over-dried hops turn powdery and lose aroma; under-dried hops mold in storage.
Store dried hops vacuum-sealed in foil bags in the freezer. They hold aroma well for 12–18 months.
Common problems and fixes
| Problem | Likely cause | Fix |
|---|---|---|
| Bines not emerging (3+ weeks after planting) | Cold soil, waterlogged rhizome, too-deep planting | Check soil temp (needs 7°C / 45°F+); improve drainage; replant shallower |
| Yellow leaves from base upward | Nitrogen deficiency | Side-dress with high-N fertilizer; water in well |
| White powder on leaves | Powdery mildew | Improve airflow; remove worst leaves; spray potassium bicarbonate |
| Purple-grey water-soaked patches on leaves | Downy mildew | Remove affected leaves; avoid wet foliage; copper fungicide if severe |
| Small sparse cones despite healthy bines | Insufficient sun or trellis too short | Relocate or extend trellis; prune surrounding trees/shrubs |
| Cones smell grassy or vegetative | Harvested too early | Wait for full lupulin yellow; repeat spring-back test |
Watch: growing hops at home video guide
This visual walkthrough covers rhizome planting, trellis setup, and cone harvest — a useful complement to the steps above.
Tazart app tip
Use Tazart’s plant care schedule to set reminders for monthly fertilizing, weekly watering checks during cone development, and the harvest window. The Dr. Afrao. plant assistant can help you identify early signs of downy mildew or nitrogen deficiency from a photo before they cost you yield.
Related guides
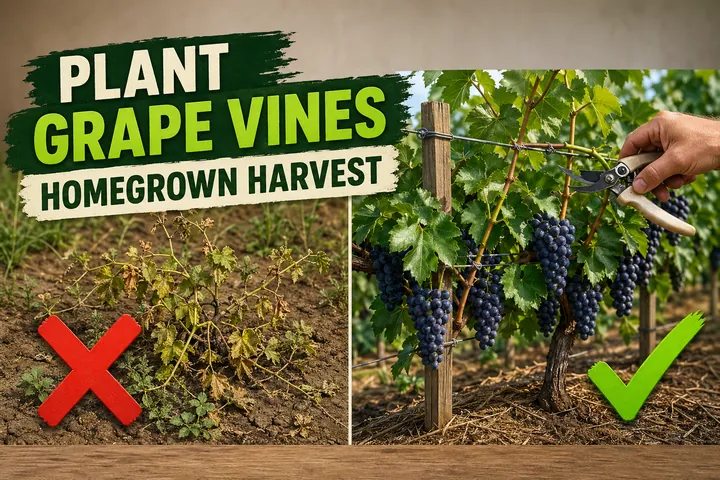
- How to plant grape vines — another long-lived perennial climber that rewards a proper trellis
- How to grow basil indoors — for the herbs that go alongside your homebrewed beer
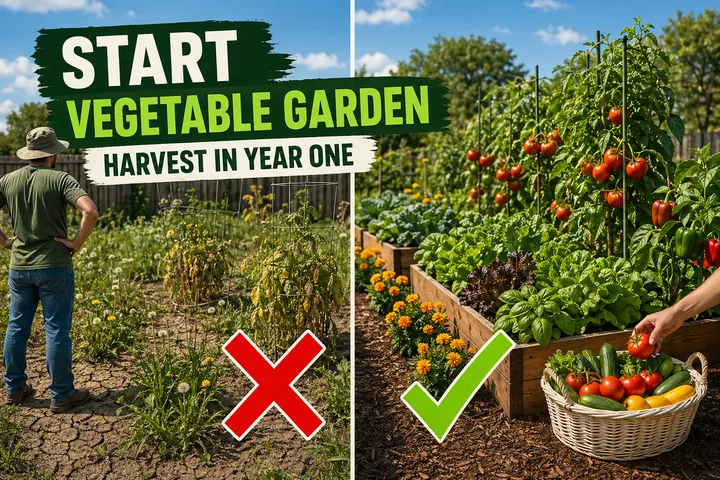
- How to start a vegetable garden — building the garden framework that works alongside a hop yard
Sources used in this article are listed below for reference. Growing conditions vary by climate, soil type, and variety — always verify specific guidance with your local university extension office.
Highly recommended
The supplies that make this guide work
Tazart is an Amazon Associate — we earn from qualifying purchases at no extra cost to you. Thank you for helping us keep these guides free.
Frequently asked questions
Can I grow hops at home without a huge garden?
Yes. One rhizome planted at the base of a 7.5 m (25 ft) rope, twine, or cable gives you a productive hop plant in a 60 cm (2 ft) footprint. You can also grow hops in a large container — at least 60 litres (15 gal) — with a strong pole or trellis. The bines climb vertically, so the ground area is small even though the plant is enormous.
How long does it take to grow hops from a rhizome?
A rhizome planted in spring produces its first light harvest in late summer of year one — usually 100–200 g (3–7 oz) dry weight per plant. Year two production roughly doubles or triples. By year three a healthy crown in the right soil delivers a full harvest of 0.5–1 kg (1–2 lb) dry per plant per season.
How tall does a hop plant grow in one season?
Hop bines routinely reach 6–7.5 m (20–25 ft) in a single growing season. In ideal conditions with full sun and rich soil, they can grow 30 cm (12 in) in a single warm day during peak growth. Plan your trellis at least 5.5–6 m (18–20 ft) tall if possible — a full-height trellis doubles yield compared to a short fence.
Do hops come back every year?
Yes. Hops are a hardy perennial. The crown (underground rhizome mass) dies back to soil level after the first hard frost, then re-sprouts from the same root system the following spring. A well-established crown in good soil can produce for 20+ years with minimal intervention beyond annual fertilizing.
How do I know when hops are ready to harvest?
Three signs together confirm harvest readiness: (1) the cones feel dry and papery, not wet or spongy; (2) the lupulin powder inside is bright yellow-gold and fragrant when you rub a cone between your fingers; (3) the cone springs back after being squeezed rather than staying compressed. Harvest typically falls August–September in the northern hemisphere.
What is the difference between a hop bine and a hop vine?
Bines climb by wrapping their rough stems around a support — they use stem friction and stiff downward-pointing hairs, not tendrils or suckers like true vines. This is why hops need a rope, twine, or cable to grip, not a wire mesh. Training the bines clockwise (when looking up) encourages them to climb naturally in the direction they prefer.
Which hop varieties are best for beginners?
Cascade, Centennial, and Chinook are the classic beginner trio. All three are vigorous, disease-tolerant, high-yielding, and widely available as rhizomes. Cascade gives floral, citrusy aroma; Centennial is similar but more bittering-forward; Chinook provides strong pine-resin and spice notes. All three perform well across USDA zones 3–8.
How do I dry hops at home after harvest?
Spread freshly picked cones in a single layer on a window screen or mesh tray in a warm, dark, well-ventilated space. A fan aimed across (not directly at) the cones speeds drying. At 30–35°C (86–95°F) — such as a food dehydrator on its lowest setting — cones dry in 1–3 hours. At room temperature they take 24–72 hours. They are dry when the inner stem (strigo) snaps instead of bending.