Flowers
How to Plant Gladiolus Bulbs (Depth, Spacing, Succession)
Plant gladiolus corms 10–15 cm (4–6 in) deep, pointed end up, 10–15 cm (4–6 in) apart — succession-plant every 2 weeks for continuous summer blooms.
On this page
- Quick answer
- What is a gladiolus corm?
- Why depth, orientation, and warmth matter
- What you’ll need
- Step-by-step: planting gladiolus corms
- Succession planting for continuous blooms
- Staking tall varieties
- Gladiolus in pots
- Lifting and storing corms in fall
- Common mistakes to avoid
- Troubleshooting
- Watch: planting gladiolus corms
- Related reading
- A note on conditions
Watch the visual walkthrough
Gladiolus // How to Plant, Grow, Harvest, and Store Gladiolus Corms// Northlawn Flower Farm
Gladiolus are grown from corms, and the corm contains all the necessary food and energy to produce a glorious flower spike with ...
Gladiolus is the easiest cutting flower in the summer garden — a single corm planted in May produces a 1.2 m (4 ft) sword-shaped flower spike in 70–90 days, and a succession of small clusters planted every 2 weeks gives you cut flowers from June through October. The catch is that gladiolus corms aren’t bulbs — they’re corms (a swollen stem base, not a layered bulb like a tulip) — and depth, orientation, and timing matter more than they would for a true bulb.
This guide walks through the way gladiolus actually wants — pointed end up, 10–15 cm (4–6 in) deep, in soil above 13°C (55°F), with succession plantings every 2 weeks from last frost until early July.
Quick answer
Plant gladiolus corms 10–15 cm (4–6 in) deep, pointed end up, 10–15 cm (4–6 in) apart in clusters of 5–10 corms. Wait until soil reaches 13°C (55°F) — usually 1–2 weeks after last frost. Succession-plant every 2 weeks for continuous bloom. Water once deeply, then leave alone until shoots emerge in 2–3 weeks. Stake tall varieties at 30 cm (12 in) tall growth. Lift corms in fall in USDA zones 7 and colder.
What is a gladiolus corm?
A gladiolus “bulb” is technically a corm — a swollen, solid underground stem base that stores energy for the next year’s growth. Each corm has:
- A pointed growth point at the top (where the leaf bud sits)
- A flatter, rounder base with a small concave area (the basal plate) where roots emerge
- Old papery tunic layers covering the corm
- Often, small “cormels” (baby corms) attached to the base — these can be saved and grown on
Gladiolus is in the iris family (Iridaceae), native to South Africa and the Mediterranean. It’s grown worldwide as a cutting flower for the dramatic vertical spikes lined with up to 30 funnel-shaped florets opening sequentially from bottom to top.
Why depth, orientation, and warmth matter
A gladiolus corm has enough stored energy to push out roots and a first flower spike on its own. Three things ruin that head start:
- Cold soil (below 10°C / 50°F): the corm sits dormant, then rots from soil bacteria
- Upside-down planting: the shoot burns energy fighting gravity to reach the surface
- Shallow planting (under 8 cm / 3 in): the corm dries out, the spike falls over without anchorage, and you’ll need to stake every plant
For a deeper dive into depth specifically, see how deep to plant gladiolus bulbs. For spacing-focused detail, see how far apart to plant gladiolus bulbs.
What you’ll need
- Firm, plump gladiolus corms with a clear pointed top (skip soft, mouldy, or shrivelled ones)
- A sunny spot — at least 6–8 hours of direct sun
- Well-drained soil at pH 6.0–7.0, amended with compost
- A garden trowel, spade, or bulb planter
- Balanced bulb fertilizer or bone meal (optional)
- 2.5–5 cm (1–2 in) of organic mulch
- 1.5 m (5 ft) bamboo stakes for tall varieties
- Soft plant tie twine
- A soil thermometer (optional but useful)
Step-by-step: planting gladiolus corms
1. Wait for warm soil
Gladiolus is more cold-tolerant than dahlia or canna, but it still rots in soggy cold soil. Test soil 10 cm (4 in) deep with a thermometer:
- Cold zones (USDA 3–5): mid-May through early June
- Cool zones (USDA 6–7): early to late May
- Mild zones (USDA 8): late April through May
- Warm zones (USDA 9–10): March through June, with successions continuing into July
Soil should be reliably 13°C (55°F) or warmer. Soil at 16–18°C (60–65°F) gives faster sprouting (10–14 days vs 18–21 days at 13°C / 55°F).
2. Pick a sunny, well-drained spot
Gladiolus needs 6–8 hours of direct sun. Less than 4 hours and the spikes lean toward light, bloom poorly, and snap easily. Loosen the soil to 30 cm (12 in) deep and mix in 5 cm (2 in) of compost.
Avoid:
- Low spots where rainwater pools
- Heavy clay that stays wet for days after rain
- Spots where gladiolus or iris grew the previous year (rotates pest/disease pressure)
3. Identify the pointed end
This is the single biggest mistake first-time gladiolus planters make:
- Look at the corm. It has a clear pointed top (often with a small visible bud) and a flatter base with old root scars
- The pointed end faces up. The flat root-scarred base faces down
- If the corm is round and hard to read, plant it on its side — the shoot will turn upward toward light. You’ll lose a few days of growth, but the corm won’t fail
- Watch for the basal plate. The small concave disc on the bottom is where new roots emerge — it should always face down
4. Dig holes 10–15 cm deep
Depth depends on corm size:
| Corm size | Diameter | Planting depth |
|---|---|---|
| Small | Under 2.5 cm (1 in) | 8–10 cm (3–4 in) |
| Medium | 2.5–4 cm (1–1.5 in) | 10–12 cm (4–5 in) |
| Jumbo | Over 4 cm (1.5 in) | 12–15 cm (5–6 in) |
Why depth matters:
- Anchoring: deeper-planted corms need less staking — the spike is well-supported by surrounding soil
- Moisture: deep corms stay moist through summer heatwaves
- Frost protection: deeper corms are more likely to survive in marginal hardiness zones
For a row, dig a single trench 15 cm (6 in) deep and place corms along the bottom.
5. Optional: feed the planting hole
Sprinkle a small handful of balanced bulb fertilizer or bone meal in the bottom of each hole and stir lightly into the soil. This is optional — gladiolus blooms reliably in moderately fertile soil without supplemental feeding.
Avoid high-nitrogen fertilizer, which produces leaves at the expense of flowers.
6. Set corms pointed-end-up and space generously
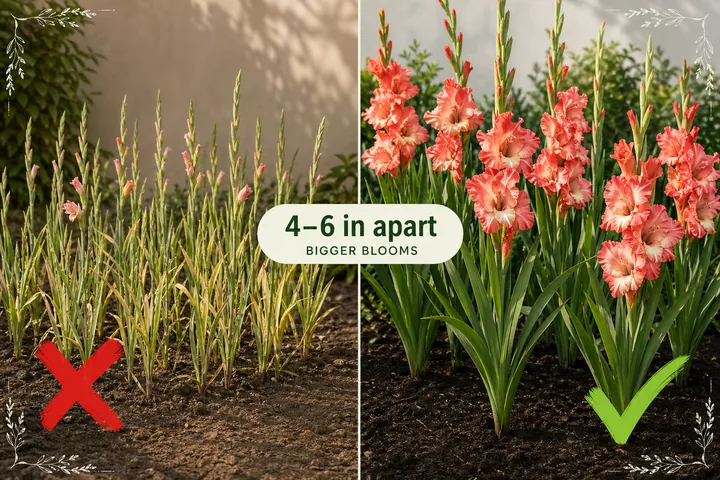
Place each corm in the hole with the pointed end facing up, spaced 10–15 cm (4–6 in) apart. The closer end of the range produces denser cutting rows; the wider end gives each spike more breathing room in a mixed border.
Cluster planting beats single-corm spacing for visual impact:
- 5 corms in a tight cluster (15 cm / 6 in apart) outperforms 5 corms strung out in a 1.5 m (5 ft) line
- 10-corm clusters create a dramatic vertical statement
- Mix colours within a cluster for a meadow effect, or block plant single colours for high impact
7. Backfill and water once — then leave it alone
Cover with the soil you removed and firm gently with your palm. Water once deeply to settle the soil. Don’t water again for 7–10 days unless the bed dries out completely — wet cold soil before sprouting is the fastest way to rot corms.
8. Mulch and label
Apply a 2.5–5 cm (1–2 in) layer of organic mulch (shredded bark, leaf mould, or compost). Mulch:
- Locks in summer moisture
- Suppresses weeds
- Insulates corms against late frosts
- Keeps mud off the lower leaves
Push a label into each cluster. Gladiolus take 2–3 weeks to surface and the bed looks empty in the meantime — labels keep you from accidentally digging the corms up while planting summer annuals nearby.
Succession planting for continuous blooms
The single trick that turns gladiolus from a one-week cutting flower into a 4-month cutting flower is succession planting:
- Plant a new cluster every 2 weeks from last-frost date until early July
- Each cluster blooms 70–100 days after planting
- A 6-cluster succession (planted weeks 1, 3, 5, 7, 9, and 11) gives you blooms from late June through October
Calendar example for USDA zone 6 (last frost ~ May 15):
| Plant date | Bloom window |
|---|---|
| May 15 | July 25 – Aug 5 |
| May 29 | Aug 8 – Aug 19 |
| Jun 12 | Aug 22 – Sep 2 |
| Jun 26 | Sep 5 – Sep 16 |
| Jul 10 | Sep 19 – Sep 30 |
| Jul 24 | Oct 3 – Oct 14 |
A free plant care app like Tazart tracks succession-planting intervals and your local frost dates so you don’t miss the 2-week planting window during a busy month.
Staking tall varieties
Tall gladiolus varieties (1.2–1.5 m / 4–5 ft) need staking — especially in windy spots or after heavy summer rains.
When to stake:
- Once leaves reach 30 cm (12 in) tall (before the spike emerges)
- Before the spike falls over (waiting until after a storm flattens it usually means a broken stem)
How to stake:
- Drive a 1.5 m (5 ft) bamboo stake 30 cm (12 in) deep into the soil 5 cm (2 in) from each spike
- Tie loosely with soft jute or vinyl tie at three heights as the spike grows: 30 cm (12 in), 60 cm (24 in), and 90 cm (36 in)
- Use figure-8 ties — one loop around the stake, one loop around the spike — to prevent rubbing
Dwarf and miniature gladiolus (under 90 cm / 36 in) usually don’t need staking, especially when planted at the deep end of the depth range (15 cm / 6 in).
Gladiolus in pots
Gladiolus grows well in containers if the pot is deep enough:
- Pot at least 30 cm (12 in) deep with drainage holes
- 5–7 corms per 35 cm (14 in) pot, planted 10 cm (4 in) deep
- Use rich peat-free potting mix amended with 20% compost
- Place in 6+ hours of full sun
- Water once at planting, then keep evenly moist after sprouting
- Feed every 3 weeks with a balanced bloom-booster
In autumn, lift corms from the pot, cure, and store as you would in-ground corms.
Lifting and storing corms in fall
In USDA zones 7 and colder, lift corms after the first frost blackens the foliage:
- Cut stems to 5 cm (2 in) above the corm
- Dig 20 cm (8 in) out from the stem with a fork to avoid spearing the corm
- Lift the corm clump, brush off loose soil, separate any cormels (baby corms) from the base
- Lay corms in a single layer in a warm, dry, shaded spot for 2–3 weeks to cure
- Once cured, snap off the old shrivelled mother corm at the base of the new corm
- Store in mesh bags or paper sacks at 4–10°C (40–50°F) — never freezing
- Check monthly through winter; remove any corms that go soft
In USDA zones 8 and warmer, leave corms in the ground but cover the bed with 5–8 cm (2–3 in) of mulch for winter insulation.
Common mistakes to avoid
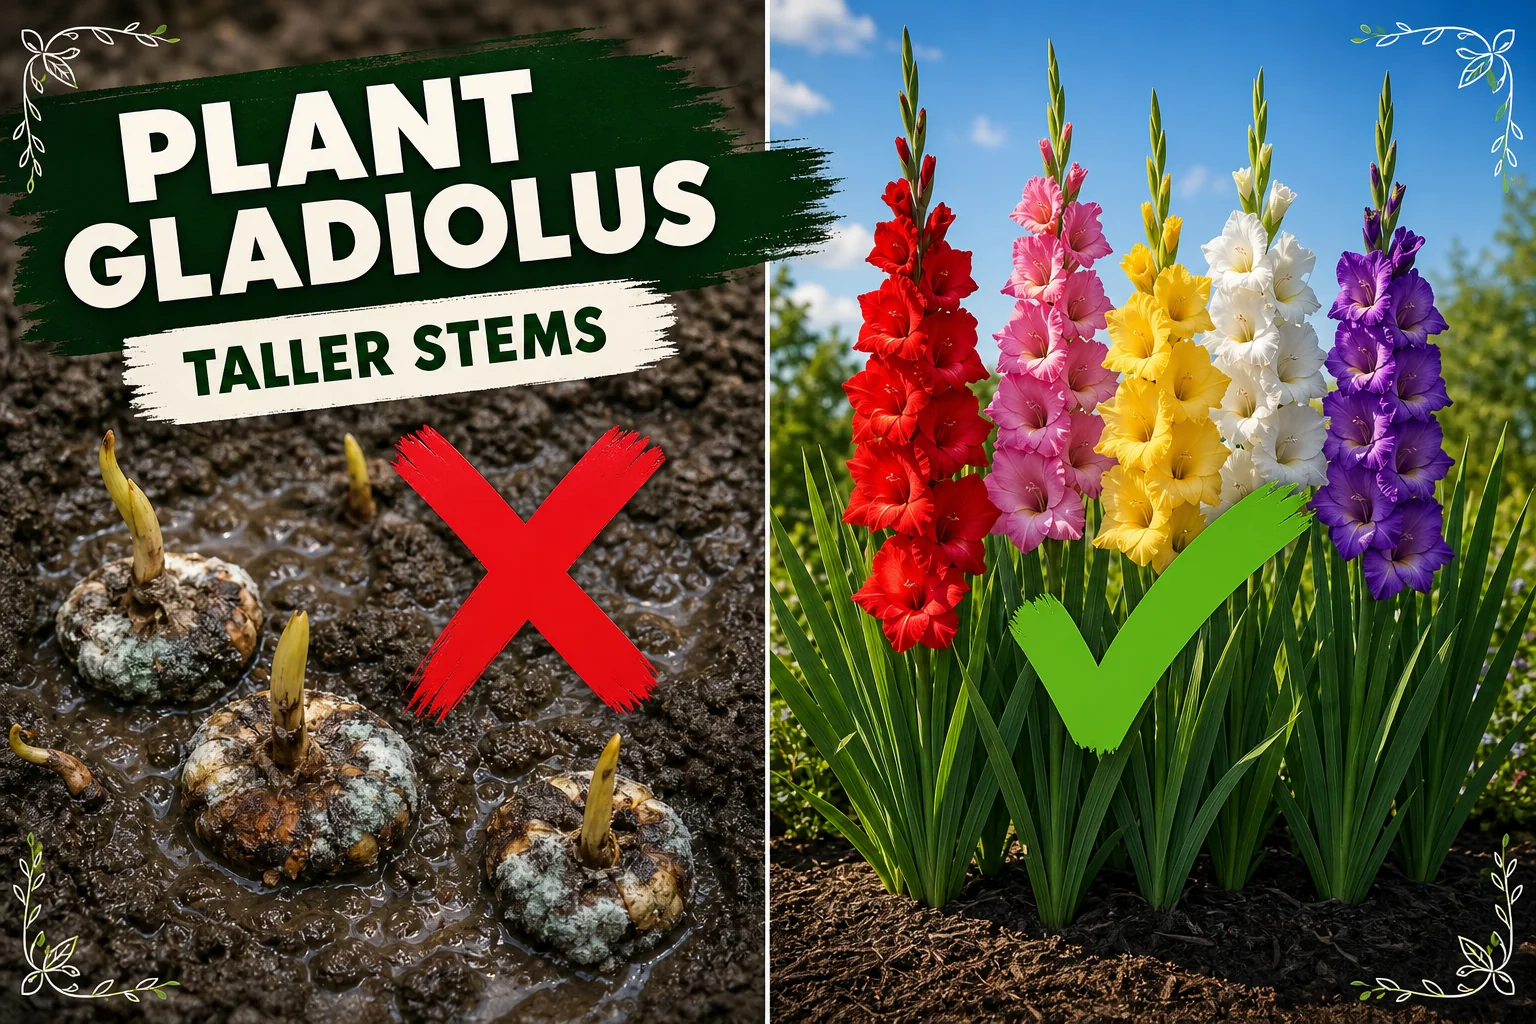
- Planting in cold soil. Below 10°C (50°F), corms rot before they sprout. Wait for warmth.
- Planting upside-down. Pointed end up. If you can’t tell, plant on the side.
- Planting too shallow. Less than 8 cm (3 in) and you’ll need to stake every plant. Deep planting (12–15 cm / 5–6 in) makes staking optional.
- Skipping succession plantings. A single sowing blooms for 1–2 weeks then nothing. Stagger plantings every 2 weeks for a 4-month show.
- Watering before sprouting. Wet cold soil rots corms. Water once at planting, then leave alone.
- Leaving corms in cold-zone ground over winter. Frost rot kills corms in zones 7 and colder. Lift after first frost.
- Skipping the cure. Corms stored damp rot in winter. Cure 2–3 weeks before bagging.
Troubleshooting
| Symptom | Likely cause | Fix |
|---|---|---|
| Corms never sprouted | Cold wet soil, upside-down planting, or rotted corm | Wait for soil ≥ 13°C (55°F); replant pointed-up; check corm firmness before planting |
| Spikes leaning or falling | Shallow planting, no staking, or windy site | Plant 12–15 cm (5–6 in) deep; stake at 30 cm (12 in) tall growth; choose sheltered spot |
| Few or no flowers | Too much shade or undersize corm | Move to 6–8 hour sun spot; buy jumbo corms over 4 cm (1.5 in) for the strongest spikes |
| Lower florets brown before tops open | Heat stress or drought | Water deeply 1–2× per week; mulch 5 cm (2 in) thick to retain moisture |
| Holes in leaves and rust spots | Thrips (most common gladiolus pest) | Spray neem oil; remove and bin (don’t compost) infested foliage; rotate beds annually |
| Corms rotted in storage | Stored damp or too warm | Cure 2–3 weeks dry; store in mesh bags at 4–10°C (40–50°F), never freezing |
| Spike emerged but no flowers formed | Bud blast from heat or dry roots | Water deeply during bud-set; mulch heavily; in extreme heat, provide afternoon shade |
| Cormels (baby corms) detached | Normal — save and replant | Plant cormels 2.5 cm (1 in) deep in a nursery row; they reach blooming size in 1–2 years |
Watch: planting gladiolus corms
A short visual walkthrough pairs well with the steps above. If you’re a visual learner, watch a quick step-by-step video that shows corm orientation, hole depth, and the succession-planting calendar, then come back to the timing in this guide.
Related reading
- How deep to plant gladiolus bulbs — depth-focused guide that pairs with this overall planting walkthrough.
- How far apart to plant gladiolus bulbs — spacing rules for cutting rows vs border clusters.
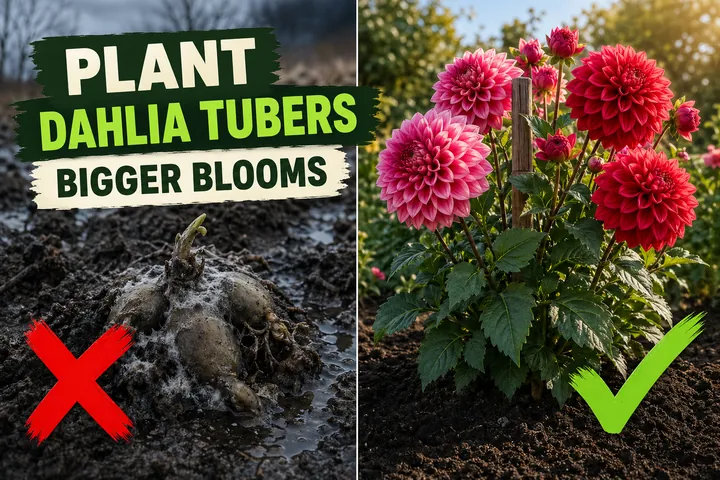
- How to plant dahlia tubers — another summer cutting flower with similar warm-soil timing and lift-in-fall logic.
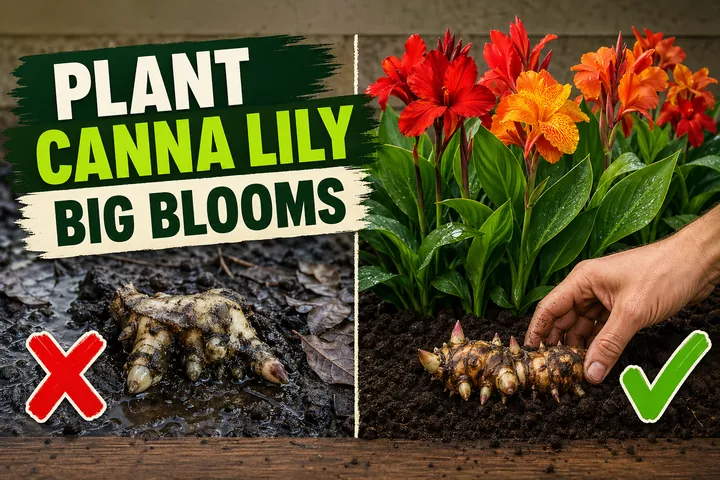
- How to plant canna lily bulbs — a tropical rhizome that pairs well with gladiolus for a layered summer cutting bed.
A note on conditions
Every garden is different. USDA zone, soil texture, summer rainfall, and how exposed the bed is to wind all change how gladiolus performs. Use the depth, spacing, and timing in this guide as a starting point and adjust based on how your spikes come up in their first season — that’s how every good cutting-garden grower learns.
Highly recommended
The supplies that make this guide work


Tazart is an Amazon Associate — we earn from qualifying purchases at no extra cost to you. Thank you for helping us keep these guides free.
Frequently asked questions
How deep do you plant gladiolus bulbs?
Plant gladiolus corms 10–15 cm (4–6 in) deep with the pointed end facing up. Use 10 cm (4 in) for small corms (under 2.5 cm / 1 in diameter) and 15 cm (6 in) for jumbo corms (over 4 cm / 1.5 in diameter). In sandy soil, go to the deeper end so the corm doesn't dry out and the spike is well-anchored. In heavy clay, stay closer to 10 cm (4 in) so the corm warms up faster and drains better. Deep planting also reduces the need for staking.
When should you plant gladiolus bulbs?
Plant gladiolus corms outdoors after the last frost, when soil temperature reaches 13°C (55°F) at 10 cm (4 in) deep. In USDA zones 3–6 that's mid-May through June; in zones 7–8 it's late April through May; in zones 9–10 it's any time from March, with succession plantings continuing into June. Cold wet soil rots gladiolus corms before they sprout — wait for warmth even if it pushes you behind the calendar.
Which way up do gladiolus corms go?
Gladiolus corms have a pointed top (the growth point with the dormant leaf bud) and a flatter, rounder bottom with old root scars and a small concave area called the basal plate. The pointed end faces up, the flat end faces down. If a corm is hard to read, plant it on its side — the shoot will turn upward toward the light. Planting upside-down is the most common reason a gladiolus corm fails to sprout.
How far apart should gladiolus be planted?
Plant gladiolus corms 10–15 cm (4–6 in) apart in clusters of 5–10 corms for the best visual impact. Single corms in a row look thin; massed plantings give the dramatic effect that makes gladiolus famous as a cutting flower. For long cutting rows, plant corms 10 cm (4 in) apart with rows 30 cm (12 in) apart — a tighter grid than border planting because the spikes grow vertically and don't compete for horizontal space.
Do gladiolus need staking?
Tall varieties (1.2–1.5 m / 4–5 ft) need staking, especially in windy spots. Drive a 1.5 m (5 ft) bamboo stake 30 cm (12 in) deep alongside each spike once the leaves reach 30 cm (12 in) tall. Tie the stem loosely with soft jute or vinyl plant tie at three heights. Dwarf and miniature gladiolus (under 90 cm / 36 in) usually don't need staking. Deep planting (15 cm / 6 in) reduces the staking requirement by anchoring the corm well below the surface.
Do you have to dig up gladiolus bulbs every year?
In USDA zones 8 and warmer, gladiolus corms survive winter in the ground and come back every spring. In zones 7 and colder, the ground freezes deep enough to kill corms, so lift them after the first frost blackens the foliage. Cut stems to 5 cm (2 in), dig up the corms with a fork, brush off soil, and let them air-dry for 2–3 weeks in a warm dry spot. Once cured, store at 4–10°C (40–50°F) in mesh bags or paper sacks until spring.