Houseplants
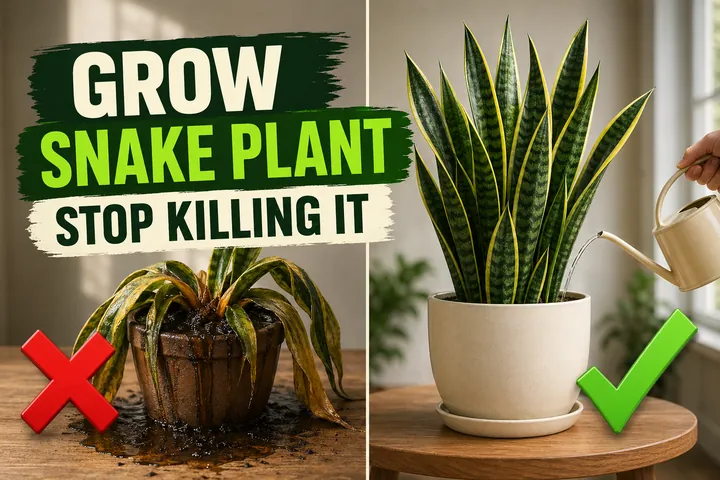
How to Repot a Snake Plant Without Killing It (Step-by-Step Guide)
Learn how to repot a snake plant the safe way — pot size, cactus soil mix, root pruning, and the 5-7 day no-water rule that prevents shock and rot.

On this page
Watch the visual walkthrough
How to REPOT and SEPARATE your SNAKEPLANT
A short visual walkthrough that pairs with the steps above.
Repotting a snake plant looks simple, but most plants that die from it are killed by the same three things: a pot that’s too big, the wrong soil, and watering too soon. Get those right and a Sansevieria barely notices the move.
This guide walks you through it step by step — when to repot, the exact soil mix, how much to size up, whether to prune the roots, and the one-week dry rest that prevents root rot.
Quick answer
Repot a root-bound snake plant in spring into a pot just 5 cm (2 inches) wider than the old one, using a mix of 2 parts cactus and succulent soil to 1 part perlite. Trim any black or mushy roots, place the rhizome at the same depth it was before, and do not water for 5 to 7 days. Resume normal watering after that, and skip fertilizer for 4 weeks.
When does a snake plant actually need repotting?
Snake plants (Dracaena trifasciata, formerly Sansevieria) like being a little snug. They store water in thick rhizomes underground, and a slightly tight pot encourages upright growth and even flowering. Most healthy plants only need repotting every 2 to 3 years.
You should repot when you see:
- Thick white or beige roots circling the bottom of the pot or pushing out the drainage holes
- The rhizome lifting the whole plant up and out of the soil
- A cracked or bulging pot — snake plant rhizomes are strong enough to split plastic and even terracotta
- Water running straight through without soaking in (the soil is exhausted and compacted)
- Top-heavy leaves flopping sideways because there’s no soil left to anchor them
If you only see one of these and the plant is otherwise thriving, you can wait another season. Repot in spring or early summer when the plant is actively growing and recovers fastest.
What you’ll need
- A pot 5 cm (2 inches) larger in diameter than the current one, with drainage holes
- Cactus and succulent potting mix
- Perlite or coarse sand
- A clean sharp knife or pruners (wipe with rubbing alcohol)
- Newspaper or a tarp for the mess
- Gloves — snake plant leaves have stiff edges that can scratch
That’s it. No fertilizer, no rooting hormone, no special tools.
Step-by-step: repotting a snake plant
1. Mix the right soil
In a bucket or large bowl, combine 2 parts cactus and succulent mix to 1 part perlite (or coarse horticultural sand). The finished mix should feel gritty and fall apart when you squeeze a handful — not clump like cake batter.
Avoid moisture-retaining or peat-heavy potting soils. They hold water around the rhizome and are the single most common cause of snake plant death after repotting.
2. Slide the plant out of its old pot
Tip the pot sideways and gently pull at the base of the leaves. If it’s stuck, run a butter knife around the inner rim, or squeeze a plastic pot to break the seal. With cracked terracotta, you can break the pot away in pieces — easier than yanking the plant.
Brush off about a third of the old soil from around the root ball. Don’t try to clean every speck — leave some clinging soil to protect the fine roots.
3. Inspect and trim the roots
Healthy snake plant roots are firm and pale, ranging from white to light tan. Look for problems:
- Black, mushy, or stinky roots → root rot. Cut them off with a clean knife, back to firm tissue. It’s normal to remove up to a third of the roots.
- Tightly circling roots → loosen them with your fingers and trim the longest by 2–3 cm (0.75–1 in) so they don’t keep girdling.
- Brown papery dead leaves at the base → peel them off; they harbour pests.
This is also the right moment to divide the plant if it’s outgrown the pot. Look for natural rhizome clumps with at least one leaf and a few roots, and cut between them with a clean knife. Let the cuts air-dry for 24 hours before potting each piece separately.
4. Choose the right pot — size up by 5 cm (2 in) only
Pick a pot that’s 5 cm (2 inches) wider than the old one — no more. A pot that’s too large traps wet soil around the rhizome long after the plant has finished using it, and that’s exactly how root rot starts.
Terracotta is ideal because it breathes and dries faster than plastic. Whatever you choose, make sure it has at least one drainage hole.
5. Pot the plant at the same depth
Add a 3–5 cm (1–2 in) layer of your cactus mix to the bottom of the new pot. Sit the plant on top so the top of the rhizome is level with where it sat before — usually about 2 cm (0.75 in) below the rim. Burying the rhizome deeper can cause it to rot.
Backfill around the roots with the gritty mix, tapping the pot on the table to settle it. Don’t pack the soil down hard. Press lightly with your fingers just enough to keep the plant standing upright.
6. Hold off on watering
This is the step most people skip — and the one that saves the plant.
Do not water for 5 to 7 days. Repotting always tears tiny feeder roots; if those wounds sit in damp soil, they invite bacteria and rot. A dry rest lets the roots callous and seal first.
After 5–7 days, water lightly until you see a few drops at the drainage hole, then return to your normal “soak when the soil is fully dry” schedule.
Care after repotting
For the first 4–6 weeks, treat your snake plant as a recovering patient — not a thriving plant.
| Task | When |
|---|---|
| First water | 5–7 days after repotting; just enough to moisten, not soak |
| Light | Bright indirect light. Avoid harsh midday sun for the first 2 weeks |
| Fertilizer | Wait at least 4 weeks; then a half-strength balanced feed monthly |
| Movement | Don’t move or turn the pot for the first 2 weeks |
A free plant care app like Tazart can hold the post-repot watering schedule for you and remind you when the dry rest is over and when to start fertilizing — useful when a single mistimed watering can undo all of this work.
When you’ll see new growth
Snake plants are slow but reliable. After repotting, expect:
- Weeks 1–2: mild leaf droop or leaning. This is transplant shock, not damage.
- Weeks 3–4: leaves firm up and stand upright again as roots reattach.
- Weeks 6–10: the first new spear pushes up from the rhizome — a thin pointed shoot that fattens and unfurls over a month.
If you don’t see new spears within 3 months in the growing season, the plant is likely under-lit rather than damaged. Move it to a brighter spot before assuming anything is wrong.
Common mistakes to avoid
- Going up two pot sizes at once. Extra soil = extra moisture trapped around the rhizome = rot. Always size up by just 5 cm (2 in).
- Using regular houseplant soil. It holds far too much water for a Sansevieria. Cactus mix plus perlite, every time.
- Watering immediately after repotting. The single fastest way to lose a snake plant. Wait the full 5–7 days.
- Burying the rhizome. The thick underground stem should sit at the same level as before. Buried deep, it suffocates and rots.
- Skipping the drainage hole. A decorative pot without drainage means standing water in the bottom — fatal within weeks.
- Fertilizing right after repotting. Fresh roots are too fragile for fertilizer salts. Wait at least 4 weeks.
Troubleshooting
| Symptom | Likely cause | Fix |
|---|---|---|
| Leaves droop or lean for 1–2 weeks | Normal transplant shock | Wait it out. Bright indirect light, no water for 5–7 days. Leaves firm up on their own. |
| Yellow mushy leaf base, foul smell | Root rot from watering too soon or wet soil | Unpot, cut all black roots back to firm tissue, repot dry in fresh cactus mix, no water 10 days |
| Leaf tips turn brown and crispy | Underwatering or low humidity stress | Resume light watering when soil is fully dry; trim brown tips with clean scissors |
| New leaf spears come up pale and floppy | Too little light | Move to a brighter spot — east or south window with filtered sun |
| Whole plant lifts out of the pot | Pot still too small or wasn’t backfilled firmly | Repot one size up only; press soil firmly around the rhizome without packing hard |
| Small flies hovering over the soil | Fungus gnats from staying too wet | Let soil dry fully; top with 1 cm (0.5 in) dry sand or fine grit |
Watch: repotting a snake plant
A short visual walkthrough pairs well with the steps above. If you’re a visual learner, watch a quick tutorial like How to Repot a Snake Plant on YouTube and then come back to follow the timing — especially the 5–7 day dry rest.
Related reading
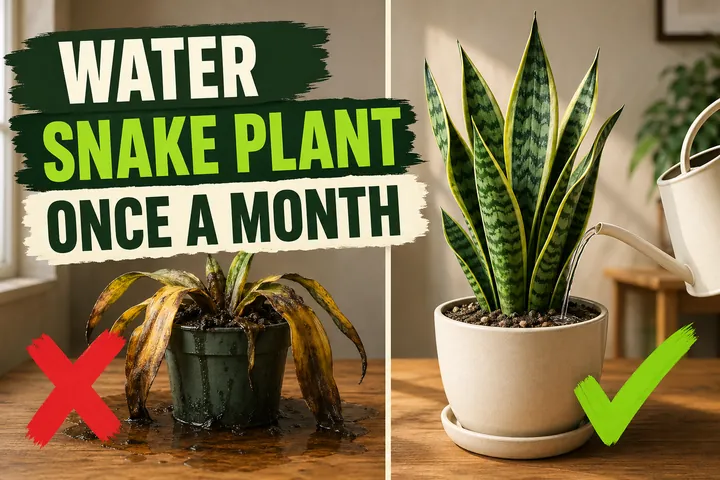
- How often to water a snake plant (without killing it) — the dedicated watering cadence guide; especially important for the 5 to 7 day dry rest right after repotting.
- How to take care of a snake plant (the full beginner guide) — the complete care guide covering light, fertilizer, and pups in addition to repotting.
- How to propagate a snake plant (water, soil, division) — turn the divisions you get from repotting into full new plants with rhizome splits or leaf cuttings.
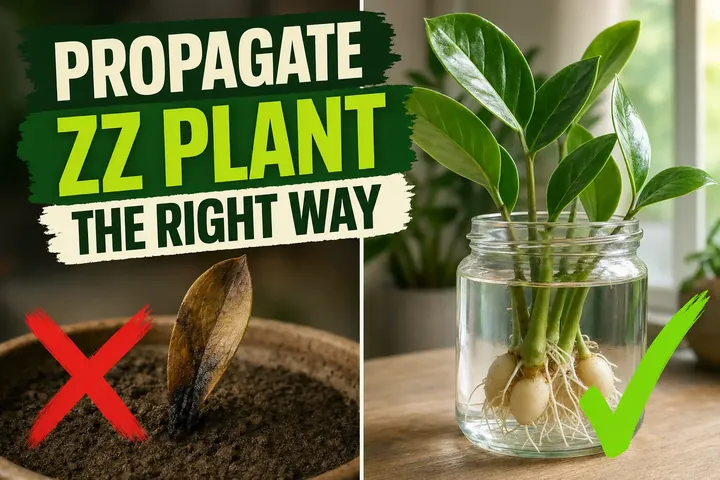
- How to propagate a ZZ plant from a single leaf — same drought-tolerant family of indoor plants, similar rules.
- How to water a Monstera the right way — the “let it dry between waterings” rule applies to most low-maintenance houseplants.
- Scan your snake plant with the free Tazart plant identifier and let it set up a custom watering and repotting schedule for you.
A note on conditions
Every home is different. Light, pot material, soil mix, indoor humidity, and the season you repot in all change how your snake plant recovers. Use the steps above as a starting point and adjust based on what your plant actually does in week two — the leaves will tell you everything you need to know.
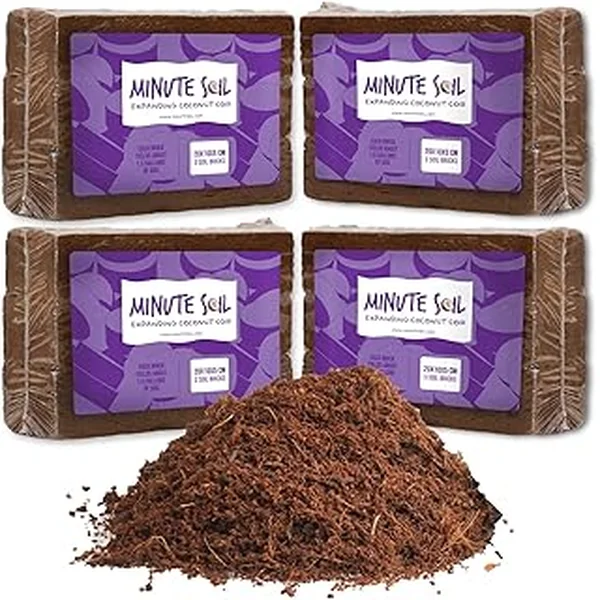
Highly recommended
The supplies that make this guide work

Tazart is an Amazon Associate — we earn from qualifying purchases at no extra cost to you. Thank you for helping us keep these guides free.
Frequently asked questions
When should you repot a snake plant?
Repot only when the plant is truly root-bound — typically every 2 to 3 years. Signs include roots circling the bottom, rhizomes pushing the plant upward out of the pot, cracking pot walls, or water running straight through without absorbing. Spring and early summer are the best times because the plant is actively growing.
What kind of soil do snake plants need?
Snake plants need a fast-draining, gritty mix. The simplest formula is 2 parts cactus and succulent mix to 1 part perlite or coarse sand. Standard houseplant soil holds too much water and is the most common cause of root rot in Sansevieria. Skip moisture-control or peat-heavy mixes.
How big a pot does a snake plant need?
Go up just 5 cm (2 inches) in diameter from the current pot — never more. Snake plants actually flower and stay upright better when slightly snug. An oversized pot holds extra wet soil around the roots and quickly leads to rot. Always pick a pot with drainage holes.
Should you water a snake plant right after repotting?
No. Wait 5 to 7 days before the first watering. Repotting always tears small feeder roots, and any open wound in soggy soil invites rot. Letting the plant rest dry gives the roots time to heal and seal before they sit in moisture again.
Can you divide a snake plant when repotting?
Yes — repotting is the perfect time to divide. Look for separate rhizome clumps with at least one leaf and a few roots each. Cut between them with a clean sharp knife, let the cuts callous in open air for 24 hours, then pot each division in fresh cactus mix.
Why is my snake plant drooping after repotting?
Mild drooping for 1 to 2 weeks after repotting is normal — it's transplant shock, not damage. The plant is regrowing the small roots that broke during the move. Keep it in bright indirect light, hold off water for 5 to 7 days, and avoid fertilizing for at least 4 weeks. Leaves should firm back up on their own.