Edible
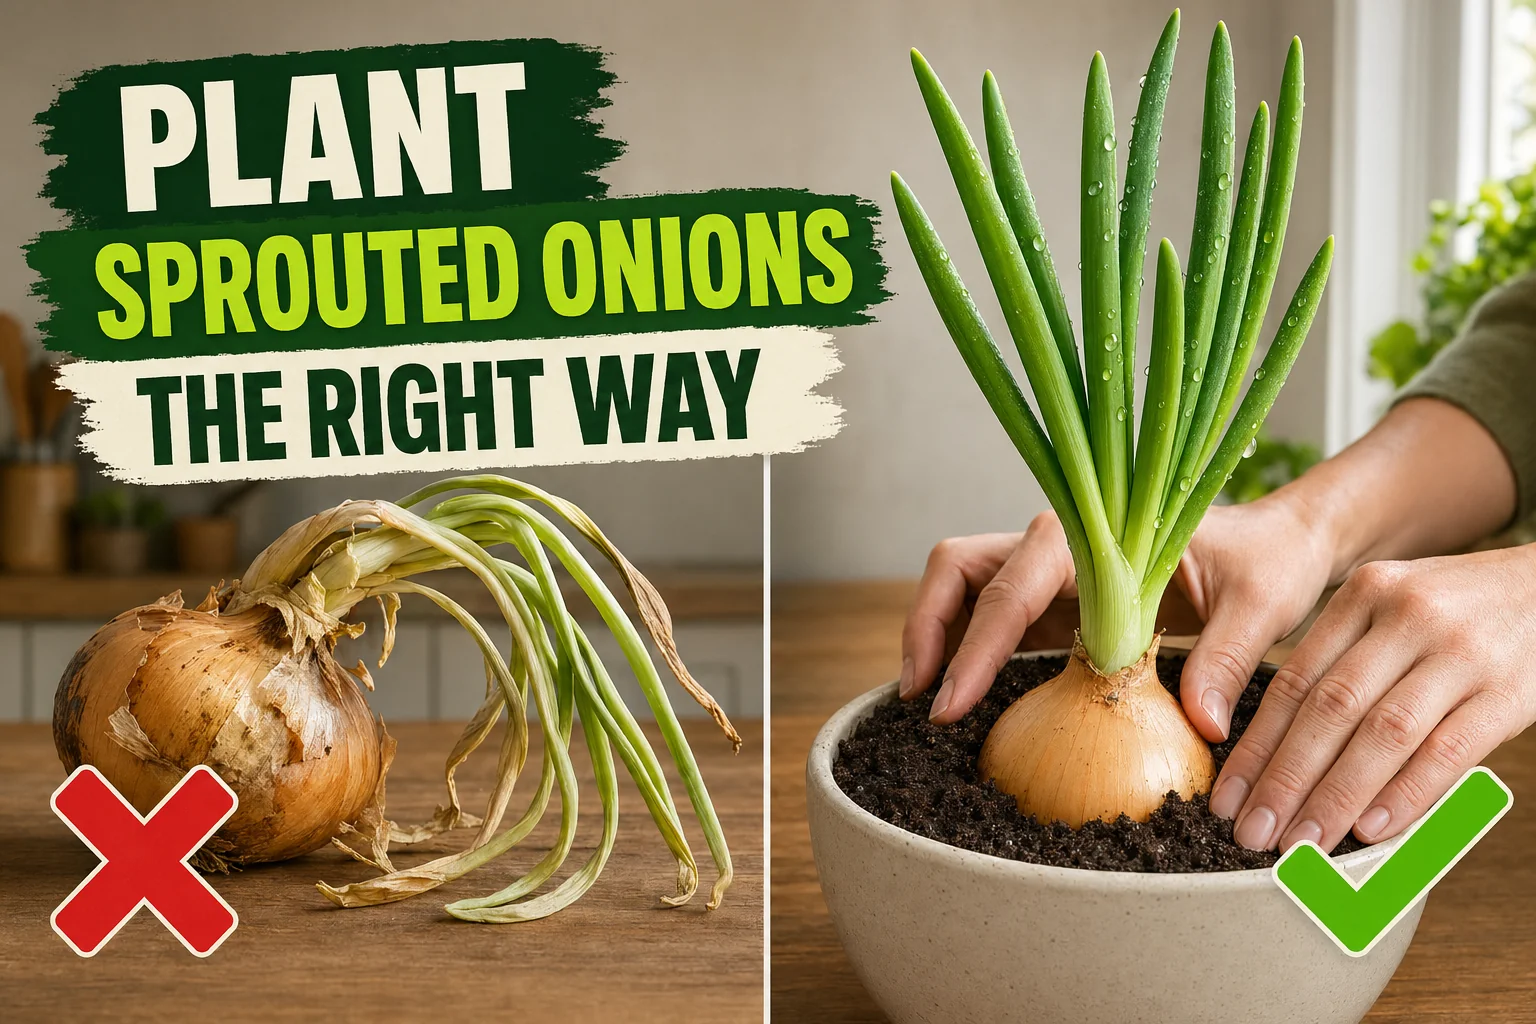
How to Plant Onions That Have Sprouted (Step-by-Step Guide)
Yes, you can plant a sprouted onion. Here's exactly how to grow it into fresh green onions or a new bulb in 4 weeks — soil, light, watering, and harvest tips.
On this page
Watch the visual walkthrough
Weird Way to Regrow Onions For Better Results!
A short visual walkthrough that pairs with the steps above.
Yes — you can absolutely plant a sprouted onion, and it’s one of the easiest crops you’ll ever grow at home. The bulb is already alive and pushing out fresh green shoots, so all you have to do is give it soil, water, and light.
This guide walks you through it step by step: picking the right onion, planting depth, watering, light, and exactly when to harvest.
Quick answer
Bury the sprouted onion halfway in moist potting soil with the green shoot facing up, water it in, and place it on a bright windowsill or outside in a spot with at least 6 hours of sun. You’ll have fresh green onion tops in 3 to 4 weeks, and a full new bulb in roughly 3 to 4 months.
Why plant a sprouted onion instead of tossing it?
A sprouted onion isn’t spoiled — it’s an onion in growth mode. Tossing it wastes a head start that commercial growers actually pay for: the bulb has already broken dormancy and is racing to push out leaves and roots.
Replanting a single sprouted onion gets you, on average:
- A handful of fresh green onion tops within a month, the same flavour you’d buy as scallions
- A new bulb 90–120 days later (variety-dependent)
- A small living plant in your kitchen or balcony, with no special seed-starting setup
The cost is one sprouted onion you were going to throw away. The return is real food.
What you’ll need
- One firm sprouted onion (skip mushy, mouldy, or hollow-cored bulbs)
- A pot at least 15 cm (6 inches) wide and 15 cm (6 in) deep, with drainage holes
- General-purpose potting mix — not garden soil, which compacts in pots
- A sunny windowsill, balcony, or outdoor spot with 6+ hours of direct light
- Watering can or cup
That’s the whole list. No fertilizer or grow lights needed for the first month.
Step-by-step: planting a sprouted onion
1. Pick a healthy sprouted onion
Squeeze the bulb gently. It should feel firm, not squishy. The green shoot can be short or already 10 cm (4 in) long — both work. If you see white roots starting at the base, even better.
Reject any onion that:
- Feels soft when pressed
- Has visible mould or fuzzy white growth
- Is hollow or rotted through the centre when you peel back the outer skin
2. Prepare the pot
Fill the pot with potting mix to about 3 cm (1 in) below the rim. Tap the pot on the table once or twice to settle the soil — don’t pack it down. Roots need air pockets to breathe.
If you’re planting in a garden bed instead, loosen the soil to a depth of 15 cm (6 in) and mix in a small handful of compost.
3. Position the bulb
Make a shallow well in the centre of the pot with your fingers. Sit the onion in it so the bulb is buried about halfway and the green shoot points straight up. The papery outer skin can stay on — it’ll soften and break down as the plant grows.
If the onion has multiple shoots coming from one bulb, that’s fine. You can either leave them or carefully separate them and plant each shoot in its own small pot.
4. Backfill and firm gently
Push soil around the bulb until only the top half is exposed. Press lightly — just enough to hold the onion upright when you water it. Don’t bury the green shoot.
5. Water it in
Pour water slowly around the base of the bulb until you see drips coming out of the drainage holes. This first watering does two things: it removes air gaps around the roots and signals the plant that it’s safe to grow.
After this, let the top 2–3 cm (0.75–1 in) of soil dry out before watering again. Onions hate sitting in wet soil — it’s the #1 cause of replanted onions rotting.
6. Place it in bright light
Set the pot somewhere it’ll get at least 6 hours of direct or very bright indirect light per day:
- Indoors: south- or west-facing window
- Outdoors: full sun, shielded from heavy wind for the first week
If you only have a north-facing window, the green tops will still grow — but you won’t get a new full-size bulb.
Care after planting
Onions are low-maintenance once they’re in soil. You only need to do three things:
| Task | When |
|---|---|
| Water | When the top 2–3 cm (0.75–1 in) of soil is dry — usually every 4–7 days indoors |
| Fertilize | After 4 weeks, a balanced liquid fertilizer every 2 weeks |
| Rotate the pot | Quarter turn weekly so the shoots grow upright |
A free plant care app like Tazart can hold the watering schedule for you, adjust it for your local weather, and ping you on Apple Watch when it’s time — useful if you’re growing more than one or two pots.
When and how to harvest
You have two harvest paths.
Green onion tops (3–4 weeks): snip the green leaves with scissors, leaving 3 cm (1 in) above the bulb so it keeps regrowing. Treat them like store-bought scallions — they taste the same.
Full new bulb (3–4 months): wait until the green tops yellow and flop over on their own. Stop watering, let the soil dry for a week, then pull up the bulb and cure it in a warm dry spot for 1–2 weeks before storing or eating.
If a tall flower stalk shoots up before harvest, the plant is bolting — usually triggered by a hot/cold swing or stress. Cut the flower off as soon as you see it. The bulb won’t get bigger after bolting, so harvest the greens and use the small bulb in cooking.
Common mistakes to avoid
- Burying the bulb completely. The papery top of the bulb wants air. Buried fully, it rots.
- Watering on a fixed schedule. Onions need the soil to dry between waterings. A weekly watering routine kills more replanted onions than anything else.
- Using garden soil in a pot. Garden soil compacts and chokes roots. Use bagged potting mix.
- Planting a soft or mouldy bulb. It won’t grow — and the mould can spread. Compost it.
- Skipping the drainage holes. A pot without drainage = standing water = root rot in days.
Troubleshooting
| Symptom | Likely cause | Fix |
|---|---|---|
| Green tops are pale and floppy | Not enough light | Move to a sunnier spot or supplement with a basic grow light |
| Bulb feels soft a week after planting | Overwatering or buried too deep | Lift, replant with bulb half-exposed, water less often |
| Yellow leaves with crispy tips | Underwatering | Water deeply once, then resume the “top 2–3 cm (0.75–1 in) dry” rule |
| Tall flower stalk shoots up | Bolting (stress trigger) | Cut the flower off; harvest the greens; use the bulb soon |
| Tops look fine but bulb stays small | Too little light, or the original onion was small | Move to full sun; for size, plant onions ≥ 5 cm (2 in) wide to start |
| Tiny black flying insects in the soil | Fungus gnats from staying too wet | Let the soil dry out fully; top with a 1 cm (0.5 in) layer of dry sand |
Watch: planting a sprouted onion
A short visual walkthrough pairs well with the steps above. If you’re a visual learner, watch a quick tutorial like How to Plant a Sprouted Onion on YouTube and then come back to follow the timing in this guide.
Related reading
- How to grow scallions on the windowsill — same allium family, same kitchen-scrap trick, but for endless free green onions in a glass of water.
- How to water a Monstera the right way — the same “let the soil dry between waterings” rule applies to most edible plants too.
- How to fertilize a fig leaf without burning the roots — once your onion is rooted, this guide covers gentle fertilizing.
- Scan the next plant you bring home with the free Tazart plant identifier and let it set up the watering schedule for you.
A note on conditions
Every home is different. Light, pot size, soil mix, season, humidity, and your local weather all change how fast a sprouted onion grows and how often it needs water. Use the steps above as a starting point and adjust based on what your plant actually does in week two — that’s how every good plant grower learns.
Highly recommended
The supplies that make this guide work


Tazart is an Amazon Associate — we earn from qualifying purchases at no extra cost to you. Thank you for helping us keep these guides free.
Frequently asked questions
Can sprouted onions be planted?
Yes. A sprouted onion is a healthy bulb sending up new shoots — exactly the stage when commercial growers plant it. Bury the bulb halfway in moist soil with the green shoot facing up, water it in, and place it in bright light. You'll see new growth within 3 to 5 days.
Can I plant a store-bought onion that has sprouted?
Yes — supermarket onions sprout the same way garden onions do, and they grow just as well in soil. Skip any bulb that is mushy, moldy, or has a black core. A firm sprouted onion with pale green shoots is the best candidate.
What do you do with onions that have sprouted?
You have three good options. (1) Plant the whole bulb in soil to grow fresh green onions and, eventually, a new bulb. (2) Slice off the green shoots and use them like scallions in cooking — the bulb is still safe to eat. (3) Compost it. Don't throw a sprouted onion in the trash — it's the easiest food crop you can grow at home.
How long does it take a sprouted onion to grow?
Green shoots are ready to harvest in 3 to 4 weeks. A full new bulb takes 90 to 120 days, depending on the variety, day length, and the size of the original onion you planted.
Do sprouted onions need full sun?
They prefer 6+ hours of direct or very bright indirect light per day. Indoors, a south- or west-facing windowsill works. Lower light still grows green shoots, but the bulb won't size up.
Are sprouted onions still safe to eat?
Yes, as long as the bulb is firm and not moldy. The taste turns slightly sweeter and milder once it sprouts, and the green shoots are edible — they taste like scallions. Cut away any soft, brown, or slimy spots before cooking.