Edible
How to Plant Seed Potatoes (Chitting, Depth, Spacing & Hilling Guide)
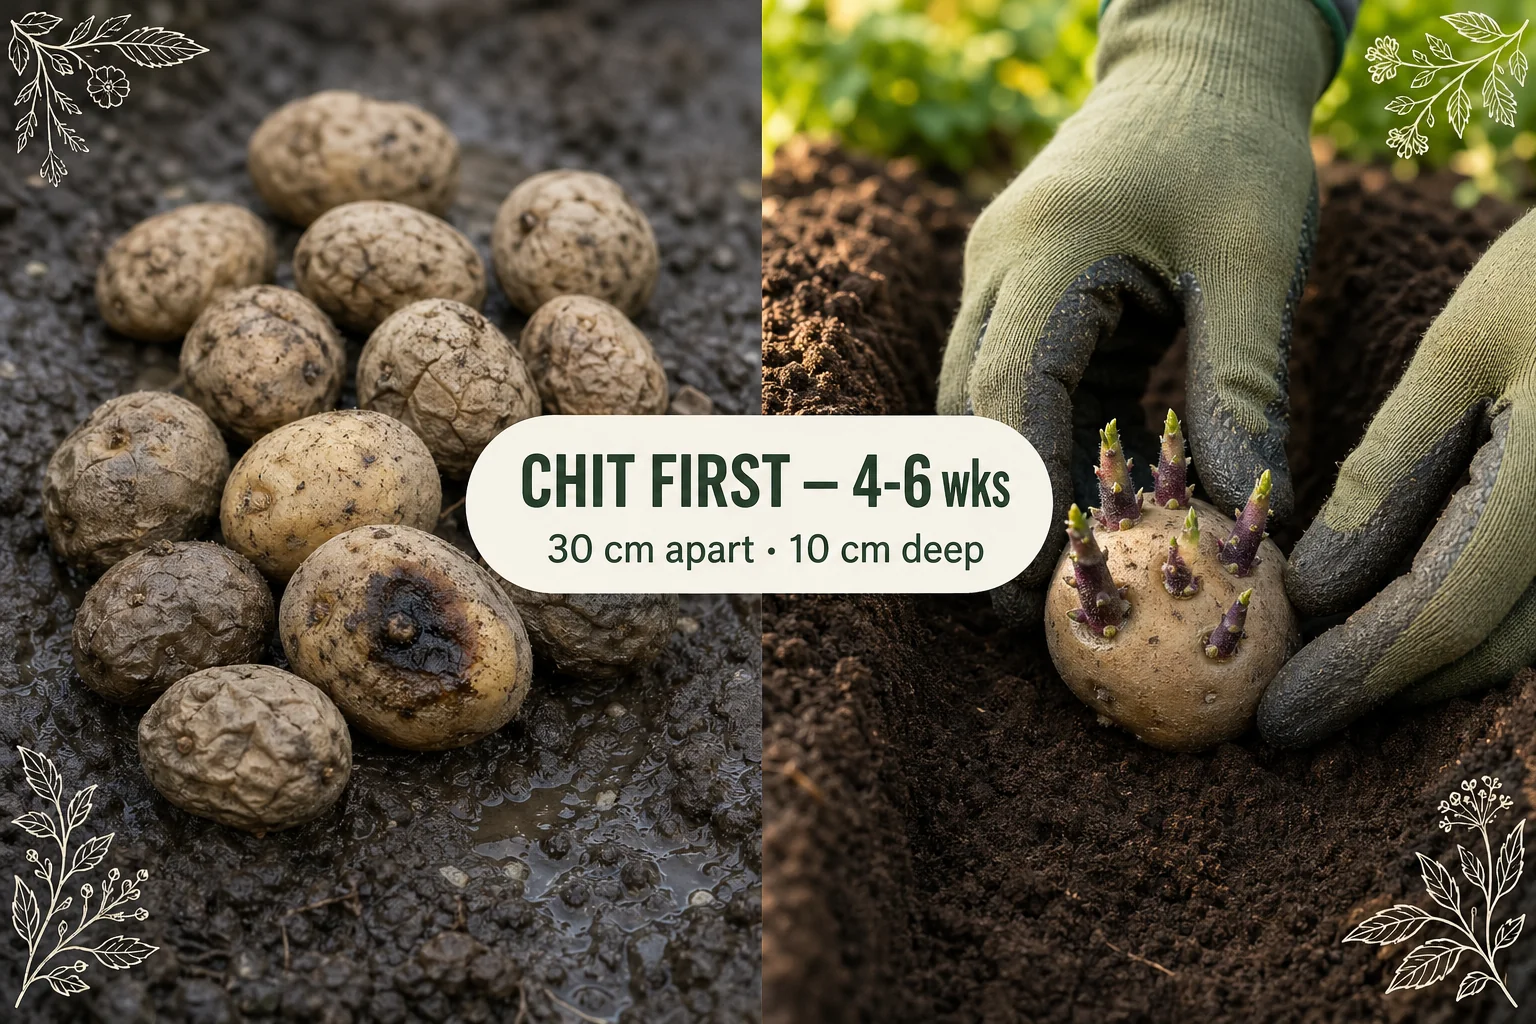
Step-by-step guide to planting seed potatoes: chit for 4–6 weeks, plant 10 cm (4 in) deep, space 30 cm (12 in) apart, hill as plants grow. Harvest in 70–100 days.
On this page
- Quick answer
- Step 1: Start with certified seed potatoes
- Step 2: Chit (pre-sprout) your seed potatoes — 4–6 weeks before planting
- Step 3: Cut large tubers and cure the cut pieces
- Step 4: Prepare the soil and trench
- Step 5: Plant at the correct depth and spacing
- Step 6: Hill the plants as they grow
- Row planting vs container planting — comparison
- Watering after planting
- Harvest timing
- Common mistakes to avoid
- Troubleshooting
- Watch: planting seed potatoes video guide
- Related reading
- A note on conditions
Watch the visual walkthrough
Seed Potatoes 101: How To Prepare Potatoes For Planting!
Get free seeds, shipping, and returns: https://www.epicgardening.com/greenhouse/ When learning how to grow potatoes, you'll ...
Seed potatoes are one of the most satisfying crops to grow at home: plant in spring, hill a few times, and dig up more food than you put in the ground. The process is simple, but a few specific steps — chitting, cutting and curing, the right depth, and consistent hilling — decide whether you get a bucketful or a disappointing handful.
This guide covers every step from choosing certified stock to knowing when to dig.
Quick answer
Chit seed potatoes eye-end up in a cool bright spot for 4–6 weeks until sprouts reach 1–2 cm (0.5–1 in). Cut large tubers into egg-sized pieces with 2+ eyes each, cure cut pieces for 24–48 hours, then plant 10 cm (4 in) deep, 30 cm (12 in) apart, sprouts facing up. Hill soil up around stems every 10–14 days. Harvest new potatoes at 60–70 days; main crop at 90–100 days once foliage dies back.
Step 1: Start with certified seed potatoes
The single best investment in a potato crop is buying certified seed potatoes rather than replanting kitchen spuds or uncertified tubers.
Certified seed potatoes are grown under inspection and declared free of major potato diseases including late blight (Phytophthora infestans), potato virus Y, and blackleg. That disease-free starting point matters because most serious potato problems are soil- or tuber-borne — you import them with what you plant.
What to look for when buying:
- A certification label or tag from your state or provincial seed authority
- Firm, plump tubers with visible dormant eyes — not shrivelled, green, or rotten
- The variety name, so you know whether you’re growing early, mid, or main-crop potatoes
Variety classes by maturity:
| Class | Days to harvest | Best for |
|---|---|---|
| First early | 60–70 days | New potatoes, small gardens, containers |
| Second early | 70–80 days | Medium-sized crop, less blight exposure |
| Main crop | 90–100+ days | Maximum yield, best for storage |
If you have a short growing season or a history of blight in your area, first and second earlies are much safer choices — they’re in and out of the ground before late blight peaks in late summer.
Step 2: Chit (pre-sprout) your seed potatoes — 4–6 weeks before planting
Chitting means deliberately sprouting the seed potatoes in a cool, bright spot before they go in the ground. It is the step most first-time growers skip, and it is the step that makes the most visible difference.
How to chit:
- Place each seed potato eye-end up in an egg box, seed tray, or flat tray — the eye-end is the end with the most indentations (eyes).
- Put the tray somewhere cool — 7–10°C (45–50°F) — with bright indirect light. A windowsill, an unheated greenhouse, or a cool porch all work well.
- Leave them for 4–6 weeks until each eye has pushed a short, fat, purple-green sprout of about 1–2 cm (0.5–1 in).
What you want: Short, stocky, dark-coloured chits — purple or green. Long, pale, stringy chits grew in the dark and snap off too easily. If yours look pale and leggy, move them to a brighter spot.
What chitting does: A chitted potato planted in the ground already has an established sprout system. It emerges from the soil faster, develops roots more vigorously, and reaches harvest one to two weeks earlier than an unchitted tuber. In a cool-climate short season, those two weeks can be the margin between a good crop and frost ending things early.
Step 3: Cut large tubers and cure the cut pieces
Small seed potatoes — roughly egg-sized, about 50–60 g (1.5–2 oz) — are planted whole. Larger tubers should be cut to get more plants from your stock and to reduce the risk of rotting in the ground.
How to cut:
- Use a clean, sharp knife. Wipe the blade with dilute bleach solution between cuts to avoid spreading disease.
- Cut each large tuber into pieces roughly the size of a large egg, making sure each piece has at least 2 healthy eyes.
- Avoid tiny scraps with only one small eye — they won’t have enough energy reserves to establish strongly.
How to cure:
After cutting, do not plant immediately. Lay the cut pieces cut-side up on a clean tray in a dry, well-ventilated spot at room temperature — about 15–18°C (60–65°F). Leave them for 24–48 hours.
During curing, the cut surface dries and forms a corky callus layer. That callus is the barrier between the starchy interior of the seed piece and the moist soil — without it, the piece can rot before it sprouts. This step takes almost no effort and prevents the most common cause of seed potato failure.
Step 4: Prepare the soil and trench
Potatoes prefer:
- Loose, well-drained soil — sandy loam or amended loam is ideal. Heavy clay causes waterlogging and encourages rot and scab.
- Slightly acidic pH — 5.5 to 6.5. Alkaline soil encourages common scab.
- Full sun — at least 6 hours of direct sunlight per day.
- No fresh manure mixed into the bed immediately before planting — it causes scab. Well-aged compost or rotted manure dug in the previous autumn is fine.
Dig a trench 10–15 cm (4–6 in) deep and flat-bottomed. A flat-bottomed trench means all seed pieces sit at the same depth, which gives a more even crop. If you’re planting multiple rows, space the trenches 60–75 cm (24–30 in) apart.
Sprinkle a handful of balanced slow-release fertilizer (5-10-10 or similar) into the bottom of each trench and mix it lightly into the base soil.
Step 5: Plant at the correct depth and spacing
Place each chitted seed potato — or cured cut piece — in the trench:
- Sprouts facing up
- 10 cm (4 in) below the soil surface (measure from the top of the seed piece to the final soil level after covering)
- 30 cm (12 in) apart along the row
Cover the seed pieces with soil and firm gently. Do not compact heavily — potatoes need loose soil for the developing tubers to expand into.
Why 30 cm (12 in) spacing matters: Each potato plant can spread its root system and tuber zone out to about 30 cm (12 in) in every direction. Planting closer packs the plants so tightly that tuber development is inhibited, blight spreads faster via the canopy, and individual yields drop. Wider spacing (up to 38 cm / 15 in) is fine for main-crop varieties; first earlies can sit at the closer end of the range.
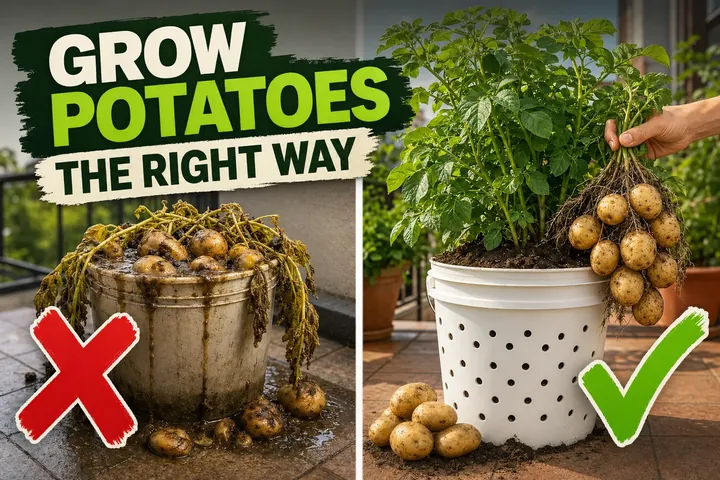
Container planting: In a grow bag or container at least 40 cm (16 in) deep, add 10–15 cm (4–6 in) of potting mix, place 1–2 seed pieces on top, cover with 10 cm (4 in) of mix, and then add more mix in stages as stems emerge — the container equivalent of hilling.
Step 6: Hill the plants as they grow
Hilling is the most important ongoing task in potato growing. Once the green stems push 15–20 cm (6–8 in) above the soil surface, mound loose soil or compost up around each stem cluster, leaving only the top 5–8 cm (2–3 in) of foliage exposed above the hill.
Repeat every 10–14 days for as long as the plants are actively growing — usually three to four hilling sessions per crop.
Why hilling is non-negotiable:
- More tubers. New tubers form along the buried portion of the stem above the seed piece. Every extra centimetre of buried stem is potential yield.
- Prevents greening. Tubers that poke above soil level turn green and produce solanine, making them bitter and mildly toxic. Hilling keeps them covered and dark.
- Weed suppression. The mounded soil smothers most weed seedlings around the base of the plants.
In containers, the same principle applies: keep adding potting mix around the stems as they grow, stopping 5 cm (2 in) from the rim.
Row planting vs container planting — comparison
| Factor | Row / bed planting | Container / grow bag |
|---|---|---|
| Yield per plant | Higher — room to spread | Lower — limited volume |
| Space needed | 60–75 cm (24–30 in) between rows | Single container on balcony/patio |
| Ease of harvest | Dig with fork, can miss tubers | Tip container, near-total recovery |
| Hilling method | Mound soil along rows | Add potting mix to container |
| Watering | Relies more on rain + manual | Dries out faster — check daily in heat |
| Best varieties | Main-crop, high-yield | First earlies, compact varieties |
Watering after planting
Potatoes have three critical watering windows:
- At planting: Water gently to settle the soil around the seed pieces. Don’t saturate — just moisten.
- During tuber initiation (when plants flower): This is the most water-critical phase. Dry soil at this point directly reduces tuber size. Aim for 2–3 cm (0.75–1 in) of water per week from rainfall plus supplemental watering.
- Before harvest: Stop watering 10–14 days before you plan to dig. Dry soil at the end of the season firms the skins, reducing bruising and improving storage life.
Avoid wetting the foliage when watering — damp leaves encourage blight. Water at the base of the plant with a watering wand or drip irrigation.
Harvest timing
New potatoes (first earlies, 60–70 days): Harvest when the plants are in flower. Carefully open the side of the hill with your hands and feel for tubers. Take what you need and re-cover — the plant keeps producing. New potatoes have thin skins and are best eaten within a few days.
Main crop (90–100 days): Wait until the foliage naturally yellows, flops, and begins dying back on its own. That dieback is the signal that the plant has finished. Stop watering for 10–14 days. On a dry day, insert a fork 30 cm (12 in) from the base of each plant and lever upward — work from the outside inward to avoid spearing tubers.
Curing after harvest: Spread the harvested potatoes in a single layer in a warm (15–20°C / 59–68°F), dark, well-ventilated space for 1–2 weeks. Curing heals minor skin damage and thickens the skin for storage. Then move to a cool (4–10°C / 40–50°F), dark, dry location. Never store in the fridge — cold converts starch to sugar.
Common mistakes to avoid
- Not chitting. Unchitted seed potatoes emerge 10–14 days later and establish more slowly. In short seasons that delay can cost you a significant portion of the crop.
- Skipping the cure after cutting. Uncured cut pieces rot in damp soil before they sprout. The 24–48 hour wait is not optional.
- Planting too shallow. 10 cm (4 in) is the minimum starting depth. Shallow seed pieces produce fewer tubers and more surface tubers that green in sunlight.
- Skipping hilling. Without hilling, yield can drop by 30–50% compared to a properly hilled plot. There is no substitute.
- Planting in the same bed year after year. Soil-borne diseases build up fast. Rotate potato crops to a different bed at least every 3 years.
- Watering overhead. Wet foliage speeds the spread of late blight. Water at the base.
- Harvesting in wet soil. Wet-soil harvest = thin-skinned, bruised potatoes that rot in storage. Wait for a dry day and dry soil.
Troubleshooting
| Symptom | Likely cause | Fix |
|---|---|---|
| No emergence after 4 weeks | Seed pieces rotted, planted too deep in waterlogged soil | Check drainage; replant cured pieces in drier bed |
| Pale, weak stems at emergence | Unchitted stock, very cool soil | Be patient; soil temp below 10°C (50°F) slows emergence significantly |
| Yellow leaves before 70 days | Underwatering, nitrogen deficiency, or early blight | Deep water once; if brown ringed spots appear, remove affected leaves and treat as blight |
| Scabby rough patches on skins | Alkaline soil or fresh manure | Lower pH to 5.5–6.5; don’t add fresh manure; rotate bed |
| Green-tinged tubers | Tubers exposed to light | Hill more aggressively; check container fill level |
| Tiny tubers even on healthy plants | Too shallow, no hilling, nitrogen overload | Next season: deeper planting, consistent hilling, switch to lower-nitrogen fertilizer |
| Brown spots inside tubers (hollow heart) | Uneven watering during growth spurt | Maintain consistent 2–3 cm (0.75–1 in)/week; avoid feast-or-famine irrigation |
| White fungal growth on leaves, blackening stems | Late blight | Remove and bag (never compost) all infected material immediately; harvest what you can; don’t replant potatoes in that bed for 3 years |
Watch: planting seed potatoes video guide
This video pairs well with the steps above and gives a visual walkthrough of chitting, cutting, trench preparation, and hilling that’s hard to convey in words alone.
Related reading
- How to plant sprouted potatoes — using kitchen-sprouted spuds instead of certified seed stock, with the same depth and hilling rules.
- How to plant potatoes in a bucket — the full container method if you only have a balcony or patio.
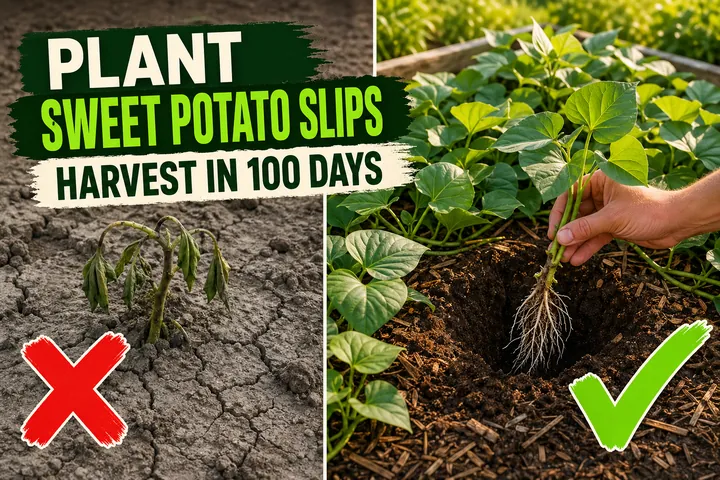
- How to plant sweet potato slips — a completely different planting method for the tropical relative of the common potato.
- How deep to plant potatoes — full depth + hilling chart, including grow-bag and bucket variations.
- Use the free Tazart plant care app to set watering reminders and hilling alerts timed to your specific planting date — it adjusts for your local weather automatically.
A note on conditions
Potato performance varies with soil type, variety, climate, container size, and local weather. The depths, spacings, and timings in this guide are proven starting points — treat them as a baseline, then adjust based on what you observe. A potato plant growing in sandy loam in a warm climate will behave differently from the same variety growing in clay-amended raised beds in a cool, wet region. Both can produce excellent crops once you understand what your specific conditions need.
Highly recommended
The supplies that make this guide work


Tazart is an Amazon Associate — we earn from qualifying purchases at no extra cost to you. Thank you for helping us keep these guides free.
Frequently asked questions
How deep do you plant seed potatoes?
Plant seed potatoes 10 cm (4 in) deep in the bottom of the trench, then cover with soil. As the stems grow, continue mounding (hilling) soil up around them so the buried stem length increases. The new tubers form along the buried stem above the seed piece, so total depth — including all the hilling — can reach 20–25 cm (8–10 in) by the end of the season.
How far apart should seed potatoes be planted?
Space seed potatoes 30 cm (12 in) apart within the row. Leave 60–75 cm (24–30 in) between rows. Crowding potatoes reduces airflow, increases blight risk, and means the tubers compete for space, producing smaller crops. In containers, plant one or two seed pieces per 40 L (10 gal) container — no more.
Do you need to chit seed potatoes before planting?
Chitting is not strictly mandatory, but it gives you a meaningful head start. Chitting (pre-sprouting seed potatoes in a cool bright spot for 4–6 weeks) means you plant a potato that already has strong 1–2 cm (0.5–1 in) purple-green sprouts, so the plant emerges faster, establishes more vigorously, and reaches maturity one to two weeks earlier. In short seasons, that can make the difference between a full crop and an early frost cutting things short.
How do you cut seed potatoes before planting?
Only cut potatoes larger than an egg. Use a clean sharp knife to cut each tuber into chunks, making sure each piece has at least 2 healthy eyes (small indentations where sprouts emerge). After cutting, spread the pieces cut-side up on a tray in a dry, cool spot for 24–48 hours. The cut surface dries and forms a corky callus that protects against soil-borne rot once planted.
Can you grow seed potatoes in containers?
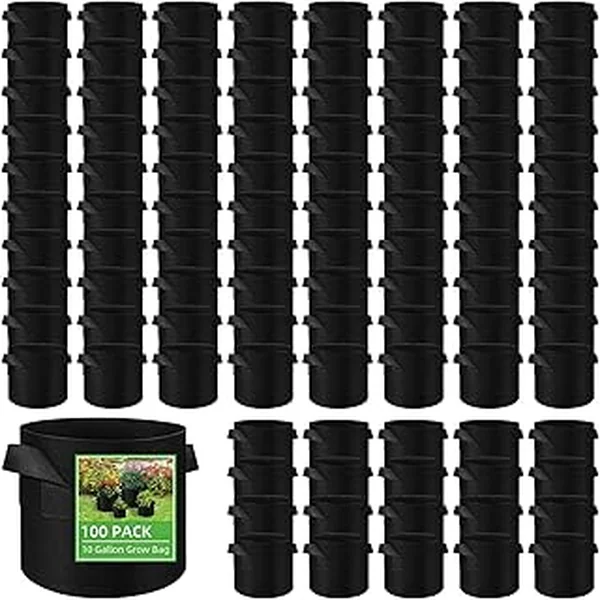
Yes — containers work well for seed potatoes. Use a container at least 40 cm (16 in) deep and 40 cm (16 in) wide, with drainage holes. Fill one-third with potting mix, plant 1–2 seed pieces, then add mix in stages as the stems grow, keeping only the top few leaves exposed. Fabric grow bags are especially popular because they air-prune roots and are easy to tip out at harvest.
When are seed potatoes ready to harvest?
New (baby) potatoes are ready about 60–70 days after planting, around the time plants flower — you can reach into the hill and pinch a few without disturbing the whole plant. The full main-crop harvest happens at 90–100 days, once the foliage has yellowed and died back. Stop watering for the last 10–14 days before digging to firm the skins.
What is hilling potatoes and why does it matter?
Hilling means mounding loose soil or compost up around the potato stems as they grow, leaving only the top 5–8 cm (2–3 in) of foliage exposed. You do this every 10–14 days while the plant is actively growing. It matters because potato tubers form along the buried portion of the stem above the seed piece. More buried stem equals more tubers. Hilling also keeps developing tubers dark (preventing them from turning green and accumulating solanine) and suppresses weeds.
What are certified seed potatoes and why use them?
Certified seed potatoes are tubers inspected and declared free of major viral and bacterial diseases, including late blight and potato virus Y. Using certified stock dramatically lowers the disease risk compared to planting saved kitchen potatoes or uncertified tubers. For any planting of more than a few buckets, certified seed potatoes are strongly recommended.