Edible
How to Plant Onion Bulbs (Sets) — Depth, Spacing & Timing
Learn how to plant onion bulbs (sets) correctly — 1 inch deep, pointed end up, 4–6 inches apart. Includes long-day vs short-day variety guide, zone timing, and harvest
On this page
- Quick answer
- Sets vs seeds vs transplants — which should you choose?
- Long-day vs short-day — the single most important variety decision
- When to plant by zone
- Soil preparation
- Step-by-step: depth and spacing
- Watering
- Fertilizing schedule
- Harvest cues
- Common mistakes to avoid
- Related reading
- A note on conditions
Watch the visual walkthrough
Your Onions Will LOVE You For This: 3 Tips To Grow GIANT Onion Bulbs!
In this video, I share 3 tips to grow giant onion bulbs! These onion growing tips have made a big difference in helping me grow ...
Onion sets are the fastest, most reliable way to grow full-size bulbs at home. Each set is a small dormant onion grown from seed the previous season — all the hard early work is already done. Plant them correctly in early spring and you’ll be lifting heavy, papery-skinned storage onions in less than four months.
The most common mistakes happen at planting: wrong depth, wrong end up, and wrong variety for the latitude. This guide fixes all three and walks through every other step in the process.
Quick answer
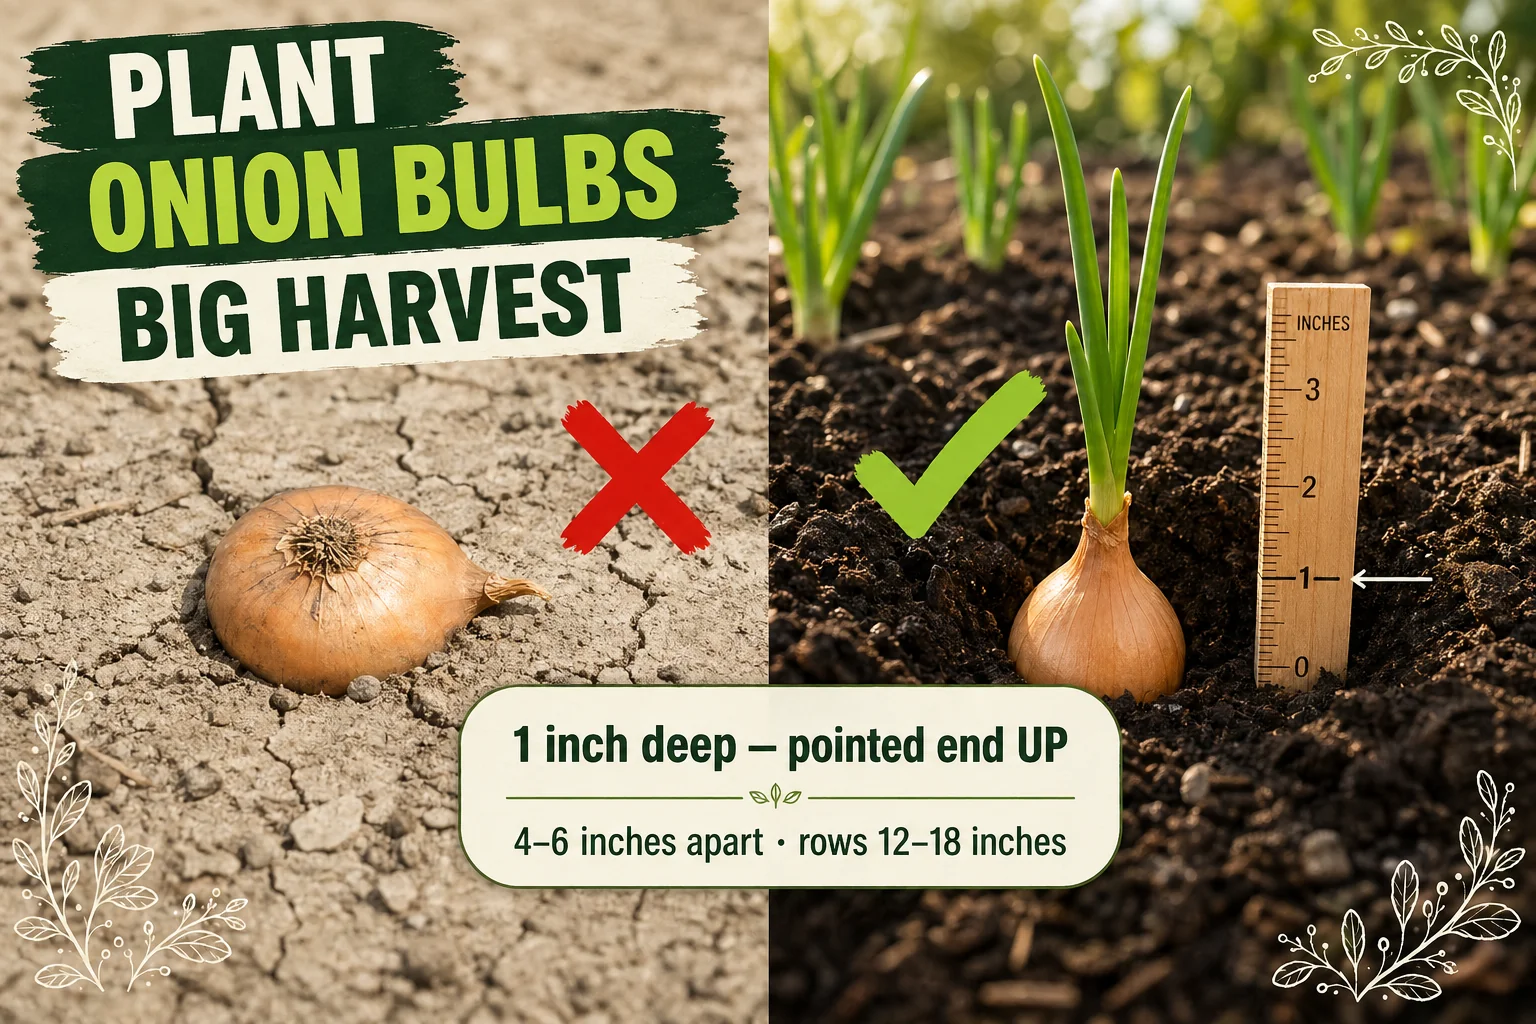
Plant onion sets with the pointed end facing up, 1 inch (2.5 cm) deep, 4 to 6 inches (10–15 cm) apart, in rows 12 to 18 inches (30–45 cm) apart. Plant in early spring, 4 to 6 weeks before your last frost. Choose long-day varieties if you live north of 36°N, short-day varieties south of that line. Harvest at 90 to 120 days, when the tops yellow and fall over on their own.
Sets vs seeds vs transplants — which should you choose?
There are three ways to start onions. Sets win for most home growers.
| Method | Pros | Cons |
|---|---|---|
| Sets | Fastest to plant, cold-tolerant, widely available, forgiving | Slightly more prone to bolting; fewer variety choices |
| Seeds | Cheapest; widest variety range | Slow (10–15 weeks indoors before transplant date); requires grow lights |
| Transplants | Almost as fast as sets; good variety range | More expensive; must be purchased at the right time |
Sets are small, pre-grown bulbs sold in garden centres from late winter. They go from planting to harvest in 90–120 days, they tolerate light frost, and they need no indoor seed-starting. If you want reliable, big storage onions with minimal effort, sets are the right choice.
Long-day vs short-day — the single most important variety decision
Onions are photoperiod-sensitive: they stop producing leaves and start forming a bulb only once day length hits a specific threshold. Plant the wrong type for your location and you’ll either get a plant that stays leafy all season without bulbing, or one that bulbs too early before the leaves are large enough to feed a big bulb.
| Type | Bulbs when days reach | Best latitudes | Example varieties |
|---|---|---|---|
| Long-day | 14–16 hours | North of ~36°N (northern US, Canada, UK, northern Europe) | Walla Walla, Yellow Sweet Spanish, Copra |
| Short-day | 10–12 hours | South of ~36°N (southern US, Mediterranean, southern hemisphere equivalent) | Vidalia, Texas Early Grano, Red Creole |
| Day-neutral | 12–14 hours | Any latitude; good for intermediate zones | Cabernet, Highlander |
Rule of thumb: If you live in the northern United States, Canada, the UK, or northern Europe, buy long-day sets. If you are in the American South (Texas, Georgia, Florida, California’s central valley), buy short-day sets. Day-neutral varieties are a safe choice if you are uncertain or between latitudes.
When to plant by zone
Onions are one of the first crops you can put in the ground each spring. They tolerate light frost (down to about 28°F / -2°C) and actually need cool early-spring weather to build foliage before long days trigger bulbing.
| USDA Zone | Approximate planting window |
|---|---|
| Zones 3–4 | Late March – late April |
| Zones 5–6 | Mid-February – late March |
| Zones 7–8 | Late January – late February |
| Zones 9–10 | October – January (fall planting for short-day types) |
Target 4 to 6 weeks before your average last frost date. The soil should be workable — not frozen solid — but it does not need to be warm. Onion sets can go in when soil temperature is as low as 50°F (10°C).
Soil preparation
Good soil is the biggest yield driver. Onion sets can’t push big bulbs through compacted, waterlogged, or nutrient-poor ground.
What to aim for:
- Loose and well-drained. Loosen the top 6 inches (15 cm) with a fork or tiller. Onion roots are shallow; they don’t need deep tillage, but they do need loose texture.
- Fertile. Work in a 2-inch (5 cm) layer of compost or well-rotted manure before planting. Onions are moderate feeders and compost gives them a slow, steady nutrient base.
- pH 6.0–7.0. Outside this range, nutrients lock up. If you’re unsure, a basic soil test (available at most extension offices or garden centres) tells you within 48 hours.
- Not recently allium-planted. Avoid beds where onions, garlic, leeks, or shallots grew in the past three years — shared diseases like white rot and onion smut persist in the soil.
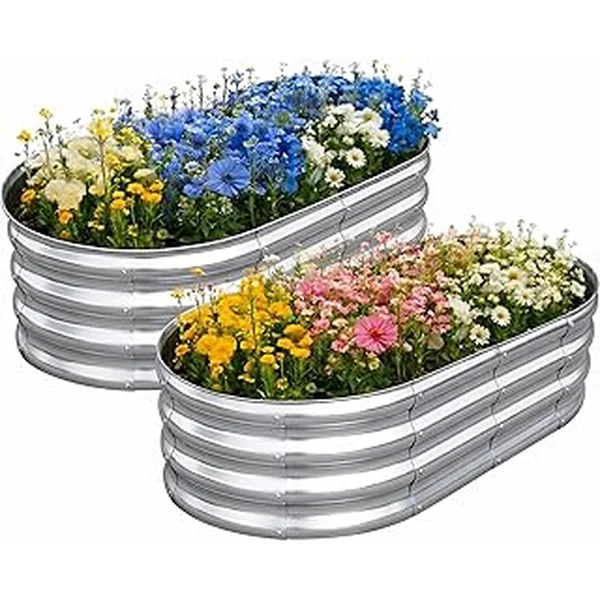
If your native soil is heavy clay, plant in a raised bed filled with a 50/50 mix of topsoil and compost. The drainage difference is significant, and raised beds warm up faster in spring.
Step-by-step: depth and spacing
1. Choose healthy sets
Pick firm, dry sets with no mould, no soft spots, and no cracks in the outer skin. Sets about the size of a marble (roughly 0.75 inch / 2 cm in diameter) are ideal. Very large sets (over 1 inch / 2.5 cm) are more prone to bolting — use them for green onion harvests rather than full bulbs.
2. Dig your row or holes
Use a trowel or garden dibber to make a shallow trench or individual holes exactly 1 inch (2.5 cm) deep. Measure once, plant consistently. Shallower than 1 inch and late frost heaves the sets out; deeper than 2 inches and emergence slows noticeably.
3. Orient the set — pointed end up
This is the step most beginners get wrong. The pointed tip is the growing point — that’s where the green shoot will emerge. The flat, slightly concave end is the root plate. Drop every set in with the point facing straight up. Upside-down sets do eventually right themselves, but they waste 2 to 3 weeks doing it and the bulb comes out small.
4. Space correctly
Place sets 4 to 6 inches (10–15 cm) apart within the row, with rows 12 to 18 inches (30–45 cm) apart.
- 4-inch spacing works if you plan to pull every other plant as a green onion once the tops are 8–10 inches tall, leaving the remainder 8 inches apart for full bulb development.
- 6-inch spacing is better if you want every plant to develop into a full storage onion from the start.
Row spacing of 12 to 18 inches gives you room to weed, fertilize, and avoid trampling the shallow bulbs as they size up.
5. Backfill and firm gently
Cover the sets with soil and press down just enough to make firm contact — not packed tight. Overly compacted soil restricts bulb expansion. The tip of the set should be just at or 1 inch below the surface.
6. Water in and mulch
Water gently after planting to settle the soil. Once shoots are 2–3 inches tall, apply a 1-inch (2.5 cm) layer of straw or shredded leaves between the rows. Mulch conserves moisture, moderates soil temperature, and cuts down significantly on weeding. Keep it away from the necks of the emerging shoots.
Watering
Onions have shallow roots and are moderately drought-sensitive during bulb development, but they hate waterlogged soil.
- After planting through early growth: water whenever the top inch of soil feels dry. In cool spring weather that’s typically every 5 to 7 days.
- During bulb sizing (roughly 60 days to harvest): consistent moisture is most critical here. Irregular watering at this stage causes bulbs to crack or form rings inside. Aim for 1 inch of water per week from rain or irrigation.
- Last 2 weeks before harvest: stop watering. Dry conditions harden the outer skins and dramatically improve storage life. Onions harvested from wet soil rot quickly in storage.
Fertilizing schedule
Onions are moderate nitrogen feeders — they need enough nitrogen to build big leafy tops (since bigger tops mean bigger bulbs) but too much nitrogen late in the season pushes leaf growth at the expense of bulb sizing.
| Timing | What to apply |
|---|---|
| At planting | Work in a balanced granular fertilizer (e.g. 10-10-10) or nitrogen-rich organic feed at the manufacturer’s rate |
| When tops are 6 inches tall | Side-dress with a nitrogen-rich fertilizer (blood meal, ammonium sulfate, or organic balanced feed) |
| 6 weeks before expected harvest | Switch to a low-nitrogen, higher-phosphorus/potassium feed to encourage bulb hardening |
| When tops begin to yellow | Stop all feeding |
Avoid high-nitrogen fertilizers in the final 4 to 6 weeks — they keep the tops green long after the bulb should be hardening, which leads to thick necks that don’t store well.
Harvest cues
Onions tell you when they’re ready. Watch for these signals:
- Tops yellow and flop. The green leaves gradually yellow from the bottom up, then the neck collapses and the top falls over. This is the primary cue.
- Half to two-thirds of tops have fallen. At this point, stop watering and wait a few more days. You can gently bend any stubborn upright tops to speed the process.
- Outer skin is papery and dry. Lift one bulb and check the outer layers — they should be dry and papery, not green or soft.
- Timeline. Most sets produce harvest-ready bulbs 90 to 120 days after planting. Long-day varieties typically run longer than short-day types.
To harvest, use a garden fork to gently lift bulbs from below rather than pulling by the tops — the neck is fragile at harvest and can tear, opening a wound for rot. Lay the bulbs in a single layer in a warm, dry, airy spot out of direct sun (a covered porch, a garage, or a shed) for 2 to 3 weeks to cure. Once the necks are completely dry and the outer skins are fully papery, trim the roots and tops, and store in a mesh bag or open crate in a cool, dry place. Well-cured long-day onions store for 4 to 6 months; short-day types are best used within 1 to 2 months.
Common mistakes to avoid
- Planting the wrong variety for your latitude. A long-day variety planted in Georgia will never form a decent bulb. Match the type to your location before you buy.
- Planting too deep. Sets pushed 3 or 4 inches down struggle to emerge and the bulbs develop irregularly. Stay at 1 inch.
- Planting flat-end up. Takes seconds to fix and makes a meaningful difference in bulb shape and size.
- Watering at harvest time. Wet bulbs going into storage is the leading cause of onion rot. Stop watering at least two weeks before you plan to lift.
- Skipping the cure. Uncured onions rot within weeks. Two to three weeks of warm, dry air transforms a fresh onion into a months-long pantry staple.
- Feeding nitrogen late. Late nitrogen pushes thick necks and soggy necks don’t store. Switch to a low-nitrogen feed 6 weeks out.
Related reading
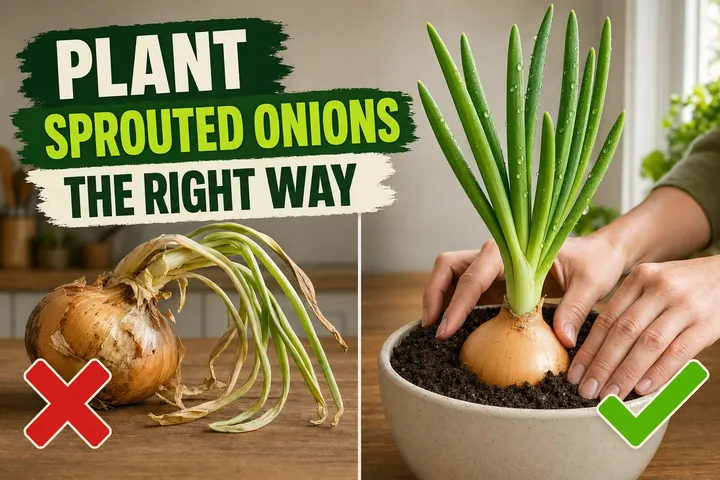
- How to plant onions that have sprouted — if a store-bought onion has already sprouted in your kitchen, this guide shows you how to replant it for green onion tops within a month.
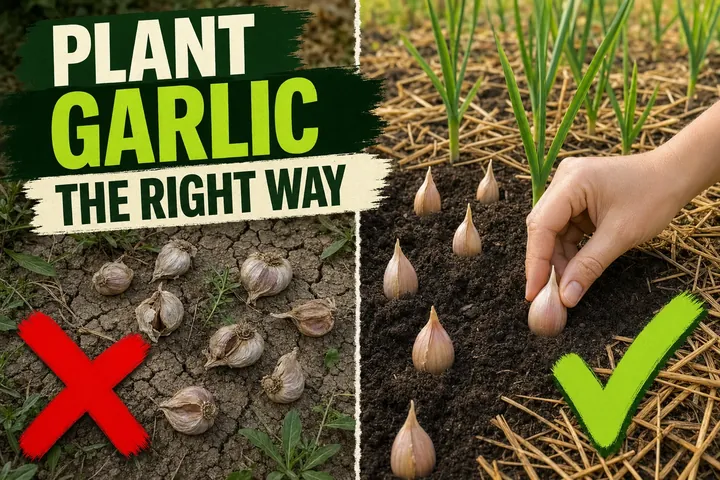
- How to plant garlic cloves — garlic’s timing, depth, and spacing rules are similar; plant them in the same bed in alternating rows to maximise space.
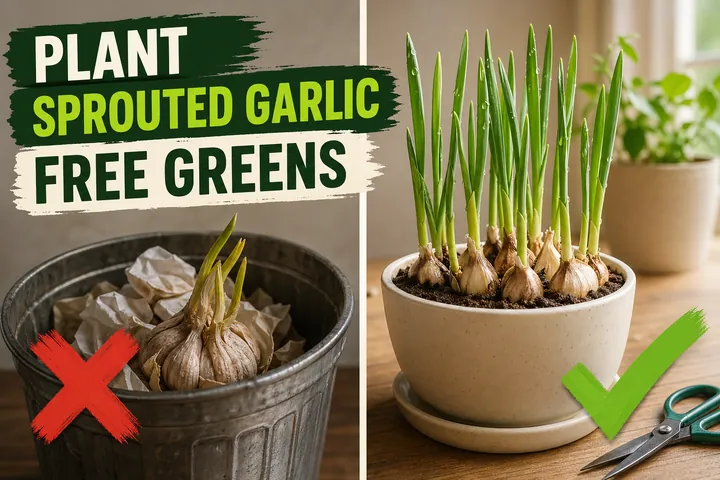
- How to plant sprouted garlic — put a sprouted garlic bulb in the ground instead of the compost bin and harvest a fresh head in late summer.
- Track watering intervals and set a harvest reminder with the free Tazart plant care app — it adjusts watering schedules for your local weather so you never miss a critical dry-down window before harvest.
A note on conditions
Every garden performs differently. Soil type, drainage, your local frost dates, the specific variety you chose, and the weather during your growing season all shift how onion sets develop and how long they take to mature. Use the depths, spacings, and timelines above as a well-tested starting point, then adjust based on what your bed actually produces in the first season — that’s how every gardener dials in their onion patch.
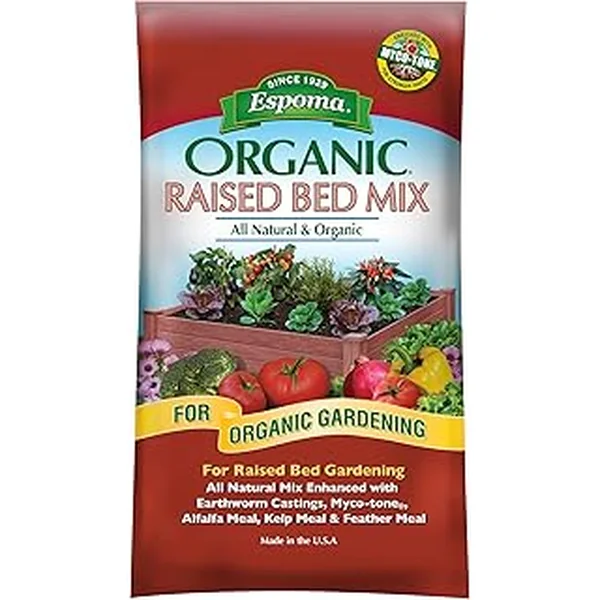
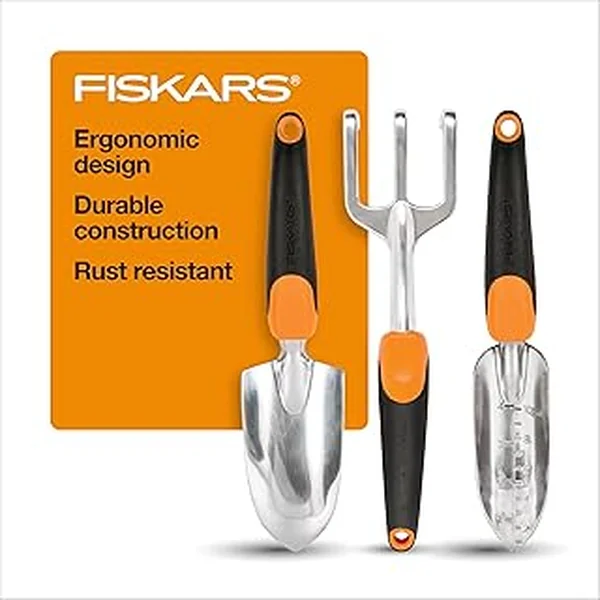
Highly recommended
The supplies that make this guide work

Tazart is an Amazon Associate — we earn from qualifying purchases at no extra cost to you. Thank you for helping us keep these guides free.
Frequently asked questions
How deep should you plant onion sets?
Plant onion sets 1 inch (2.5 cm) deep — measured from the tip of the set to the soil surface. In very cold areas where late frosts are common, going slightly deeper (up to 1.5 inches) is fine, but anything deeper than 2 inches slows emergence. The shallow depth keeps the developing bulb in the warm top layer of soil where it can size up properly.
Which end of an onion set goes up?
The pointed end goes up and the flat root end goes down. The pointed tip is where the green shoot emerges; the flat end is where the roots will form. Sets planted upside-down still grow eventually, but they waste energy and produce misshapen, smaller bulbs. Take the extra second to orient every set correctly.
When should you plant onion sets in spring?
Plant onion sets as early in spring as the soil can be worked — typically 4 to 6 weeks before your last expected frost date. Onions are frost-tolerant and actually need cool weather early on to build strong foliage before long days trigger bulbing. In USDA zones 6–8, that often means late February to mid-March; in zones 3–5, late March to late April.
What is the difference between long-day and short-day onions?
Long-day onions start forming bulbs when day length exceeds 14–16 hours — they are best for growers in northern latitudes (roughly north of 36°N). Short-day onions begin bulbing at 10–12 hours of daylight, making them ideal for southern growers where spring days don't get as long. Planting the wrong type for your latitude produces either tiny bulbs or a plant that never bulbs at all.
How far apart do you plant onion sets?
Space onion sets 4 to 6 inches (10–15 cm) apart within the row, with rows 12 to 18 inches (30–45 cm) apart. Closer spacing (4 inches) works fine if you plan to harvest some early as green onions, thinning and giving the remaining bulbs more room. For full-size storage onions, 6-inch spacing from the start gives every bulb space to develop.
How do you know when onions are ready to harvest?
Onions are ready when the green tops yellow and fall over naturally — usually at 90 to 120 days after planting. You can gently bend any stubborn tops at the neck to speed the process. Once half to two-thirds of the tops have flopped, lift the bulbs with a fork, and cure them in a warm, dry, airy spot for 2 to 3 weeks before storing.
Can you plant onion sets in raised beds?
Yes — raised beds are actually ideal for onion sets. They offer the loose, well-drained, fertile soil onions prefer, and the raised profile warms up faster in spring, letting you plant earlier. Fill with a mix of topsoil and compost, aim for 6 inches of depth, and follow the same 1-inch planting depth and 4–6-inch spacing as in a ground bed.
Do onion sets need fertilizer?
Yes. Apply a nitrogen-rich granular fertilizer (or balanced organic feed) at planting and again when tops are 6 inches tall. Switch to a low-nitrogen, higher-phosphorus feed about 6 weeks before harvest to support bulb sizing without pushing excessive leaf growth. Stop all feeding once the tops begin to yellow.