Guide
How to Plant Lavender: Site, Soil, Spacing & Timing
Learn exactly how to plant lavender so it thrives from day one — best timing, full-sun site selection, gritty soil prep, planting depth, and establishment watering tips.
On this page
- Quick answer
- Table of contents
- Best time to plant lavender
- Choosing the right site
- Soil preparation and amendment
- Step-by-step planting instructions
- Spacing guide by variety
- Watering during establishment
- Mulching: gravel only, not bark
- Common planting mistakes
- Troubleshooting new lavender plants
- Watch: how to plant lavender correctly
- Related reading
- A note on variability
Watch the visual walkthrough
Plant Profile: Lavender :: How to Prune, Plant & Grow Beautiful Lavender!
Welcome Gardeners! Lavender is not only one of the most beautiful and best smelling plants in the garden, but it's also fuss free!
Lavender is deceptively easy to kill and deceptively easy to grow — the difference comes down to one decision made before you dig a single hole: drainage.
Get the soil right, plant at the correct depth, choose a sunny site, and lavender will thrive for a decade with almost no intervention. Get it wrong and the plant will look fine for a few weeks, then mysteriously decline through its first winter.
This guide covers the planting process only — timing, site, soil prep, spacing, depth, establishment watering, and mulching. For ongoing care after the first season (pruning, feeding, overwintering), see the companion lavender plant care guide.
Quick answer
Plant lavender in late spring (after the last frost) or early autumn, in full sun (6+ hours), in free-draining gritty soil at pH 6.5–7.5. Space compact varieties 30–45 cm (12–18 in) apart. Set the crown exactly at soil level — never below. Water every 2–3 days for the first 2–3 weeks, then taper. Mulch with gravel, never bark.
Table of contents
- Best time to plant lavender
- Choosing the right site
- Soil preparation and amendment
- Step-by-step planting instructions
- Spacing guide by variety
- Watering during establishment
- Mulching: gravel only, not bark
- Common planting mistakes
- Troubleshooting new lavender plants
- FAQ
Best time to plant lavender
There are two reliable windows for planting lavender:
Late spring (recommended in most climates) Plant after your last frost date, once soil temperature has climbed above 10°C (50°F). In the UK and northern Europe, this is typically mid-April to late May. In the US, it ranges from early April in zones 8–9 to late May or early June in zones 5–6.
Planting in late spring gives lavender an entire growing season to anchor its roots before winter. The warm soil encourages quick establishment, and by autumn the plant is robust enough to handle cold.
Early autumn (works well in mild climates) Plant at least 6–8 weeks before the first hard frost. In mild climates (UK, Pacific Northwest, USDA zones 7+), early September to early October works well. The soil is still warm enough for root growth, but the cooler air temperatures reduce transplant stress.
Avoid early autumn planting in harsh climates (zones 4–5) — the window is too short for proper establishment before the ground freezes.
Midsummer planting: avoid if possible Planting in midsummer, when soil and air temperatures are at their peak, combines heat stress with transplant stress. Lavender can survive it, but the failure rate rises and you’ll need more frequent watering. If you must plant in summer, do it in the early morning, water thoroughly, and provide temporary afternoon shade for the first week.
Choosing the right site
Lavender evolved on the rocky, sun-baked hillsides of the Mediterranean — it wants the sunniest, driest, most exposed spot in your garden.
Sun: non-negotiable Lavender needs a minimum of 6 hours of direct sun per day. Eight hours or more produces the densest flower spikes, most intense fragrance, and strongest winter hardiness. In fewer than 4–5 hours of sun, lavender stretches toward the light (etiolation), produces sparse blooms, and becomes prone to fungal disease.
South-facing or west-facing beds and slopes are ideal. South-facing slopes have the additional benefit of shedding water quickly — both sun and drainage in one location.
Avoid these sites
- Low spots where water collects after rain
- Beds against north-facing walls
- Under trees or large shrubs
- Positions with heavy morning shade
Raised beds and slopes If your garden has poor drainage or heavy soil everywhere, a raised bed filled with a gritty mix is the most reliable solution. Even raising the bed by just 15–20 cm (6–8 in) can be enough. On a slope, plant with the slope running away from the crown — water drains downhill away from the plant naturally.
Pots and containers Lavender grows well in terracotta pots with generous drainage holes. Use a gritty compost (50% potting mix, 50% horticultural grit). Terracotta is preferred over plastic because it allows moisture to evaporate through the walls, keeping roots drier. See the lavender plant care guide for pot size recommendations and repotting advice.
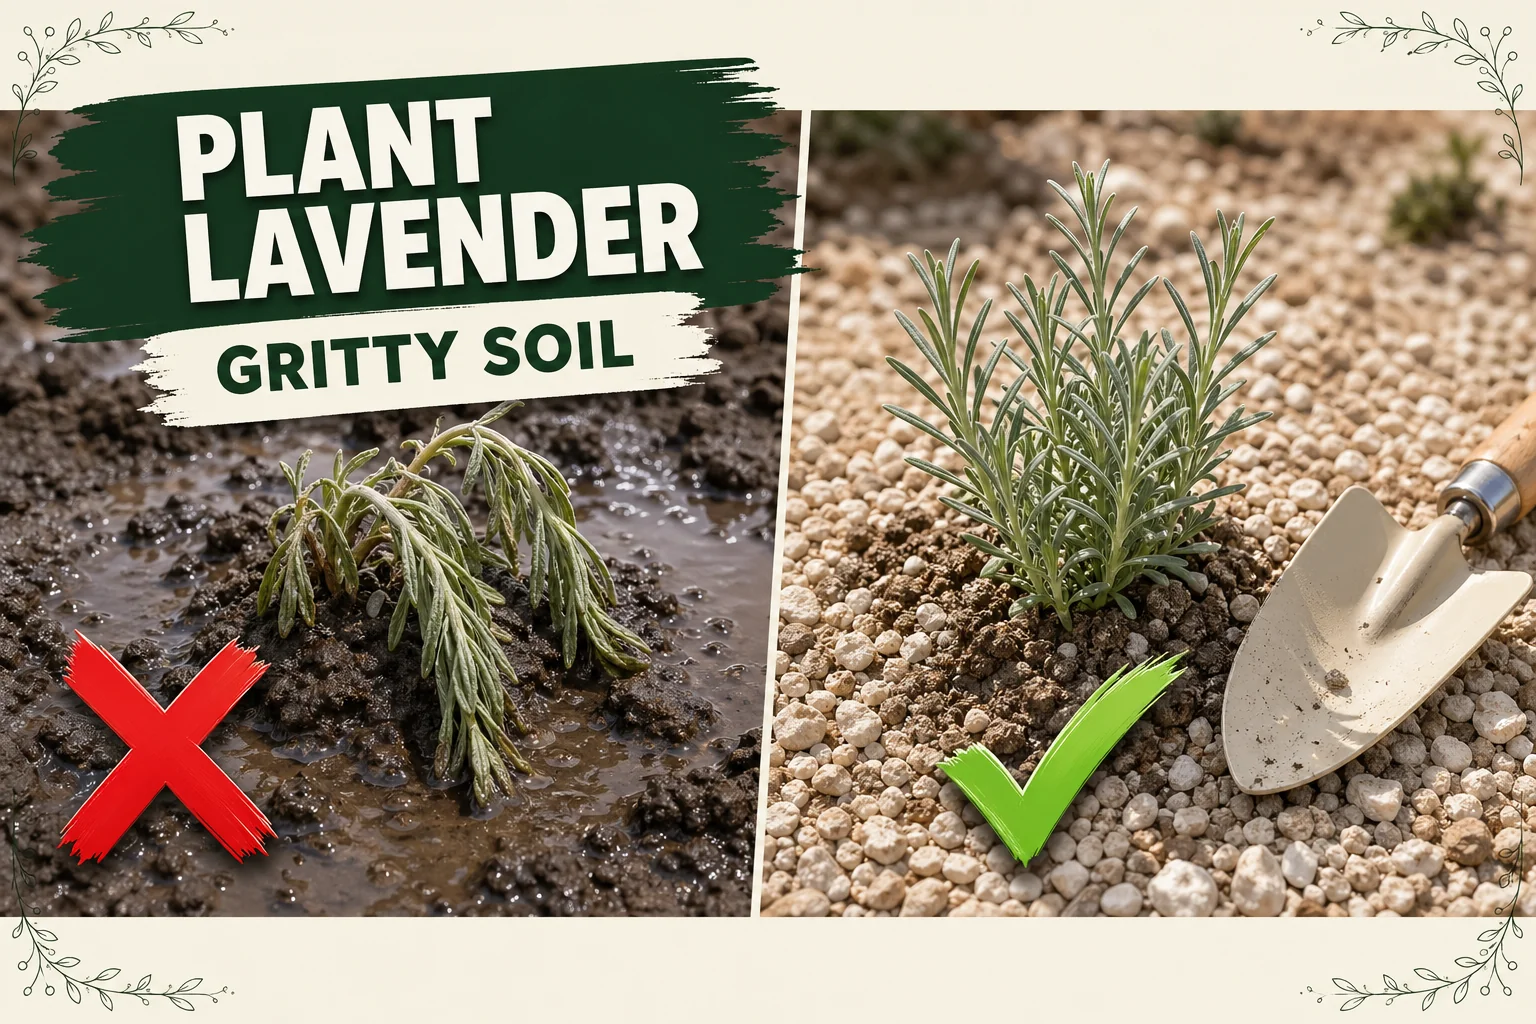
Soil preparation and amendment
This is the most important step in the entire planting process. Lavender grown in the wrong soil will fail regardless of how carefully you water or feed it.
What lavender soil needs
| Property | Ideal range | Why it matters |
|---|---|---|
| Drainage | Excellent — water clears within 1 hour | Roots and crown rot within weeks in waterlogged conditions |
| pH | 6.5–7.5 (slightly alkaline) | Lavender evolved on limestone soils; acidic soil causes poor growth and yellowing |
| Fertility | Low to moderate | High nitrogen = leafy soft growth with few flowers and poor winter hardiness |
| Texture | Gritty, open, friable | Air pockets allow roots to spread and allow excess moisture to drain |
Testing your soil
Before you dig, pour a cup of water onto a representative area of soil. If it puddles for more than 15–20 minutes, your drainage is insufficient for lavender without amendment.
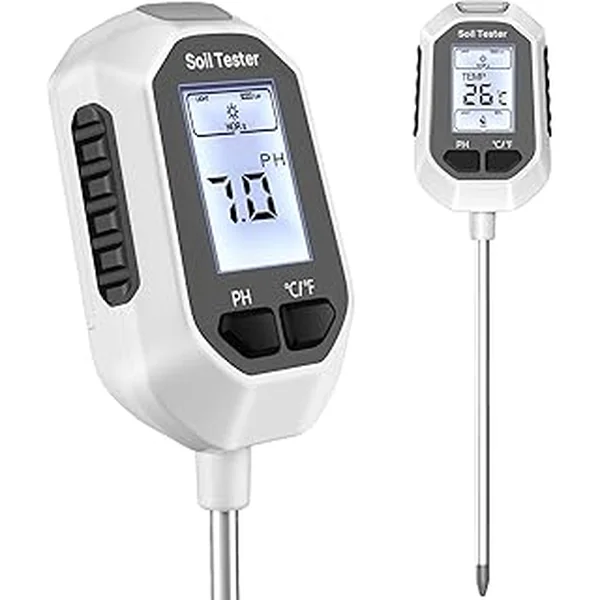
To test pH, use an inexpensive soil pH meter or a soil test kit. Most garden centres stock them. If the result is below 6.5, you’ll need to add lime.
Amending heavy clay soil
Heavy clay is the most common reason lavender fails in gardens. Clay holds water, drains slowly, and compacts around roots.
The fix:
- Dig the planting area to a depth of at least 30 cm (12 in).
- Remove the clay and mix it with 20–30% horticultural grit or coarse sharp sand by volume. (Do not use fine building sand — it fills pore spaces and makes drainage worse.)
- Add a handful of crushed limestone chips or a tablespoon of garden lime per planting hole to raise pH if needed.
- Backfill the area with the amended mix before digging individual planting holes.
If the clay is very deep and heavy, a raised bed is more reliable than in-ground amendment.
What not to add
- Peat or peat-free compost in large quantities — these retain moisture and lower pH, both harmful to lavender.
- Garden compost or manure — too rich; encourages leafy growth, not flowers, and softens the plant tissue that needs to be woody and frost-hardy.
- Fine builder’s sand — fills drainage pores rather than opening them.
Adding limestone
If your soil is naturally acidic (below pH 6.5), add crushed limestone chips or dolomitic garden lime to each planting hole — roughly a small handful per plant. Mix it into the soil rather than leaving it on the surface. Re-test pH after 4–6 weeks if you want to confirm the adjustment.
Step-by-step planting instructions
What you’ll need
- Healthy lavender transplant (or bare-root plant in autumn)
- Horticultural grit or coarse sharp sand
- Garden lime or limestone chips (if soil is acidic)
- Trowel or bulb planter
- Watering can or gentle hose
- Pea gravel or horticultural grit for mulch
1. Prepare the soil (if not done already)
Dig the planting area to 30 cm (12 in) deep. Mix in 20–30% horticultural grit by volume. If soil pH is below 6.5, add a handful of garden lime per planting position and work it in.
2. Water the plant before removing from the pot
An hour before planting, water the lavender well while it’s still in its nursery pot. A hydrated rootball handles transplant stress better than a dry one.
3. Dig the planting hole
Dig a hole slightly wider than the rootball — about 5 cm (2 in) wider on each side — and the same depth as the rootball. Precision on depth matters here.
4. Check the crown height
Set the rootball in the hole and look at where the crown — the point where the woody stem meets the roots — sits relative to the surrounding soil.
The crown must be exactly flush with the soil surface. Not 1 cm (0.4 in) below, not piled with soil. Flush.
If the crown sits below the surface, remove some soil from the base of the hole. If it sits too high, dig the hole slightly deeper.
5. Backfill and firm in
Return the amended soil around the rootball, firming it gently with your hands to eliminate large air pockets. Don’t press hard enough to compact the soil — just eliminate gaps. Do not mound soil against the stem.
6. Apply a light label
Mark the variety if you’re planting more than one type. Lavender varieties vary significantly in height, spread, flower colour, and winter hardiness — it’s useful information at pruning time.
7. Water in slowly
Using a gentle rose head or watering can, water slowly until you see water draining from the base of the hole. This first watering settles the soil around the roots and removes remaining air pockets.
Spacing guide by variety
Spacing affects airflow, which directly affects disease resistance and how quickly the bed fills in. Tight spacing looks better in year one but causes problems by year two.
| Variety | Height | Spread | Recommended spacing |
|---|---|---|---|
| ’Hidcote’ | 45 cm (18 in) | 45 cm (18 in) | 30–45 cm (12–18 in) |
| ‘Munstead’ | 45 cm (18 in) | 60 cm (24 in) | 30–45 cm (12–18 in) |
| ‘Vera’ | 60–90 cm (24–36 in) | 90 cm (36 in) | 60–90 cm (24–36 in) |
| ‘Grosso’ | 60 cm (24 in) | 90 cm (36 in) | 60–90 cm (24–36 in) |
| ‘Phenomenal’ | 60–75 cm (24–30 in) | 75 cm (30 in) | 45–60 cm (18–24 in) |
| French lavender (L. stoechas) | 30–45 cm (12–18 in) | 30 cm (12 in) | 30–40 cm (12–16 in) |
For hedging: plant compact varieties 25–30 cm (10–12 in) apart in a single row. The plants will knit together by year two to form a continuous fragrant hedge.
For a natural border: use the wider end of the spacing range and plant in irregular clusters of three or five plants for a relaxed, cottage-garden look.
Watering during establishment
One of the most common lavender planting mistakes is underwatering during the first few weeks, then overwatering once the plant is established. The schedule is the opposite of what most gardeners expect.
Weeks 1–3 (active establishment phase) Water every 2–3 days in warm weather, or whenever the top 2 cm (0.75 in) of soil feels dry. The rootball is small relative to the volume of soil around it and dries out faster than you’d expect in full sun.
Watch for wilting in the heat of the afternoon — this is normal in the first few days and doesn’t mean the plant needs more water immediately. If the soil is already moist, wait; if the soil is dry, water.
Weeks 3–6 (tapering phase) Once you see new growth (the first sign that roots have spread into surrounding soil), reduce watering to once a week. Continue checking soil moisture before every watering — don’t water if the soil is still moist from the previous session.
After 6–8 weeks Lavender that has rooted into surrounding soil needs little supplemental watering in temperate climates. In a summer heatwave (sustained temperatures above 30°C / 86°F) with no rain for more than 10–14 days, water once at the base of the plant. Otherwise, leave it alone.
After the first full growing season Established lavender is genuinely drought-tolerant. In the UK and northern Europe, rainfall alone is usually sufficient. In hot dry climates (California, Mediterranean Europe), a monthly deep watering during the driest months keeps the plant productive.
Warning: Never water from above using a sprinkler or overhead hose. Wet foliage in humid conditions promotes botrytis (grey mould) and stem rot. Always water at the base.
Mulching: gravel only, not bark
Mulching lavender is strongly recommended, but the mulch material is critical.
Use: Pea gravel, pea shingle, horticultural grit, crushed limestone — anything inorganic that drains freely and doesn’t retain moisture.
Never use: Bark chips, wood chip mulch, leaf mould, garden compost, or any organic mulch. These hold moisture against the crown and lower stems, creating exactly the damp conditions that cause lavender to rot at the base.
How to apply gravel mulch
- Clear any weeds from around the newly planted lavender.
- Spread a 2–4 cm (0.75–1.5 in) layer of pea gravel or horticultural grit around the plant in a 30–45 cm (12–18 in) radius.
- Keep the gravel clear of the stem by at least 2–3 cm (about 1 in) — don’t pack it right up against the wood.
Benefits of gravel mulch:
- Keeps the crown and lower stems dry between rain events
- Reflects heat and light upward, warming the plant and speeding ripening of the lower stems
- Suppresses weeds without smothering surface roots
- Prevents soil splash onto lower foliage, reducing fungal disease risk
- Gives the planting a clean, Mediterranean-style finish
Common planting mistakes
Burying the crown
The single most common reason lavender dies in its first year. Even 2–3 cm (1 in) of soil covering the crown traps moisture against the woody tissue and causes slow crown rot. Take the time to set the depth correctly before backfilling.
Planting in wet or clay soil without amendment
Lavender can survive in clay for a season, but root and crown rot will eventually catch up. Amend before planting, not after.
Using bark mulch
It looks tidier than gravel to some gardeners, but bark retains moisture and lavender in a bark-mulched bed almost always develops basal rot within 2–3 years.
Over-watering after establishment
Once roots have spread into surrounding soil (typically after 3–4 weeks), lavender does not want regular watering. Gardeners who set a fixed watering schedule and keep to it kill more lavender than neglect does.
Choosing a shaded spot
Lavender in partial shade produces fewer flowers, grows leggy and floppy, and is more vulnerable to disease. If you can’t offer 6+ hours of sun, plant something else in that spot.
Planting too close together
Dense spacing traps humid air between plants, promoting botrytis and powdery mildew. Allow the spacing recommended for the variety.
Planting in acidic soil without lime
In acidic soil below pH 6.0, lavender shows pale chlorotic foliage, weak growth, and poor flowering. A simple pH test before planting prevents this entirely.
Troubleshooting new lavender plants
| Symptom | Likely cause | Fix |
|---|---|---|
| Wilting in afternoon heat within first week | Normal transplant stress | Check soil moisture; water if dry; plant is adjusting |
| Wilting + soggy soil | Overwatering or poor drainage | Reduce watering frequency; improve drainage around the plant |
| Yellowing lower leaves | Wet soil, acidic soil, or crown buried too deep | Check drainage and pH; verify crown is at soil level |
| Plant not putting on new growth after 4 weeks | Roots not established; possibly planted too deep | Check crown depth; ensure sun exposure is adequate |
| Brown mushy stem at base | Crown rot from wet soil or bark mulch | Difficult to reverse; remove plant, improve drainage, let soil dry before replanting |
| Grey fuzzy mould on stems | Botrytis — triggered by wet conditions and poor airflow | Improve spacing; remove affected stems; apply copper-based fungicide if severe |
| Pale leggy growth | Insufficient sun | Relocate to a sunnier position; lavender in shade rarely thrives long-term |
Watch: how to plant lavender correctly
A hands-on visual walkthrough pairs well with the steps above. Search YouTube for “how to plant lavender RHS” or “planting lavender in clay soil” for a practical demonstration of soil amendment and crown-depth technique.
Related reading
- Lavender plant care guide — once your lavender is established, this companion guide covers pruning, feeding, winter protection, and long-term care.
- Catmint plant care — another drought-tolerant Mediterranean herb that thrives in the same sunny, well-drained conditions as lavender.
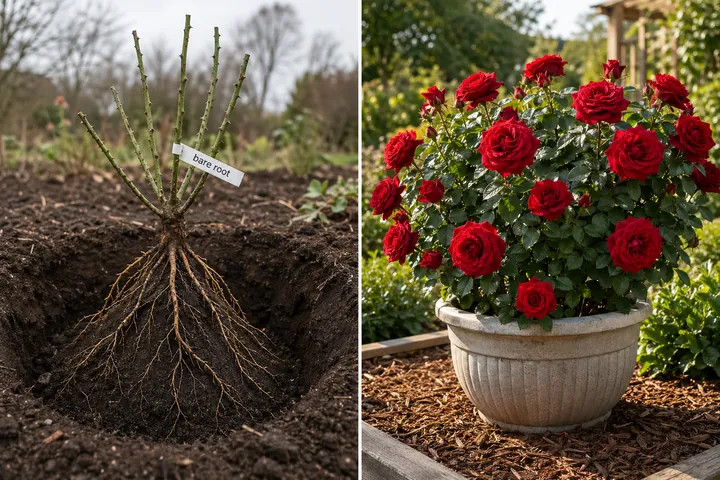
- How to plant a rose bush — follow the same site-selection and soil-prep principles when combining lavender with roses in a classic fragrant border.
- Track your lavender’s watering schedule through establishment with the free Tazart plant care app — set a tapering watering reminder so you don’t overwater once roots are established.
A note on variability
Lavender performance varies enormously depending on your local climate, soil type, rainfall pattern, and the specific variety you’ve chosen. English lavender (Lavandula angustifolia) is hardier than French or Spanish types and better suited to colder, wetter climates. Hybrid lavender (L. × intermedia, including ‘Grosso’ and ‘Phenomenal’) produces longer flower stems and is more drought-tolerant but slightly less cold-hardy.
Use this guide as a framework, observe how your plants respond in their first season, and adjust. Lavender grown in exactly the right conditions needs almost nothing from you; lavender in the wrong spot will demand constant attention and eventually fail. The planting decisions you make today determine which experience you’ll have.
Highly recommended
The supplies that make this guide work

Tazart is an Amazon Associate — we earn from qualifying purchases at no extra cost to you. Thank you for helping us keep these guides free.
Frequently asked questions
When is the best time to plant lavender?
Plant lavender in late spring (after the last frost, once soil temperature is reliably above 10°C / 50°F) or in early autumn (at least 6–8 weeks before the first hard frost). Spring gives the plant a full growing season to anchor before winter. Early autumn works well in mild climates — the cooler soil encourages root growth without summer heat stress. Avoid midsummer planting; the combination of heat and transplant shock raises the failure rate significantly.
What soil does lavender need?
Lavender needs free-draining, low-fertility, slightly alkaline soil — ideally pH 6.5–7.5. Heavy clay, peat, or rich loam stays too wet and causes root and crown rot. Amend clay soils with 20–30% horticultural grit or coarse sand before planting, or raise the bed. If your soil is acidic, add a handful of garden lime per planting hole to nudge the pH upward. Lavender thrives in conditions that would starve most other plants.
How far apart should lavender plants be spaced?
Space lavender plants 30–45 cm (12–18 in) apart for compact varieties like 'Hidcote' or 'Munstead', and 60–90 cm (24–36 in) apart for taller varieties like 'Vera' or 'Grosso'. Good airflow between plants is essential — tight spacing traps moisture and promotes botrytis (grey mould). The planting will look sparse at first, but lavender fills in well within two seasons.
How deep should you plant lavender?
Plant lavender so the crown (where the stem meets the roots) sits exactly at soil level — never below it. Burying the crown even a centimetre or two deep traps moisture against the woody base and is the most common cause of lavender dying in the first year. Set the rootball in the hole, check the crown is flush with the surrounding soil surface, then backfill.
How do you water lavender after planting?
Water lavender regularly for the first 2–3 weeks after planting — roughly every 2–3 days in warm weather — to help the roots establish. Once you see new growth, reduce watering to once a week, then once every 10–14 days. After the first full growing season, established lavender is drought-tolerant and rarely needs supplemental watering except during prolonged dry spells.
Can you mulch lavender with bark?
No. Bark mulch holds moisture against the lavender crown and causes rot. Use gravel, pea shingle, or horticultural grit as mulch instead. A 2–4 cm (0.75–1.5 in) layer of grit mulch around each plant reflects heat, keeps the crown dry, suppresses weeds, and prevents soil splash onto lower foliage — exactly the Mediterranean conditions lavender evolved for.
Can you plant lavender in clay soil?
Yes, but you must improve the drainage first. Dig in 20–30% horticultural grit or coarse sharp sand by volume to break up the clay's water-retaining structure. Better still, plant in a raised bed filled with a gritty mix. Lavender planted directly into unimproved heavy clay will almost certainly die within 1–2 years from root rot or crown rot, no matter how careful your watering is.
Does lavender need full sun?
Yes. Lavender needs at least 6 hours of direct sun per day, and 8+ hours gives the best performance — dense fragrant spikes, compact growth, and strong winter hardiness. In less than 4–5 hours of sun, lavender grows leggy and floppy, produces fewer flowers, and becomes more vulnerable to disease. Choose the sunniest spot in your garden.