Flowers
How to Plant Hydrangeas in the Ground (Step-by-Step Guide)
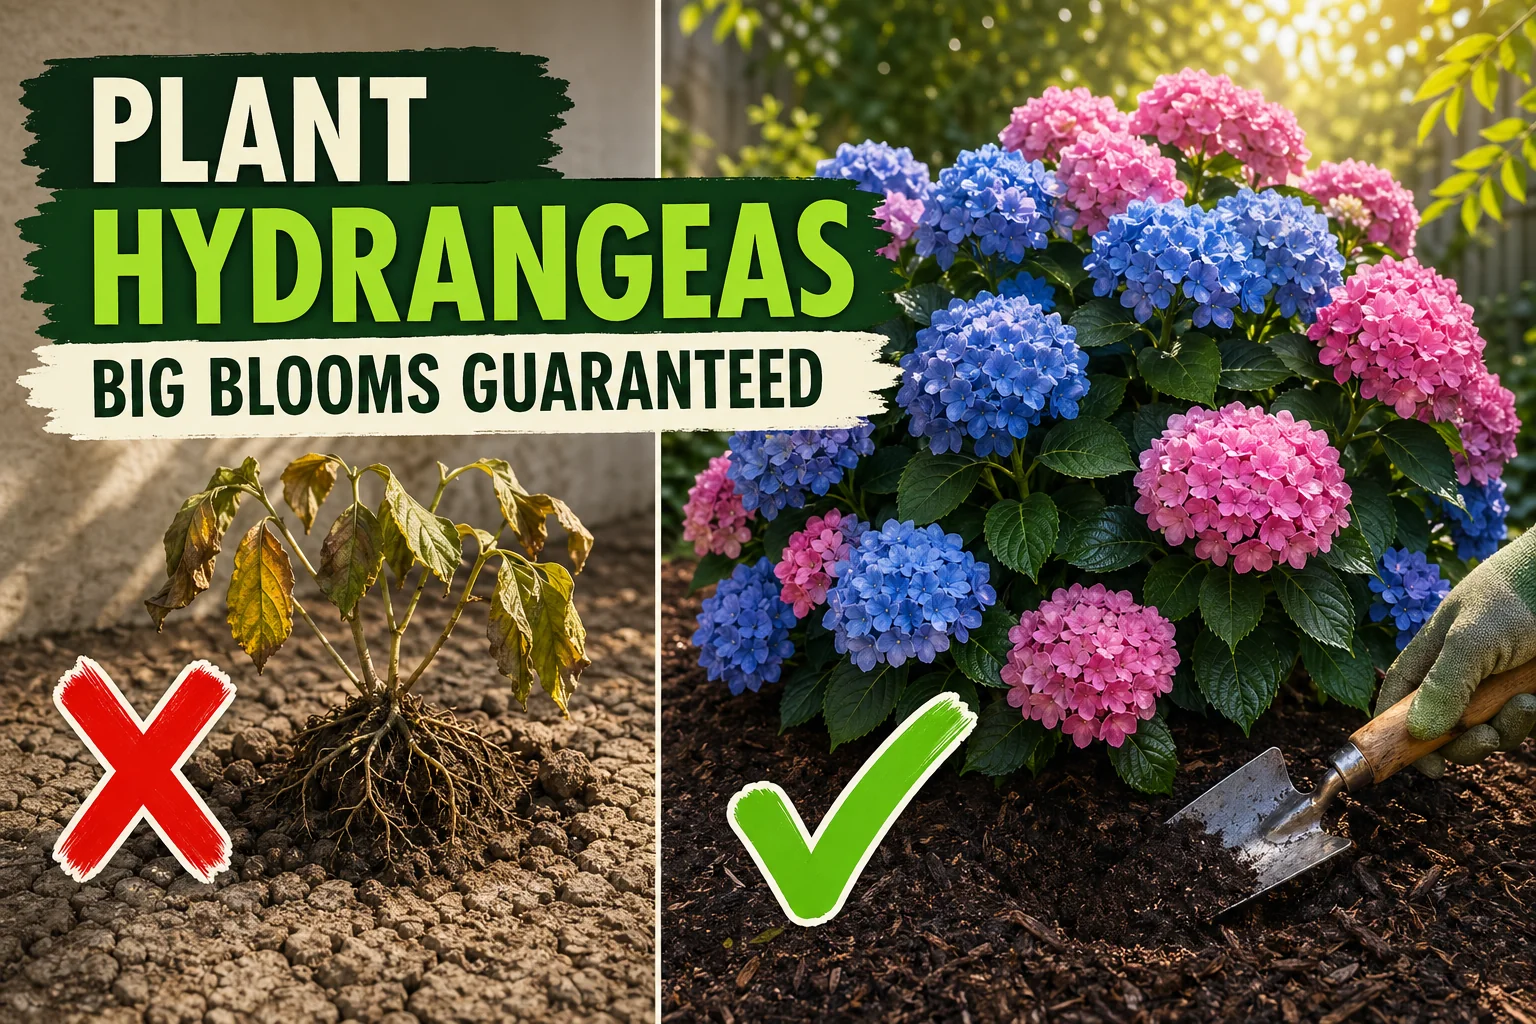
Plant hydrangeas in the ground the right way — wide hole, root crown level with the soil, deep mulch, and morning sun. Here's the exact depth and timing for big blooms.
On this page
- Quick answer
- Best time to plant a hydrangea
- What you’ll need
- Step-by-step: planting a hydrangea in the ground
- Watering after planting
- Care after the first month
- When you’ll see blooms
- Common mistakes to avoid
- Troubleshooting a newly planted hydrangea
- Watch: planting a hydrangea the right way
- Related reading
- A note on conditions
Watch the visual walkthrough
How to Plant Your Hydrangeas
A short visual walkthrough that pairs with the steps above.
A hydrangea is one of the most rewarding shrubs you can plant — but only if you put it in the ground the right way the first time. Get the depth, the hole width, and the mulch right, and a $30 nursery hydrangea will throw out armloads of mophead blooms every summer for the next 20 years.
This guide walks you through it step by step: timing, hole size, exact planting depth, watering, and what to do in week one to keep a newly planted hydrangea from wilting in heat.
Quick answer
Plant hydrangeas in early fall or early spring. Dig a hole 2-3 times wider than the root ball but no deeper. Set the root ball so its top sits level with the surrounding soil — never deeper. Backfill, water deeply with 8 L (2 gal), and mulch 8 cm (3 in) thick. Water 2-3 times a week for the first month, then weekly. Pick a spot with morning sun and afternoon shade.
Best time to plant a hydrangea
Early fall is the gold standard. Roughly six weeks before your first hard frost, the soil is still warm enough for roots to grow but the air is cool — so the plant puts energy into rooting instead of fighting heat stress. By spring, your hydrangea is wired in and ready to bloom.
Early spring is the strong second choice — plant after the last hard frost, while the buds are still tight. Roots establish before summer heat hits.
Mid-summer planting is risky. A newly planted hydrangea has a tiny root ball relative to its leaf mass, and hot afternoons can wilt it past recovery. If you must plant in summer, do it on a cloudy day, water twice daily for a week, and shade-cloth the plant for the first two weeks.
What you’ll need
- One healthy nursery hydrangea — Hydrangea macrophylla, paniculata, arborescens, or quercifolia
- A sharp spade or garden fork
- 2-3 buckets of compost or aged manure
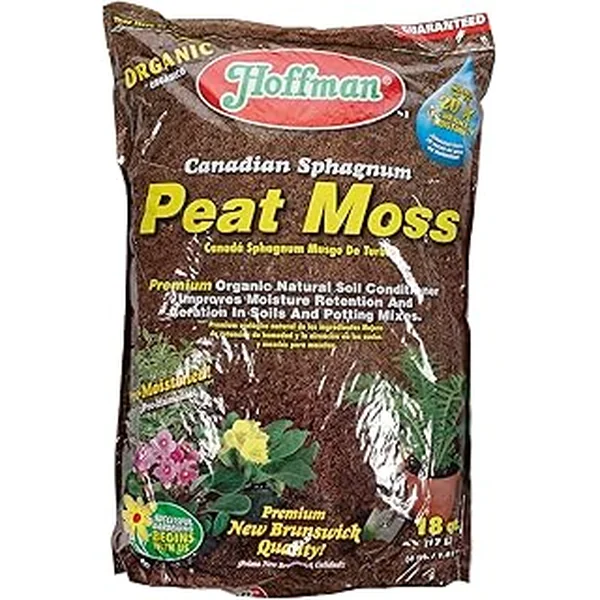
- Peat moss or pine bark fines for acidic-soil-loving varieties
- A bag of shredded bark or wood-chip mulch
- A watering can or hose
- Optional: balanced slow-release fertilizer (do not use high-nitrogen feed at planting)
That’s the whole list. Don’t add bone meal, blood meal, or strong fertilizer to the planting hole — it can burn the new roots.
Step-by-step: planting a hydrangea in the ground
1. Pick the right spot
Most hydrangeas want morning sun and afternoon shade — about 4-6 hours of gentle light. The east side of a house, a spot under high tree canopy, or a bed shaded by a fence after midday all work well.
Variety-specific notes:
- Hydrangea macrophylla (mopheads, lacecaps): morning sun only — protects the big blooms from afternoon scorch.
- Hydrangea paniculata (PeeGee, Limelight): full sun is fine; tolerates 6-8 hours.
- Hydrangea arborescens (Annabelle, Incrediball): part sun is best; pure shade reduces blooms.
- Hydrangea quercifolia (oakleaf): part sun to part shade; most heat tolerant.
Avoid windy spots — broken stems are the second most common new-hydrangea problem after wilting.
2. Test the soil and prep it
Hydrangeas want soil that’s:
- Well-draining — no puddles 30 minutes after rain
- Moisture-retentive — rich in organic matter
- Slightly acidic — pH 5.5-6.5 ideal for blue mophead color, 6.0-7.0 for pink
Dig a small test hole 30 cm (12 in) deep and fill it with water. If it drains in 1-2 hours, you’re fine. If water still sits after 4 hours, pick a different spot or build up a raised mound — hydrangeas rot in standing water.
3. Dig a wide, shallow hole
Dig the planting hole 2-3 times wider than the root ball, but no deeper than the root ball itself. A typical 3-gallon nursery hydrangea has a root ball about 25 cm (10 in) wide and 25 cm (10 in) deep, so dig a hole roughly 60-75 cm (24-30 in) wide and 25 cm (10 in) deep.
The wide, shallow shape matters because hydrangea roots spread sideways more than down. Loose soil around the sides lets new roots push out fast in year 1.
4. Amend the backfill
Mix the soil you removed with about one-third compost and a generous handful of peat moss or pine bark fines. If your soil is heavy clay, add a couple of handfuls of coarse sand. If it’s pure sand, double the compost.
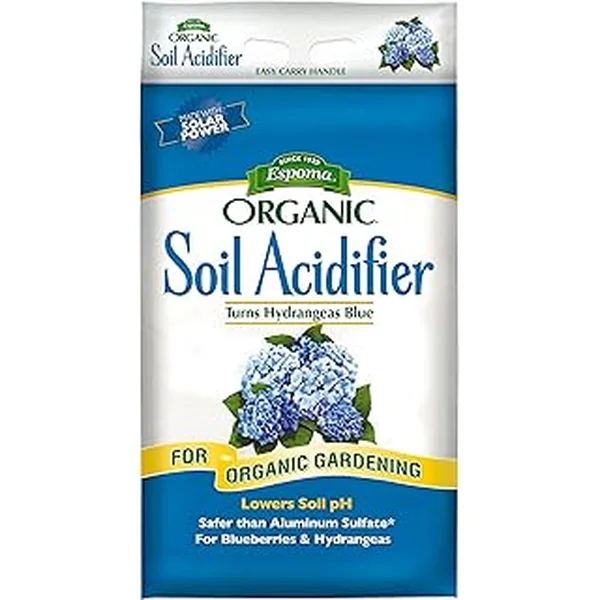
For blue macrophylla blooms: mix in 2 tablespoons of aluminum sulfate. For pink macrophylla blooms in acidic soil regions: add a small handful of garden lime.
Don’t add chemical fertilizer to the hole. Slow-release shrub feed goes on top of the mulch in 4-6 weeks.
5. Set the root ball at the right depth
Slide the hydrangea out of the pot and gently tease the outer roots loose with your fingers. If the roots are spiraling tightly (root-bound), make 3-4 vertical slices down the side of the root ball with a clean knife — this forces new roots outward.
Sit the root ball in the hole and check the depth with a stick laid across the hole:
- The top of the root ball must sit exactly level with — or 2-3 cm (1 in) above — the surrounding soil.
- Never bury the woody crown where stems meet roots.
- Planting too deep is the #1 cause of crown rot and slow death in hydrangeas.
If the hole is too deep, lift the plant out, add backfill underneath, and re-check. It’s worth getting this exactly right.
6. Backfill and water in
Push the amended soil back around the root ball, firming gently with your hands — not stomping. Stop when soil reaches the top edge of the root ball, no higher.
Water slowly with 8 L (2 gal) of water at the base. This collapses air pockets and seals the roots into the surrounding soil. If the plant settles below grade after watering, lift it slightly and re-firm — never bury the crown.
7. Mulch deeply
Spread 8 cm (3 in) of shredded bark or wood-chip mulch over the entire planting area, in a circle 60-90 cm (24-36 in) wide. Keep mulch 5 cm (2 in) away from the main stems — touching the wood causes rot.
Mulch is non-negotiable for hydrangeas. It keeps the shallow root ball cool, holds moisture between waterings, and is the single biggest reason a newly planted hydrangea survives its first summer.
Watering after planting
The first month decides whether your hydrangea thrives or sulks for years. Here’s the schedule:
| Week | Watering |
|---|---|
| Week 1-2 | Deep soak with 8 L (2 gal) every 2-3 days, even if it rains |
| Week 3-4 | Deep soak with 8 L (2 gal) every 3-4 days |
| Week 5-8 | Deep soak with 8 L (2 gal) once a week |
| Year 1+ | Once a week in summer; only in dry spells thereafter |
Always water at the base, not over the leaves. Wet leaves invite powdery mildew. Mornings are best — the soil has all day to absorb water before nighttime.
A free plant care app like Tazart can hold the watering schedule for you, adjust it for your local weather and rainfall, and ping you on Apple Watch when it’s time. Useful if you’re planting a row of hydrangeas instead of just one.
Care after the first month
Once your hydrangea is established (4-6 weeks in), the workload drops sharply.
| Task | When |
|---|---|
| Top up mulch | Every spring — keep it at 8 cm (3 in) |
| Fertilize | Light slow-release shrub feed in spring; skip year 1 |
| Prune | After flowering for macrophylla; late winter for paniculata |
| Adjust pH for blue | Aluminum sulfate in early spring around the drip line |
Don’t fertilize a brand-new hydrangea in its first 6 weeks. The roots aren’t ready, and salts can burn them.
When you’ll see blooms
Most nursery-grown hydrangeas bloom the year you plant them, especially if planted in fall or early spring. Realistic timeline:
- Year 1: the existing buds bloom; smaller than mature size
- Year 2: full-sized blooms on most stems, bush starts to fill out
- Year 3-5: the mature show — 30+ blooms on a healthy macrophylla
- Year 10+: a 1.5 m (5 ft) wide established shrub with hundreds of flowers each summer
If a brand-new hydrangea fails to bloom in year 1, it’s usually transplant shock — leaves first, blooms next year. Don’t panic.
Common mistakes to avoid
- Planting too deep. Burying the woody crown traps moisture and rots the plant from the base. The top of the root ball must stay at or just above grade.
- Hole too narrow. A tight hole forces roots to circle and the plant struggles to expand. Always go 2-3 times wider than the root ball.
- Skipping the mulch. Bare soil bakes the shallow roots in summer and the plant wilts even when watered. 8 cm (3 in) of mulch is the difference between thrive and die.
- Mulch piled against the stem. It looks tidy but rots the bark. Keep mulch 5 cm (2 in) clear of all woody parts.
- Planting in afternoon sun. Macrophylla hydrangeas wilt every hot afternoon and the blooms scorch. Move it before its first summer if possible.
- Strong fertilizer at planting. High-nitrogen feed burns young roots and pushes leaves at the expense of blooms. Wait 6 weeks, then use a slow-release shrub feed.
- Watering with a sprinkler. Wet leaves invite powdery mildew. Always water at the base.
Troubleshooting a newly planted hydrangea
| Symptom | Likely cause | Fix |
|---|---|---|
| Wilting every afternoon, recovers overnight | Heat stress on small root ball | Add 8 cm (3 in) mulch; soak deeply at base; provide afternoon shade for first month |
| Wilting that doesn’t recover by morning | Crown rot from planting too deep | Lift the plant, replant with root ball top level with soil, water less for 2 weeks |
| Yellow leaves with green veins | Iron chlorosis from alkaline soil | Add 2 tablespoons of aluminum sulfate around the drip line; mulch with pine bark |
| Brown crispy leaf edges | Sunburn from too much afternoon sun | Move to morning sun + afternoon shade; water deeply at base |
| Powdery white film on leaves | Powdery mildew from overhead watering | Switch to base watering only; thin crowded stems for airflow; water in the morning |
| Stem tips go black after frost | Late spring frost damaged new buds | Snip damaged tips back to green wood; the plant will push new shoots |
| No blooms in year 1, only leaves | Transplant shock or pruned at the wrong time | Be patient; macrophylla blooms on old wood — never prune in spring |
| Pink blooms when you wanted blue | Soil pH too high (alkaline) | Apply aluminum sulfate per label rate in early spring; takes one season to shift color |
Watch: planting a hydrangea the right way
A short visual walkthrough pairs well with the steps above. If you’re a visual learner, watch a quick tutorial like How to Plant a Hydrangea Bush on YouTube and then come back to follow the timing in this guide.
Related reading
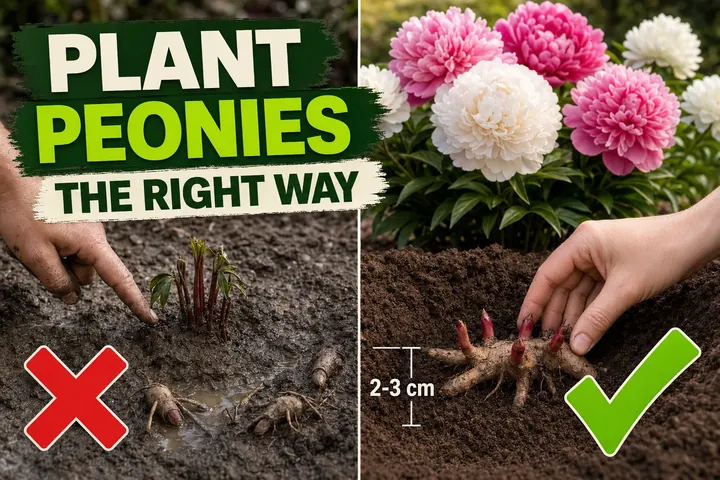
- How to plant peony bulbs the right way — another shallow-planting flower where depth decides whether you get any blooms.
- How deep to plant gladiolus bulbs — the same “wide hole, careful depth” rule that works for hydrangeas.
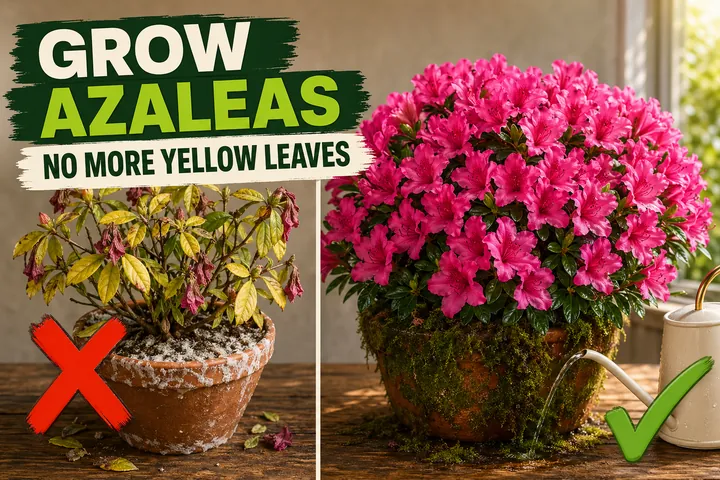
- Azalea plant care (acid-loving beauty done right) — azaleas pair beautifully with hydrangeas in the same acid bed and want similar mulching and watering.
- Scan the next plant you bring home with the free Tazart plant identifier and let it set up the watering and mulching schedule for you.
A note on conditions
Every garden is different. Climate zone, soil type, drainage, sun exposure, and your local rainfall all change how a hydrangea establishes. Use the steps above as a starting point — especially the “root ball level with soil” depth rule and the 8 cm (3 in) mulch — and adjust based on what your plant tells you in week 2-4. A hydrangea that gets its first month right rewards you for decades.
Highly recommended
The supplies that make this guide work
Tazart is an Amazon Associate — we earn from qualifying purchases at no extra cost to you. Thank you for helping us keep these guides free.
Frequently asked questions
How deep should you plant a hydrangea?
Plant a hydrangea so the top of the root ball sits exactly level with — or 2-3 cm (1 in) above — the surrounding soil. Never bury the woody crown. Burying it deeper than the original nursery line traps moisture against the stem and is the #1 cause of crown rot in young hydrangeas.
When is the best time to plant hydrangeas in the ground?
Early fall is best, roughly six weeks before your first hard frost — cool soil and steady rain let roots establish without heat stress. Early spring after the last frost is the strong second choice. Avoid mid-summer planting; newly planted hydrangeas wilt fast in heat and often don't recover.
Do hydrangeas need full sun or shade?
Most hydrangeas (macrophylla, quercifolia, serrata) prefer morning sun and afternoon shade — about 4-6 hours of gentle light. Paniculata and arborescens types tolerate full sun if watered well. Deep shade gives leafy plants with weak, sparse blooms. Pick a spot that gets sun before noon and shade by 2 PM in summer.
How far apart should you plant hydrangeas?
Space hydrangeas based on their mature width — usually 1.2-1.8 m (4-6 ft) apart for macrophylla and arborescens, and 1.8-3 m (6-10 ft) apart for paniculata varieties that grow into small trees. Crowding causes poor airflow, mildew, and competition for water.
How long does it take a hydrangea to bloom after planting?
Most nursery-grown hydrangeas already bloom the year you plant them, but the first season's flowers are usually small. Year 2 brings full-sized blooms, and year 3 onward delivers the mature show. If you planted a bare-root or very young plant, expect the first real bloom year to be year 2.
Why is my newly planted hydrangea wilting?
Wilting in the first 2-4 weeks is almost always heat stress and shallow roots, not a watering shortage. The fix is deep mulch (8 cm / 3 in), morning shade if possible, and a slow soak at the base every 2-3 days for the first month. Wilting that doesn't recover overnight after watering points to crown rot from planting too deep.
Do hydrangeas like acidic soil?
Macrophylla hydrangeas turn blue in acidic soil (pH below 6.0) and pink in alkaline soil (pH above 7.0). Paniculata, arborescens, and quercifolia don't change color but still grow best in slightly acidic soil. Mix peat moss or compost into the planting hole to gently lower pH at planting time.