Flowers
How to Plant Elephant Ear Bulbs (Huge Tropical Leaves Fast)
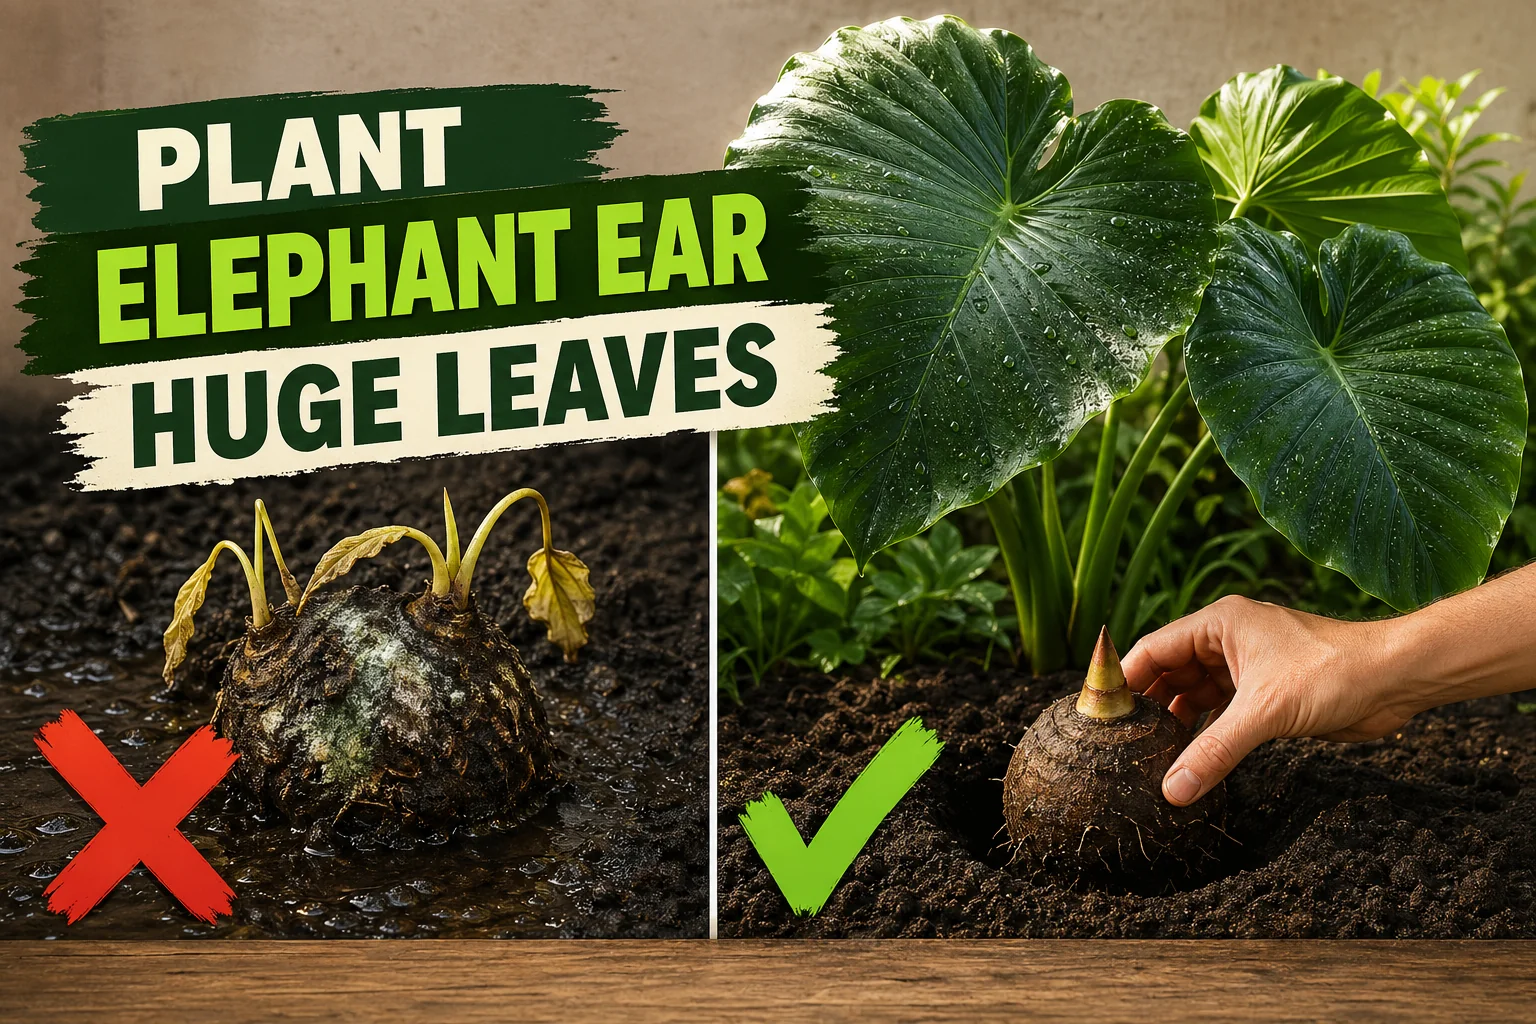
Plant elephant ear bulbs 5–10 cm (2–4 in) deep, pointed side up, after the last frost — and get massive tropical leaves up to 90 cm (35 in) long in a single season.
On this page
Watch the visual walkthrough
How to Plant Elephant Ear Bulbs 🐘🌿
A short visual walkthrough that pairs with the steps above.
Elephant ears (Colocasia esculenta and Alocasia species) are the fastest way to get a tropical, dinner-plate-leaf jungle look in a temperate garden. A single corm planted in spring can throw out leaves 60–90 cm (24–35 in) long by mid-summer — and the planting itself takes about ten minutes once you know which end is up.
The two genera want slightly different things: Colocasia likes its feet wet (it’s the same plant as taro and grows in bog edges) and holds its leaves drooping downward. Alocasia prefers richer, well-drained soil and holds its leaves pointing upward and outward. The planting steps are the same; the watering and siting differ. This guide covers both.
Quick answer
Plant elephant ear bulbs 5–10 cm (2–4 in) deep with the pointed/sprout end facing up, spaced 60–90 cm (2–3 ft) apart, in soil that has warmed to 18–24°C (64–75°F) after your last frost. Water deeply once, then keep the soil consistently moist. Expect the first leaf in 14–28 days.
Which way is up?
This is the single biggest mistake beginners make, because elephant ear corms are weirdly lopsided and don’t have an obvious “top” like a tulip bulb does.
Use this order to figure it out:
- Look for a sprout or pink growth nodes. That end is the top. Plant it facing up.
- No sprout? Look for a concave dimple. That’s where leaves emerge — point it up. The rounded, smoother side with old hairy root scars goes down.
- Still unsure? Plant the corm on its side. The growing tip will reorient itself within days and push the shoot upward through the soil. You’ll lose 1–2 weeks of growth, but the bulb won’t fail.
A bulb planted fully upside down in cold wet soil is the #1 cause of “my elephant ear never came up” — the shoot exhausts the corm’s energy trying to find the surface and rots before it gets there.
When to plant
Elephant ears are tropical perennials, hardy outdoors only in USDA zones 8–11. Cold wet soil rots the corm, so timing matters more than for hardy bulbs.
- Soil temperature ≥ 18°C (64°F), ideally 18–24°C (64–75°F). A cheap soil thermometer pays for itself.
- After the last frost in your area — typically late April to mid-May in temperate zones.
- Night temperatures above 13°C (55°F) before transplanting outside.
Want a head start? Pot the corms in 4-litre pots indoors 4–6 weeks before your last frost date. Keep them at 21°C (70°F), water lightly, and transplant outdoors once the weather settles.
What you’ll need
- Firm elephant ear corms (skip any that are soft, hollow, or moldy)
- A garden bed or container at least 40 cm (16 in) wide and 30 cm (12 in) deep, with drainage holes if it’s a pot
- Rich, well-drained, organic-matter-heavy soil — bagged tropical or general potting mix works in containers
- A trowel or hand-fork
- Compost or aged manure for the planting hole
- A balanced slow-release fertilizer (optional, but elephant ears are heavy feeders)
- Watering can or hose
Step-by-step: planting elephant ear bulbs
1. Choose the site
- Colocasia: partial shade to full sun, with consistently moist or even boggy soil. Pond edges and rain gardens are ideal.
- Alocasia: dappled shade to morning sun, in rich well-drained soil. Avoid waterlogged spots.
- Both want shelter from strong wind — those huge leaves shred in gusts.
2. Prepare the soil
Loosen the soil to a depth of about 30 cm (12 in) with a garden fork. Mix in a 5 cm (2 in) layer of compost or aged manure, plus a handful of slow-release balanced fertilizer per planting hole. Elephant ears are heavy feeders and reward generous prep.
3. Dig the hole
For each corm, dig a hole 5–10 cm (2–4 in) deep, measured from where the top of the corm will sit to the finished soil surface. Larger corms (palm-sized) go to 10 cm (4 in); small corms (golf-ball size) go to 5 cm (2 in).
4. Orient the bulb
Place the corm in the hole with the pointed/sprout end facing up. If there’s no sprout, point the concave dimpled side up. If still uncertain, plant on its side. Don’t bury the corm so deep that you can’t see it sitting at the bottom of the hole.
5. Space them properly
Plant corms 60–90 cm (2–3 ft) apart. Mature leaves can span 90 cm (35 in) or more — crowding them produces smaller leaves and increases fungal disease pressure. For containers, plant one large corm per 40 cm (16 in) pot.
6. Backfill and firm
Push soil back over the corm, breaking up any clumps. Press the surface lightly with the flat of your hand — firm enough to remove air pockets, gentle enough not to pack the soil into a brick. Roots need oxygen to develop.
7. Water it in
Water deeply and slowly until the soil is saturated to the depth of the bulb. This first watering closes air gaps and signals the corm to break dormancy.
After this, the watering rules diverge:
- Colocasia: keep the soil consistently moist. It’s hard to overwater this plant in summer.
- Alocasia: water when the top 2–3 cm (0.75–1 in) of soil dries. Don’t let it sit wet.
Care after planting
Once the first leaf appears, elephant ears are nearly self-sufficient — but four habits separate average leaves from huge ones:
| Task | When |
|---|---|
| Water (Colocasia) | Whenever the surface looks dry — daily in hot weather |
| Water (Alocasia) | When the top 2–3 cm (0.75–1 in) of soil is dry — every 3–7 days |
| Feed | Balanced liquid fertilizer every 2 weeks once leaves appear |
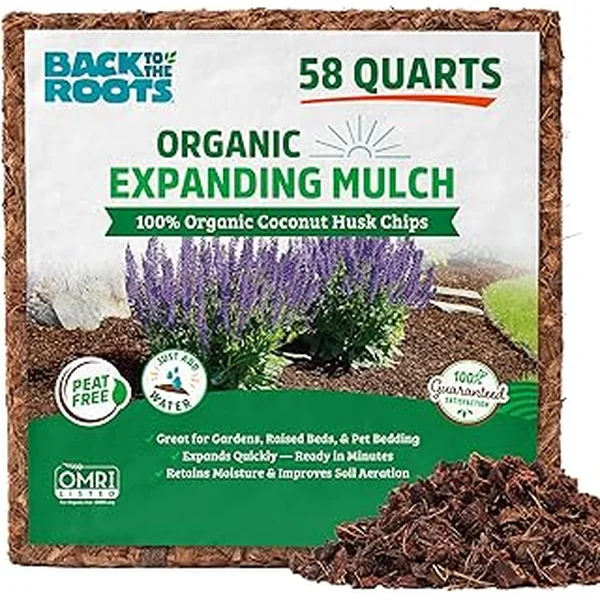
| Mulch | 5 cm (2 in) of compost or shredded bark to lock in moisture |
A free plant care app like Tazart can hold the watering schedule for you, adjust it for your local weather, and ping you on Apple Watch when each plant actually needs water — handy if you’re juggling Colocasia (wet) and Alocasia (drier) in the same garden.
Container vs ground
Elephant ears do brilliantly in big pots — often better than in the ground in cooler climates, because the container soil warms faster.
| Factor | In-ground | Container |
|---|---|---|
| Pot size | n/a | At least 40 cm (16 in) wide × 30 cm (12 in) deep per large corm |
| Soil mix | Garden soil + 5 cm (2 in) compost | Bagged tropical or general potting mix + slow-release feed |
| Watering | Once or twice a week (Colocasia: more) | Daily in summer for big leaves |
| Winter | Hardy in zones 8–11; lift in zone 7- | Move pot into a cool indoor space; keep barely moist |
Containers also make overwintering far easier — you just bring the whole pot into a frost-free space.
Lifting bulbs for winter (zones 7 and below)
If the ground freezes in winter where you live, the bulbs won’t survive in soil. Lift them after the first light frost blackens the leaves:
- Cut the foliage back to about 10 cm (4 in) above the corm.
- Dig the corm with a fork, keeping a generous root ball — don’t yank by the stem.
- Brush off (don’t wash) loose soil. Let the corm air-dry in a sheltered spot for 3–5 days.
- Pack the bulb in a paper bag or cardboard box of dry peat, sawdust, or vermiculite.
- Store at 10–13°C (50–55°F) somewhere dark and dry — an unheated garage or basement works.
- Check monthly. Discard any corm that softens or molds.
- Replant outdoors after your next last frost date, following the steps above.
Common mistakes to avoid
- Planting upside down. Pointed/sprout end up. Concave side up if no sprout. Side-on if you genuinely can’t tell.
- Planting too early in cold soil. Below 18°C (64°F) the corm sits and rots. Wait for warmth.
- Burying the corm too deep. Stick to 5–10 cm (2–4 in). Deeper means slow emergence and rot risk.
- Skipping the rich soil prep. These are heavy feeders — bare clay produces small leaves.
- Letting Colocasia dry out. It’s a bog plant. Dry soil = brown crispy edges within days.
- Letting Alocasia stay waterlogged. Wet feet = root rot. Let the surface dry between waterings.
Troubleshooting
| Symptom | Likely cause | Fix |
|---|---|---|
| No sprout 4+ weeks after planting | Soil too cold, or corm planted upside down | Lift carefully, check orientation, replant once soil hits 18°C (64°F) |
| Yellow lower leaves | Overwatering (Alocasia) or hungry plant | Let surface dry; feed with balanced liquid fertilizer |
| Brown crispy leaf edges | Underwatering or wind damage | Water deeply; move container out of strong wind |
| Leaves stay small all season | Too little light or too cold a summer | Move to a sunnier sheltered spot; warm zones grow biggest leaves |
| Soft, mushy corm at end of season | Rot from cold wet soil | Discard; next year wait for warmer soil and improve drainage |
| Sticky white spots on undersides | Mealybugs or scale | Wipe with diluted soapy water; treat with horticultural oil |
Watch: planting elephant ears
A short visual walkthrough pairs well with the steps above. If you’re a visual learner, watch a quick tutorial like How to Plant Elephant Ear Bulbs on YouTube and then come back to follow the depth and spacing in this guide.
Related reading
- How deep to plant gladiolus bulbs — same depth-and-orientation logic for another summer-flowering corm.
- How to plant peony bulbs — a hardy perennial alternative for gardens too cold to overwinter elephant ears in the ground.
- How to plant morning glory seeds — pair fast-climbing morning glories with elephant ears for a layered tropical bed in a single season.
- Scan the next plant you bring home with the free Tazart plant identifier and let it set up the watering schedule for you.
A note on conditions
Every garden is different. Light, soil drainage, pot size, season, humidity, and your local weather all change how fast an elephant ear corm sprouts and how big the leaves get. All elephant ear plants also contain calcium oxalate crystals — irritating to humans and toxic to pets if chewed raw — so plant them out of reach of curious mouths. Use the steps above as a starting point and adjust based on how your plant actually behaves in week three: that’s how every good gardener learns.
Highly recommended
The supplies that make this guide work

Tazart is an Amazon Associate — we earn from qualifying purchases at no extra cost to you. Thank you for helping us keep these guides free.
Frequently asked questions
Which end of an elephant ear bulb goes up?
The pointed end (or the end with visible sprouts or pinkish growth nodes) faces up. If the corm is a flattish lopsided shape with no obvious sprout, the concave or dimpled side is the top — that's where the leaves emerge — and the rounded, smoother side with old root scars goes down. If you genuinely can't tell, plant it on its side; the shoot will find the surface on its own.
How deep should elephant ear bulbs be planted?
Plant elephant ear bulbs 5–10 cm (2–4 inches) deep, measured from the top of the corm to the soil surface. Larger corms go closer to 10 cm (4 in), small ones closer to 5 cm (2 in). Space them 60–90 cm (2–3 feet) apart so the mature leaves have room to spread without overlapping.
When should I plant elephant ear bulbs outside?
Wait until the last frost has passed and the soil temperature is steady at 18–24°C (64–75°F). Elephant ears are tropical and rot in cold wet ground. In most temperate regions that's late spring — mid-May in the northern hemisphere. To get a head start, you can pot them up indoors 4–6 weeks before your last frost date and transplant outside once nights stay above 13°C (55°F).
How long do elephant ear bulbs take to sprout?
Expect 14–28 days to see the first leaf push above the soil, longer in cooler weather. If soil temperatures stay below 18°C (64°F) the bulb may sit dormant for 6+ weeks, which is the most common reason new growers think their bulb is dead. Warmth speeds it up dramatically — bulbs in 24°C (75°F) soil often sprout in under two weeks.
Are elephant ear plants toxic to pets?
Yes. All parts of every elephant ear (Colocasia, Alocasia and Xanthosoma) contain calcium oxalate crystals, which cause intense oral burning, swelling and drooling if chewed by cats, dogs, or humans. Cooked Colocasia esculenta (taro) is a staple food, but the raw plant in your garden is not safe to eat or chew. Plant out of reach of pets and small children.
Can elephant ear bulbs survive winter in the ground?
Only in USDA zones 8–11, where the ground stays above roughly -7°C (19°F). In zones 7 and colder, lift the bulbs after the first light frost blackens the leaves, let them air-dry for a few days, then store in dry peat or sawdust at 10–13°C (50–55°F) until spring. Replant after your next last frost date.