Flowers
How to Plant a Rose Bush (Bare Root vs Containerized)
Learn how to plant a rose bush the right way — bare root vs containerized, bud union depth by zone, wide hole technique, and first-year care for strong blooms.
On this page
- Quick answer
- Bare root vs containerized roses
- When to plant roses by zone
- Choosing the right spot
- Soil preparation
- Hole dimensions
- The center mound (bare root only)
- Bud union depth — cold zones vs warm zones
- Fanning out the roots (bare root)
- Watering in
- Mulching
- First year care
- Common mistakes to avoid
- Related reading
- A note on conditions
Watch the visual walkthrough
How to Grow Roses: From Planting to Pruning
Episode One: The Huntington has been growing roses in Southern California for over 100 years. Join Stephen, assistant curator ...
A rose bush planted correctly in its first hour will reward you with decades of blooms. Planted wrong — too deep, too narrow a hole, bud union in the wrong position — it will sulk, sucker, and eventually die without you ever knowing why. The stakes at planting time are high, and the margin for error on bud union depth is narrow.
This guide covers both bare root and containerized roses from the ground up: when to plant by zone, how wide and deep to dig, exactly where to position the bud union, how to fan out bare roots, and what to do in the first year to keep the plant from going backwards.
Quick answer
Bare root roses: soak roots 8–24 hours, dig a hole twice as wide as the roots, build a center mound, spread roots outward, set bud union 1–2 inches below soil in cold zones (USDA 6 and below) or at soil level in warm zones (USDA 7+). All roses: 6+ hours of direct sun, well-draining soil at pH 6.0–6.5, 5–8 cm (2–3 in) of mulch from day one. Water with 8–10 L (2–2.5 gal) immediately after planting.
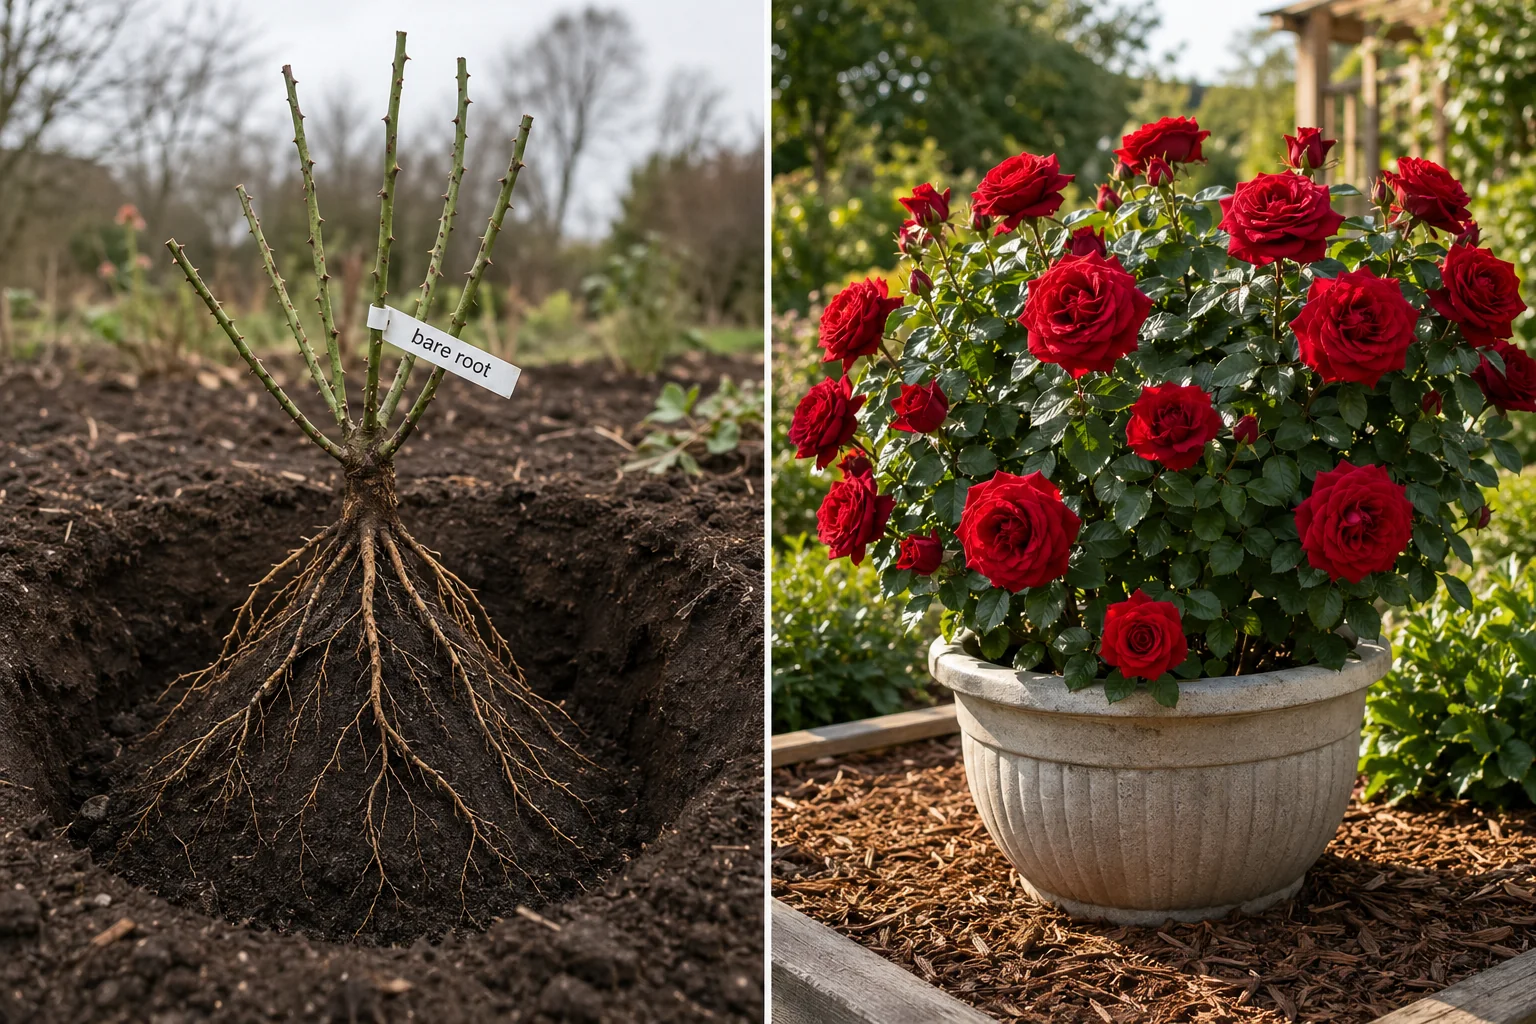
Bare root vs containerized roses
The first question is which form of rose you have, because it changes a few critical steps.
Bare root roses are sold dormant, with the roots exposed and dry, typically from late winter through early spring. They’re cheaper, lighter to ship, and — when handled correctly — establish just as well as containerized plants. The risk is that the roots dry out quickly and the establishment window is narrow: bare root roses must go in the ground while still dormant.
Containerized roses come already growing in a nursery pot. They’re available from spring through fall and can be planted anytime the ground is workable. They cost more and need their roots checked for circling before planting, but they forgive timing mistakes better.
| Factor | Bare root | Containerized |
|---|---|---|
| Best planting window | Late winter to early spring (dormant) | Spring or early fall |
| Price | Lower | Higher |
| Pre-plant step | Soak roots 8–24 hours | Check and loosen circling roots |
| Establishment risk | Higher if roots dry out | Lower |
| Center mound needed? | Yes | No |
When to plant roses by zone
Cold zones (USDA 3–6): Plant bare root roses as soon as the soil is workable in late winter or very early spring — typically February to April. Containerized roses: early spring after last frost, or early fall six weeks before first frost.
Moderate zones (USDA 7–8): Bare root roses go in January through March. Containerized roses can be planted spring or fall; fall planting gives the best establishment before summer heat arrives.
Warm zones (USDA 9–11): Bare root roses are less common; plant in December through February during the cool season. Containerized roses establish best in fall through early winter — avoid summer planting entirely in regions with 35°C+ (95°F+) heat.
The rule in any zone: avoid planting when heat is already building. A freshly planted rose with a small root-to-leaf ratio cannot replace moisture fast enough in high heat, and wilting stress in the first two weeks sets the plant back for the entire first season.
Choosing the right spot
Roses are uncompromising about light. They need a minimum of 6 hours of direct sun per day — 8 hours is better. Morning sun is preferred because it dries the foliage quickly after overnight dew, dramatically reducing black spot and powdery mildew pressure. A spot that gets full sun until around 3 PM and then some afternoon shade in the hottest months is close to ideal.
Avoid:
- Sites where tree roots compete aggressively within 60–90 cm (2–3 ft)
- Low spots where water pools after rain
- Areas shaded by fences or buildings before early afternoon
- Spots with reflected heat from walls (unless you’re growing a heat-tolerant climber)
Good airflow around the canes also reduces disease. Don’t crowd roses against a fence with no space behind them.
Soil preparation
Roses want soil that is:
- Well-draining — roots sitting in waterlogged soil for more than a few hours begin to rot
- Rich in organic matter — compost improves both drainage in clay and water retention in sand
- pH 6.0–6.5 — the range where phosphorus, iron, and manganese are fully available
Test your soil pH before planting. A basic electronic meter costs under $15 and is worth using. If your soil reads above 6.5, work in garden sulfur; if below 6.0, add garden lime. Both need 4–8 weeks to act, so ideally amend the bed two to four weeks before planting day.
Mix two to three buckets of compost into the excavated soil before backfilling. If your soil is heavy clay, also add a bucket of coarse horticultural grit per planting hole. Do not add chemical fertilizer to the hole — it burns new roots and sets the plant back.
Hole dimensions
For most shrub roses and hybrid teas:
- Width: at least twice the root spread or root ball width — typically 45–60 cm (18–24 in). Width is the priority; roots spread laterally first.
- Depth: enough to accommodate the full root length at a natural angle — roughly 30–45 cm (12–18 in).
For bare root roses with particularly long roots, err on the side of a wider, shallower hole rather than stuffing bent roots into a narrow deep one. Bent or circling roots never fully straighten and restrict growth for the life of the plant.
The center mound (bare root only)
After digging the hole, push some of the amended backfill back into the center and firm it into a cone-shaped mound. This mound is what separates bare root planting from containerized planting — it’s essential for bare root establishment.
The mound:
- Supports the crown of the plant at the correct height
- Allows the roots to drape naturally outward and downward in all directions
- Prevents an air pocket from forming under the crown, which dries out the roots
Pack the mound firmly enough that it doesn’t compress when you set the plant on top. The peak of the mound should place the bud union at the correct depth for your zone (see below) before you’ve added any backfill.
Bud union depth — cold zones vs warm zones
The bud union is the swollen, lumpy junction where the named rose variety has been grafted onto its rootstock. Getting this at the right depth is the most important single judgment call in rose planting, and it varies by zone.
Cold zones (USDA 6 and below): Plant the bud union 1–2 inches (2.5–5 cm) below the soil surface. The extra soil acts as insulation — winter frost cannot kill the graft if it’s buried. Without this, a hard freeze can wipe out the grafted variety entirely, leaving only the rootstock, which produces inferior blooms.
Warm zones (USDA 7 and above): Plant the bud union at soil level — right at the surface. Burying the union in a warm climate encourages the grafted variety to put out its own roots (fine) but also lets the rootstock send up suckers from below the graft. Rootstock suckers have different foliage, usually seven leaflets and a wild-rose look, and they’re more vigorous than the named variety — left unpruned, they take over the plant entirely.
Lay a stick or the handle of your spade flat across the hole to measure. Move the plant up or down by adjusting the mound height until the bud union sits exactly where it should for your zone. Do this before you backfill — it is very hard to correct afterward.
Fanning out the roots (bare root)
Once the bud union is at the correct height on the mound, spread the roots evenly in all directions like spokes on a wheel. Work each root individually if needed.
- No root should point straight down and then bend back up
- No two roots should cross or lie on top of each other
- Damaged or broken roots: snip cleanly with sharp secateurs just behind the damage
- Very long roots that cannot fit without bending: trim to a workable length rather than forcing them
This step takes five minutes and is where most rushed plantings go wrong. A rose with evenly spread roots establishes far faster in year one than one with cramped or circling roots.
Watering in
Backfill the hole in two stages. Fill it halfway, firm gently with your hands — not your boot — then pour in 4–5 L (about 1 gal) of water. Let it drain fully. This first pour collapses air pockets before the roots are fully covered. Then add the remaining backfill to bring the soil level up to grade, firm gently again, and pour a second 4–5 L at the base. Total: 8–10 L (2–2.5 gal) at planting.
The watered-in soil should settle without the bud union dropping below grade. If it does drop, lift the plant slightly and re-firm the soil underneath — never add soil on top to compensate, as that buries the canes.
Mulching
Spread 5–8 cm (2–3 in) of organic mulch — shredded bark, wood chips, or garden compost — over the entire planting area, extending in a circle at least 60 cm (24 in) wide. Keep the mulch at least 5 cm (2 in) clear of the main canes. Mulch piled against the wood traps moisture and invites fungal cane disease.
Mulch is not optional for newly planted roses. It:
- Holds soil moisture between waterings
- Keeps the root zone at a stable temperature through warm and cold swings
- Suppresses weeds that compete for water and nutrients
- Slowly feeds the soil biology as it breaks down
Top it up each spring to maintain depth. A well-mulched rose bed looks after itself between waterings far better than a bare one.
First year care
The first year is about root establishment, not bloom maximization. Adjust your expectations and your routine accordingly.
Watering schedule:
| Period | Frequency |
|---|---|
| Weeks 1–2 | Deep soak of 8–10 L (2–2.5 gal) every 2–3 days |
| Weeks 3–6 | Deep soak every 4–5 days if no rain |
| Month 2–3 | Weekly deep soak; twice weekly in hot dry spells |
| Year 1 thereafter | Weekly in summer, rainfall-dependent otherwise |
Always water at the base. Overhead watering wets the foliage and accelerates black spot. Morning watering is best — the soil absorbs the water and foliage stays dry through the day.
Fertilizing: Wait until you see 2–3 cm (1 in) of new cane growth before applying any feed — typically 4–6 weeks after planting. Use a slow-release granular rose fertilizer applied around the drip line. Do not rake it into the root zone; let it break down on the surface. A second application in midsummer supports the next flush of blooms. Stop feeding by late summer — soft new growth in autumn is vulnerable to frost damage.
Pruning in year 1: Remove any damaged or crossing canes at planting. Beyond that, leave the plant alone in year one. Deadhead spent flowers through the season to push repeat blooming. Do not hard-prune in the first year.
Suckering: Inspect the bud union area every few weeks. Any shoot emerging from below the bud union, directly from the rootstock, should be pulled off at the point it emerges — not cut, pulled. Cutting leaves a stub that re-sprouts aggressively.
Black spot and powdery mildew: Water at the base, ensure good airflow, and avoid crowding. If black spot appears, remove and bin (do not compost) affected leaves. A preventive spray of dilute neem oil every two weeks from spring through fall keeps most fungal pressure in check without harsh chemicals.
A plant care app like Tazart can hold your watering schedule, remind you when to fertilize, and log when you last deadheaded — useful if you’re planting a whole rose bed and need to track multiple plants with different establishment dates.
Common mistakes to avoid
- Skipping the bare root soak. Dry roots planted directly from packaging often fail to establish, especially in warm or dry conditions. Eight hours minimum.
- Wrong bud union depth for your zone. This is the most consequential mistake in rose planting. Too deep in warm zones means rootstock suckers take over. Too shallow in cold zones means winter kills the graft.
- Hole too narrow. Cramped roots never fully expand. Always go at least twice as wide as the root system.
- Fertilizer in the planting hole. Burns roots before they’ve had a chance to establish. Compost only at planting; slow-release feed at 4–6 weeks.
- Mulch against the canes. Looks tidy, causes cane rot. Keep a clear gap of 5 cm (2 in) around all woody stems.
- Planting in a shaded spot. Fewer than 6 hours of sun means poor bloom output and high disease pressure every year — not just year one. Move the plant before it’s established if possible.
Related reading
- How to plant hydrangeas in the ground — the same wide hole, correct depth, and deep mulch principles apply; a natural companion planting for sheltered rose beds.
- Azalea plant care — roses and azaleas share similar pH preferences and soil amendment needs; great reference if you’re building a mixed acid-loving bed.
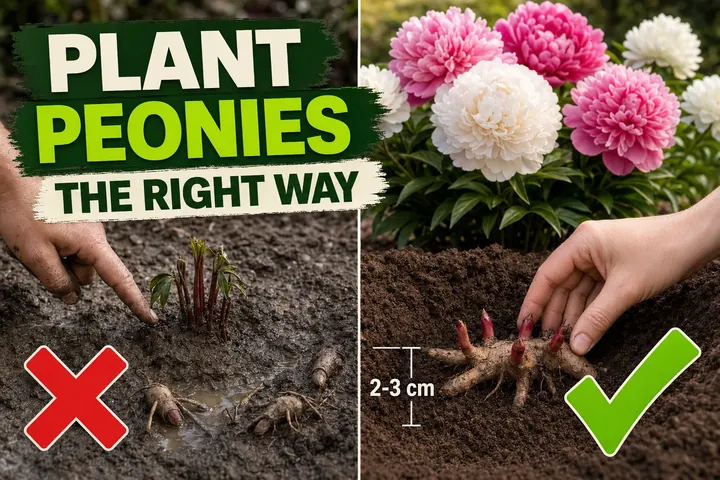
- How to plant peony bulbs the right way — another planting-depth-critical flower where getting it wrong by even 2 cm means years of no blooms.
- Scan a new rose variety with the free Tazart plant identifier to get its specific water and sun requirements, then set up a watering reminder before you plant.
A note on conditions
Every rose planting site is different. Your USDA zone, soil drainage, local rainfall, and wind exposure all change how quickly a rose establishes and how it performs in year one. Use the bud union depths and watering schedules above as your starting point — they reflect the American Rose Society and RHS consensus — and adjust based on what your plant shows you in weeks two to four. A rose that gets its first season right can bloom without intervention for 20 years.
Highly recommended
The supplies that make this guide work


Tazart is an Amazon Associate — we earn from qualifying purchases at no extra cost to you. Thank you for helping us keep these guides free.
Frequently asked questions
How deep should you plant a rose bush?
The correct depth depends on your climate zone. In cold zones (USDA 6 and below), plant the bud union 1–2 inches (2.5–5 cm) below the soil surface so winter frost cannot kill the graft. In warm zones (USDA 7 and above), set the bud union at soil level — right at the surface, not below. For containerized roses, never bury the bud union deeper than it was growing in the nursery pot.
Should you soak bare root roses before planting?
Yes — always. Soak the bare roots in a bucket of plain water for 8–24 hours before planting. Bare root roses are dormant and partially desiccated from storage. Rehydrating the roots dramatically improves establishment. Do not soak for more than 24 hours, as root damage starts to occur. Plant immediately after soaking.
What is the correct bud union depth for roses?
The bud union is the swollen knob where the named variety has been grafted onto the rootstock. In cold zones (USDA 6 and below), bury it 1–2 inches below soil level to protect the graft from freezing. In warm zones (USDA 7 and above), keep it at soil level. If you bury the bud union in a warm climate, suckers from the rootstock dominate and the grafted variety declines.
When is the best time to plant roses?
Bare root roses must go in the ground while dormant — late winter to early spring (January–March in most regions) is the classic window, as soon as the soil is workable. Containerized roses are more flexible: early spring and early fall are best, but they can be planted any time the ground is not frozen. Avoid planting in midsummer heat — newly planted roses wilt badly and often fail.
How many hours of sun do roses need?
Roses need a minimum of 6 hours of direct sun per day, and 8 hours is better. They are heavy-blooming plants with high photosynthesis demands. In fewer than 6 hours of sun, bloom output drops sharply, disease resistance falls, and the plant becomes drawn and leggy. Morning sun is ideal — it dries the leaves quickly and reduces black spot pressure. Avoid planting where trees or buildings shade the bed after 10 AM.
What soil pH do roses prefer?
Roses grow best in slightly acidic soil at pH 6.0–6.5. In this range, key nutrients — phosphorus, iron, and manganese — are fully available to the roots. Alkaline soil (pH above 7.0) locks out iron and causes interveinal yellowing. Acidic soil below 5.5 makes magnesium and calcium hard to absorb. Test your soil before planting and amend with garden sulfur to lower pH or garden lime to raise it.
How wide should the planting hole be for a rose bush?
Dig the hole at least twice as wide as the root system or root ball — typically 45–60 cm (18–24 in) wide for most shrub and hybrid tea roses. The width matters more than the depth: roots spread laterally in the first year, and loose amended soil on all sides lets them establish quickly. A cramped hole forces the roots to circle, which throttles growth and flowering for years.
Do you need to add fertilizer to the planting hole?
Do not add synthetic fertilizer to the planting hole — it burns new roots. Instead, mix generous compost into the backfill soil and optionally add a tablespoon of mycorrhizal inoculant directly on the roots to boost uptake. Feed with a slow-release rose fertilizer only after 4–6 weeks, once you see new growth pushing, to avoid stressing the newly planted bush.