Guide
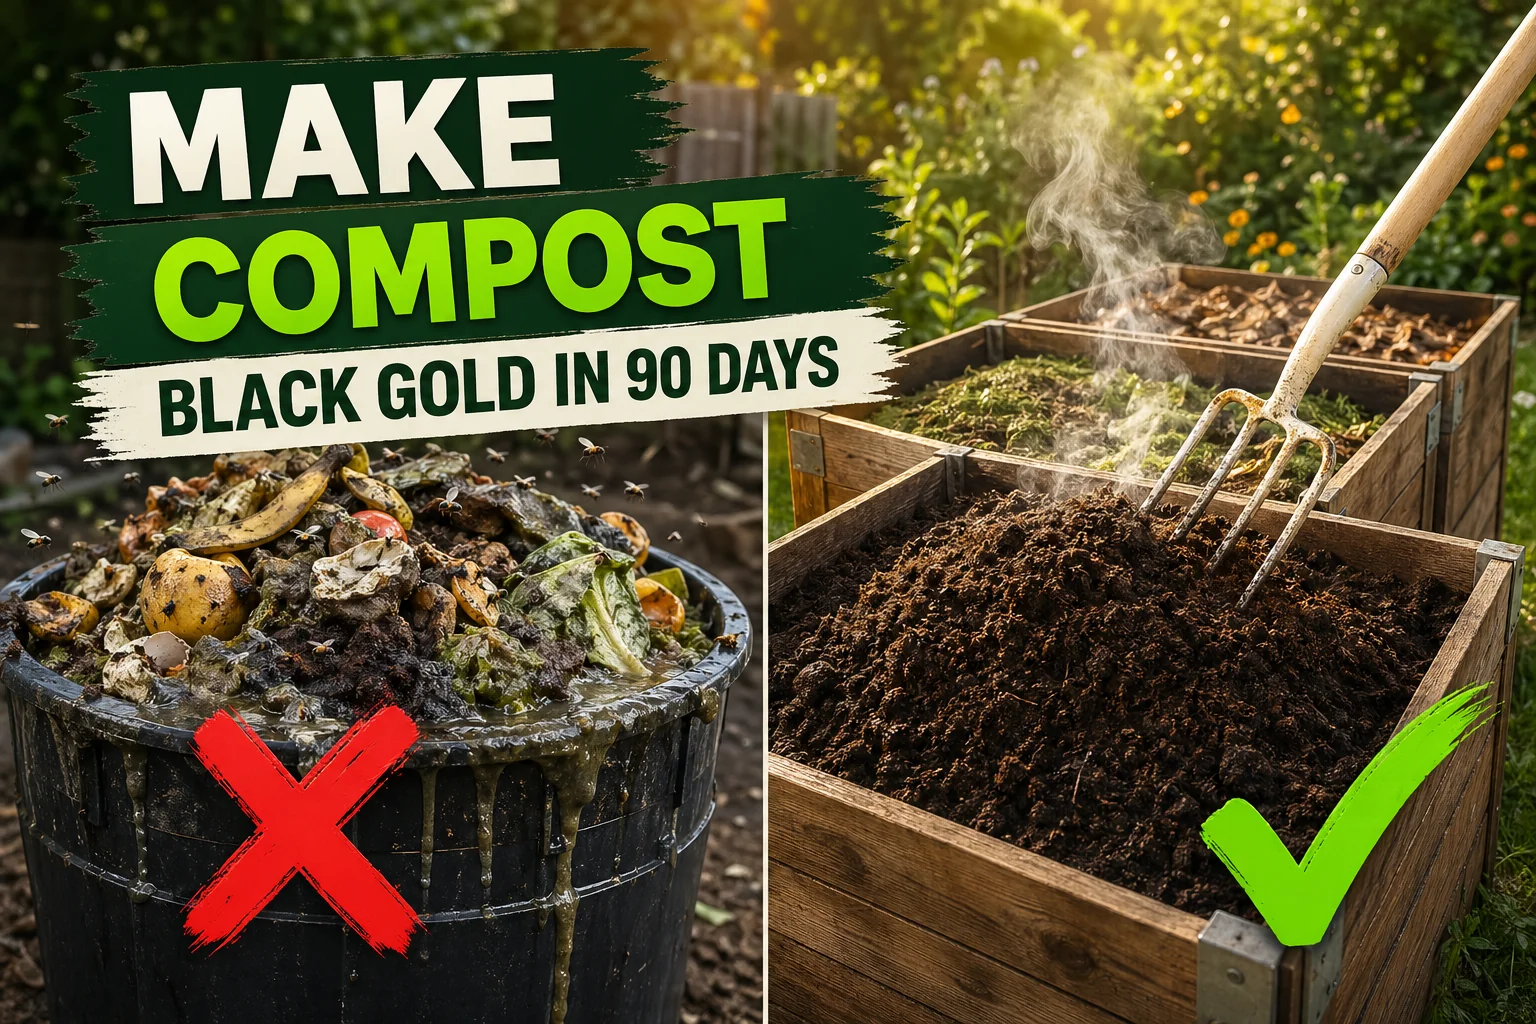
How to Make Compost at Home (Black Gold in 90 Days)
Turn kitchen scraps and yard waste into rich garden compost in 90 days. Learn the green-to-brown ratio, hot vs cold methods, and how to fix smells and flies.
On this page
Watch the visual walkthrough
How to start composting for beginners: Easiest method I’ve used that works! 
A short visual walkthrough that pairs with the steps above.
Compost is just decomposed plant matter — but done right, it turns kitchen scraps and yard waste into the most valuable soil amendment a gardener can have. People call it black gold for a reason.
This guide walks you through it: where to put the pile, what to throw in, the green-to-brown ratio, hot vs cold methods, and how to fix smells, flies, and slow piles.
Quick answer
Pile 2 parts dry browns (leaves, cardboard, straw) to 1 part fresh greens (kitchen scraps, grass, coffee grounds) in a bin or heap at least 90 cm (3 ft) wide. Keep it as damp as a wrung-out sponge, turn it every 1 to 2 weeks, and you’ll have rich finished compost in 60 to 90 days using the hot method — or 6 to 12 months if you let it break down on its own.
Why compost at home?
A single household throws out roughly 30% of its food. Compost it instead and you get back:
- A free soil amendment that beats most bagged products at the garden centre
- Less waste in the bin (and lower garbage fees in many cities)
- Lower fertilizer needs in your beds — finished compost slow-releases nitrogen, phosphorus, and potassium
- Better water retention in sandy soil and better drainage in clay soil
- A small but meaningful drop in the methane your kitchen scraps would have produced rotting in landfill
The cost is a corner of the yard and 5 to 10 minutes a week.
What you can compost (greens vs browns)
Compost works because microbes need both nitrogen (greens) and carbon (browns) in roughly a 1:30 ratio by weight — which works out to about 2 parts browns to 1 part greens by volume.
| GREENS (nitrogen) | BROWNS (carbon) |
|---|---|
| Fruit and vegetable scraps | Dry fallen leaves |
| Coffee grounds and paper filters | Shredded cardboard (no glossy print) |
| Tea leaves and bags (no plastic) | Newspaper and plain office paper |
| Fresh grass clippings | Straw and dry hay |
| Weeds (no seeds) | Wood chips and small twigs |
| Plant trimmings | Sawdust (untreated wood) |
| Eggshells (crushed) | Pine needles (use sparingly) |
| Manure from herbivores (chicken, rabbit, horse) | Dried plant stalks |
Do NOT compost
- Meat, fish, bones, dairy, oily food (attracts pests, smells)
- Pet waste from dogs and cats (pathogens)
- Diseased plants and weeds gone to seed
- Coal ash, treated wood, glossy paper
- Anything labelled “compostable” plastic unless you have an industrial pile
The 6-step setup
1. Pick a spot
Choose a level, partly shaded area at least 90 cm × 90 cm (3 ft × 3 ft). Direct contact with bare soil is ideal — it lets earthworms and beneficial bacteria climb up into the pile. A spot near a hose makes watering easy.
If you’re in a flat or have a tiny yard, a closed plastic tumbler or a worm bin (vermicompost) does the same job in less space.
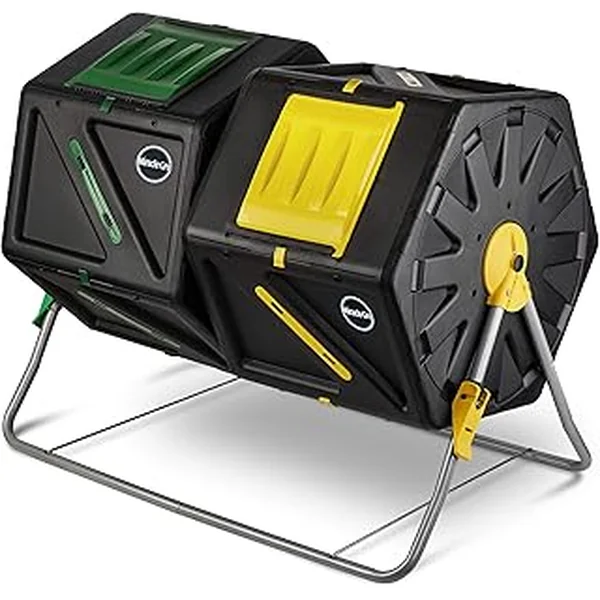
2. Choose a bin (or skip it)
You don’t actually need a bin. An open heap works fine. But a bin keeps things tidy and animals out:
- 3-bay wooden bin: classic and best for serious volume — fill bin 1, then turn into bin 2, then into bin 3 to finish
- Wire mesh hoop: cheap, breathable, easy to lift off when turning
- Plastic tumbler: small footprint, fast (60–90 days), turn the handle instead of using a fork
- Open heap: zero cost, works fine on a farm or large yard
3. Layer it
Start with a 10–15 cm (4–6 in) layer of coarse browns (twigs, straw) at the bottom for airflow. Then alternate:
- 15 cm (6 in) of browns
- 7 cm (3 in) of greens
- A light dusting of soil or finished compost as a microbe starter
- Repeat until the pile is at least 90 cm (3 ft) tall
Bigger is better — a pile under 1 m³ (1 cubic yard) struggles to hold heat. Bigger than 1.5 m³ (about 1.5 cubic yards) and the centre runs out of oxygen.
4. Moisten as you go
Each layer should feel like a wrung-out sponge — damp, but no water dripping when you squeeze a handful. Sprinkle with the hose between layers in summer; cover with a tarp in heavy rain to stop it drowning.
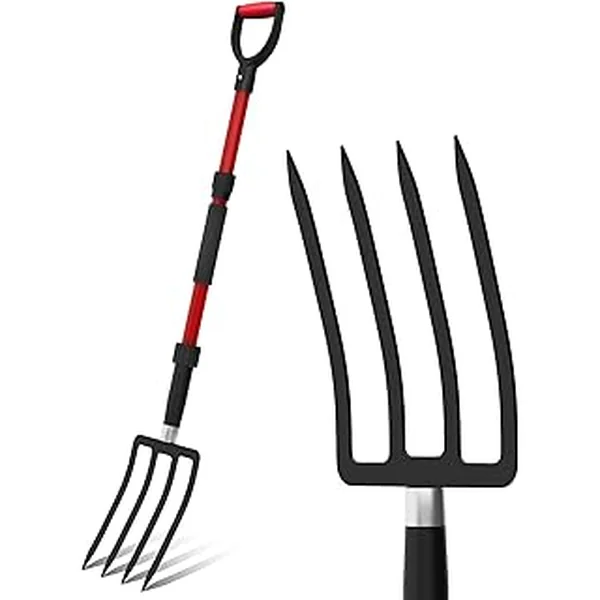
5. Turn the pile
Turning is what mixes oxygen back in and pushes outer material into the hot core. With a pitchfork, lift and flip the pile so the outside ends up in the middle.
| Method | Turn frequency | Time to finish |
|---|---|---|
| Hot (active) | Every 3–7 days | 60–90 days |
| Warm (moderate) | Every 2 weeks | 4–6 months |
| Cold (passive) | Never (or once a season) | 6–12 months |
6. Harvest
Compost is ready when it’s:
- Dark brown to almost black
- Crumbly between your fingers — no recognisable scraps
- Smells earthy, like forest floor — no ammonia, no rotten-egg
Sift it through a 1 cm (½ in) screen to take out chunks that haven’t broken down yet. Toss the chunks back into the active pile.
Hot vs cold composting
Hot composting runs the pile at 55–65°C (130–150°F) by giving it perfect conditions: right ratio, right moisture, frequent turning. Microbes work overtime, kill weed seeds and pathogens, and produce finished compost in roughly 90 days. It’s more work but the result is better and faster.
Cold composting is just piling material up and waiting. No turning, no monitoring. The pile peaks at 30°C (85°F) at most. It works — but takes 6 to 12 months and won’t reliably kill weed seeds.
Most home composters land somewhere in between: turn occasionally, harvest twice a year. That’s perfectly fine for the average backyard.
Care after starting the pile
| Task | When |
|---|---|
| Add kitchen scraps | Bury under 5 cm (2 in) of browns each time |
| Check moisture | Weekly — adjust with water or dry browns |
| Turn the pile | Every 1–2 weeks for hot, monthly for warm |
| Harvest | When the bottom looks like dark crumbly soil |
A free plant care app like Tazart can hold reminders for turning and watering schedules along with the rest of your garden — useful if you also have plants that need tracking.
Common mistakes to avoid
- Too many greens. A pile of grass clippings or food waste alone turns into a wet smelly slime. Always add 2× browns by volume.
- Letting the pile dry out. Microbes stop in dry material. Check moisture weekly and water if it crumbles dust-dry.
- Pile too small. Below 60 cm × 60 cm × 60 cm (2 ft × 2 ft × 2 ft) the pile can’t hold heat. Bulk it up with leaves or cardboard.
- Skipping the turn. No oxygen = anaerobic stink. Even one good turn a month keeps it going.
- Composting meat or dairy. Brings rats and creates smell. Stick to plant material plus eggshells.
Troubleshooting
| Symptom | Likely cause | Fix |
|---|---|---|
| Smells like ammonia or rotten eggs | Too many greens, anaerobic conditions | Mix in shredded cardboard or dry leaves; turn to aerate |
| Pile is dry and not heating up | Too dry, or too much carbon | Soak in stages while turning; add a layer of greens |
| Pile is wet and slimy | Overwatered or compacted | Mix in browns; turn to break up clumps; cover from rain |
| Fruit flies swarming | Exposed fresh scraps on the surface | Bury every new addition under 5 cm (2 in) of browns |
| Pile is full but cold | Pile too small or out of nitrogen | Bulk it up to at least 1 m³ (1 cubic yard); add greens or compost activator |
| Maggots or grubs visible | Black soldier fly larvae — actually beneficial | Leave them; they speed decomposition; harvest below the active layer |
| Rodents digging in | Meat, dairy, or oily food added | Remove food waste; switch to a closed bin or tumbler |
| Compost looks finished but seedy | Cold pile didn’t kill weed seeds | Use only on paths or shrubs, not vegetable beds |
Watch: how to build a compost pile
A short visual walkthrough pairs well with the steps above. If you’re a visual learner, watch a quick tutorial like How to Make Compost at Home on YouTube and then come back to follow the timing in this guide.
Related reading
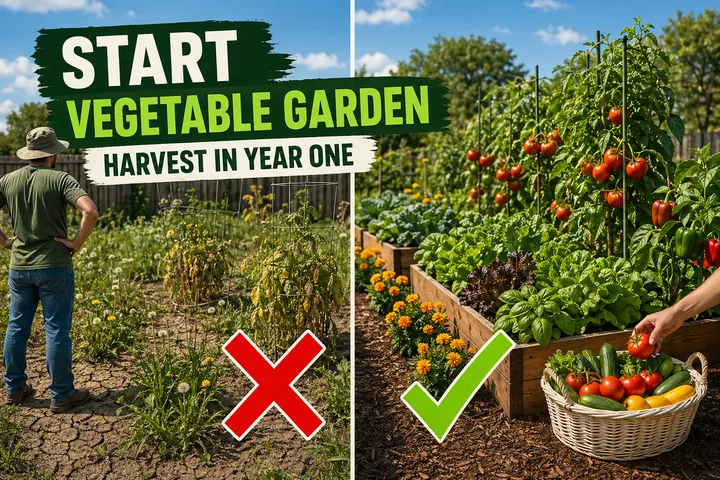
- How to start a vegetable garden the right way — finished compost is the single biggest upgrade you can make to a new vegetable bed.
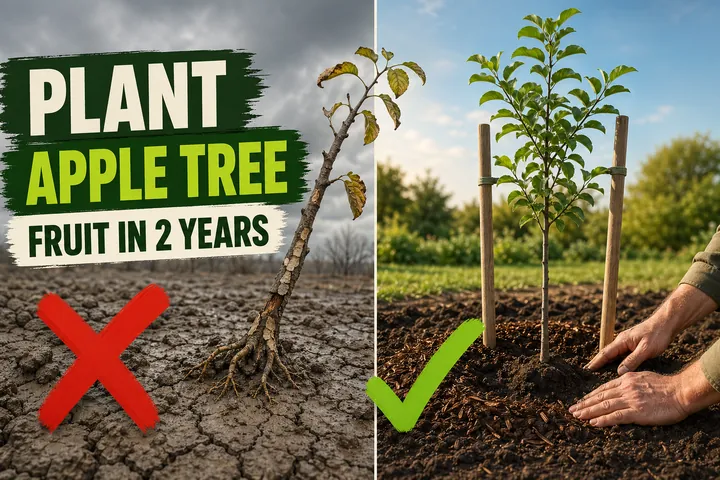
- How to plant an apple tree — work a bucket of compost into the planting hole for slow-release nutrients in year one.
- How to plant asparagus roots — perennial beds love a yearly top-dress of finished compost.
- Set watering reminders for your whole garden with the free Tazart plant care app.
A note on conditions
Every backyard is different. Local climate, pile size, what you eat, the leaves you can collect, and how often you turn all change how fast a compost pile finishes. Use the steps above as a starting point and adjust based on what your pile actually does in week three — that’s how every good composter learns.
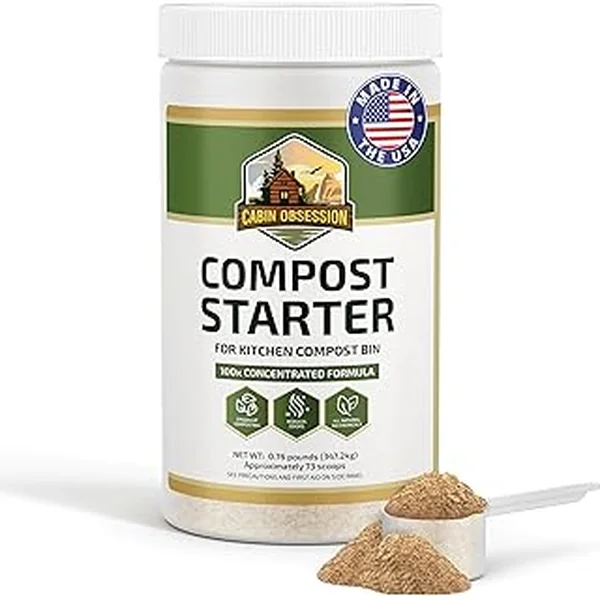
Highly recommended
The supplies that make this guide work
Tazart is an Amazon Associate — we earn from qualifying purchases at no extra cost to you. Thank you for helping us keep these guides free.
Frequently asked questions
How do you start a compost pile at home?
Pick a shaded corner of the yard or a covered bin at least 90 cm (3 ft) wide. Layer two parts dry brown material (dead leaves, cardboard, straw) for every one part fresh green material (kitchen scraps, grass clippings, coffee grounds). Moisten each layer until it feels like a wrung-out sponge, then turn the pile every 1 to 2 weeks. You'll have finished compost in 60 to 90 days with the hot method, or 6 to 12 months if you leave it to break down passively.
What is the ratio of greens to browns in compost?
Aim for roughly 2 parts browns to 1 part greens by volume — that gives you the carbon-to-nitrogen (C:N) ratio of about 30:1 that microbes need to heat the pile up. Too many greens (grass, food waste) and the pile turns wet and smelly. Too many browns (leaves, cardboard) and decomposition stalls. When in doubt, add browns.
How long does it take compost to be ready?
Hot composting (active turning, 60–70°C / 140–160°F core temp) finishes in 60 to 90 days. Cold composting (just pile it and wait) takes 6 to 12 months. Compost is ready when it's dark brown, crumbly, smells like forest floor, and you can't recognise the original ingredients.
Why does my compost smell bad?
A smelly compost pile is almost always too wet, too packed down, or too rich in greens. Anaerobic bacteria take over and produce ammonia or rotten-egg smells. Fix it by mixing in a generous helping of dry browns (shredded cardboard, dry leaves, straw) and turning the pile to add air. The smell clears within 24 to 48 hours.
How do I get rid of fruit flies in my compost?
Fruit flies breed on exposed fresh fruit scraps. Bury new kitchen scraps under at least 5 cm (2 in) of browns or finished compost every time you add them — flies can't lay eggs on what they can't reach. A tight-fitting lid on countertop bins, plus emptying them every 2 to 3 days, stops the cycle indoors.
Can you compost in winter?
Yes. The pile slows down or freezes in cold weather, but microbes resume as soon as temperatures rise above 4°C (40°F). Keep adding scraps all winter — they'll break down in spring. A larger pile (at least 1 m³ / 1 cubic yard) holds heat better and can keep working through mild winters.
Do you need a bin to make compost?
No. An open heap on bare ground works fine and is how most farms still do it. A bin just keeps the pile tidier, deters wildlife, and traps a little extra heat. Wood pallets, hardware cloth, or a plastic tumbler all work — pick whatever fits your space and budget.