Guide
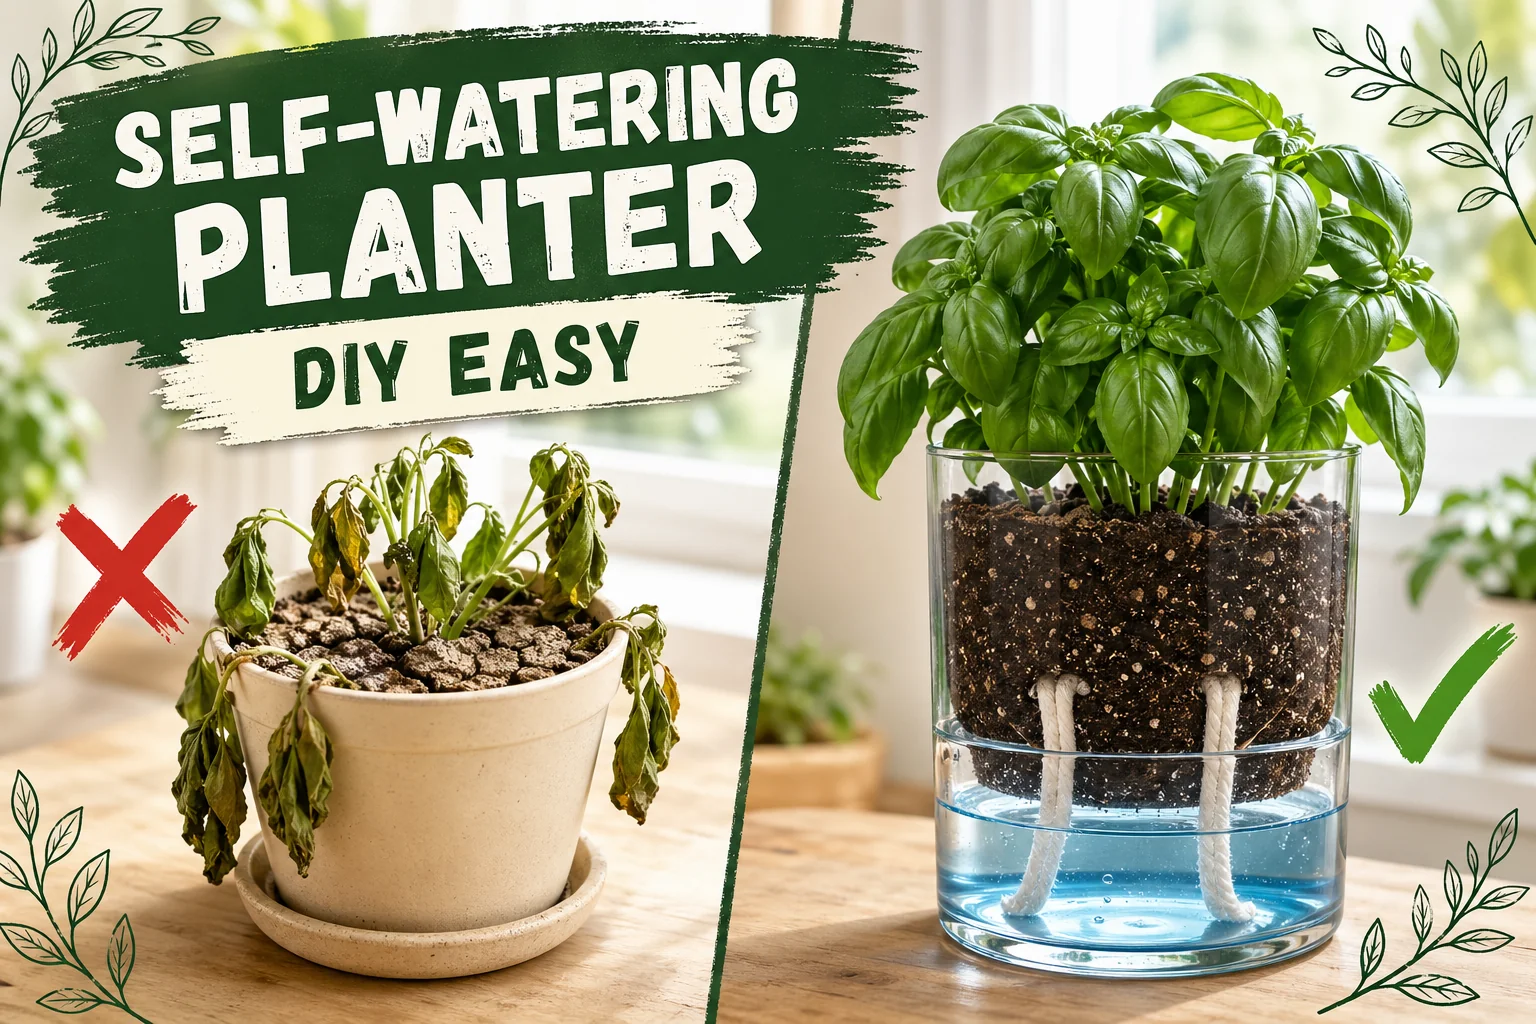
How to Make a Self-Watering Planter (3 DIY Methods)
Learn how to make a self-watering planter at home using recycled bottles, cotton wicks, or nested pots. Step-by-step instructions, best plants, and troubleshooting tips.
On this page
- Quick answer
- How self-watering planters work (capillary action explained)
- What you need (all methods)
- Method 1: Two-bottle self-watering planter
- Method 2: Wick-in-pot method (cotton string from saucer)
- Method 3: Dual-pot method (inner pot inside a reservoir pot)
- Best plants for self-watering planters
- Plants that do NOT suit self-watering planters
- Refill frequency guide
- Troubleshooting
- Watch: DIY self-watering planter video guide
- Common mistakes to avoid
- Related reading
- A note on conditions
Watch the visual walkthrough
DIY Simple self watering pot for indoor plants - everyone can do this!
We hope you will enjoy this video! Chapters: 00:27 Things you need to proceed 1. 02:13 Measure and cut 2. 04:42 Cut the ...
A self-watering planter does one thing really well: it keeps the soil at a steady, even moisture level without you having to remember a watering schedule. Instead of watering from the top and hoping you timed it right, water sits in a reservoir at the bottom and wicks up into the soil as the plant needs it.
You can build one in under 30 minutes from things you probably already own.
Quick answer
To make a self-watering planter, place a water reservoir below or around your pot, thread a cotton wick from the reservoir up into the soil, and let capillary action do the rest. Refill the reservoir every 5 to 14 days depending on pot size and plant thirst. Works best for moisture-loving plants like pothos, peace lily, and basil — not for succulents or cacti.
How self-watering planters work (capillary action explained)
The science is simple. Capillary action is the same force that pulls water up a paper towel when you dip the corner in a glass. In a self-watering planter, a cotton wick — or a column of moist soil touching the reservoir — acts as that paper towel. Water climbs from the reservoir into the soil continuously, at whatever rate the plant is drinking.
Because the plant controls the uptake rate, the soil never floods and never goes bone dry. It stays in the narrow “just right” zone that most houseplants prefer.
Two things make capillary action work reliably:
- A porous wick or soil bridge — the path water travels upward.
- An air gap above the water level — at least 2–3 cm (1 in) between the water surface and the bottom of the soil. This stops the roots from sitting in standing water and going anaerobic.
For smaller pots or plants that need very targeted, slow delivery, a glass or ceramic plant water dropper is a low-tech alternative that works on the same slow-release principle without any DIY construction.
What you need (all methods)
Universal materials
- A container for the outer reservoir (bottle, bucket, tub, or second pot)
- Potting mix — avoid dense garden soil, which compacts and clogs wicks
- Coarse perlite (mix in 20% by volume to improve drainage)
- Thick braided cotton rope or twine, at least 0.5 cm (¼ in) diameter
- A drill or sharp knife to make drainage and wick holes
- Tape or dark paper to block light from the reservoir (prevents algae)
Method 1: Two-bottle self-watering planter
This is the easiest entry point. All you need is one large plastic bottle — a 1.5 L (50 fl oz) or 2 L (½ gal) soda bottle works perfectly.
What it’s good for: herbs on a windowsill, basil, small pothos cuttings, seedlings.
Step-by-step
Step 1 — Cut the bottle in half. Use scissors or a craft knife to cut the bottle roughly in the middle. The top half (with the neck) becomes the planting cup; the bottom half becomes the reservoir. Keep both pieces.
Step 2 — Thread the wick. Cut a length of cotton rope about 20 cm (8 in) long. Pull it through the bottle neck so roughly 5 cm (2 in) hangs out of the opening (this end will sit in the water) and the rest extends upward into the planting cup (this end goes into the soil).
Step 3 — Fill the planting cup. Invert the top half of the bottle and set it neck-down into the bottom half. Fill it with potting mix. Curl the wick so it sits roughly in the centre of the soil, not pressed against the bottom.
Step 4 — Fill the reservoir. Pour water into the bottom half until it just touches — or comes within 1 cm (½ in) of — the bottle neck. If the neck sits in water, that’s fine for this method because the bottle opening naturally creates a small air gap.
Step 5 — Block light. Wrap the bottom reservoir section with dark tape, brown paper, or foil. Algae only grows where light reaches water.
Step 6 — Plant and place. Plant your herb or cutting, firm the soil gently, and place in a bright spot. Check the reservoir weekly and top up when it drops below half.
Method 2: Wick-in-pot method (cotton string from saucer)
This method upgrades any existing pot and saucer into a self-watering system. It takes about 10 minutes and needs no cutting.
What it’s good for: peace lily, pothos, philodendron, ferns — any medium to large moisture-loving houseplant already in a pot.
Step-by-step
Step 1 — Choose a deep saucer or tray. You need a reservoir at least 4–5 cm (1.5–2 in) deep. A standard shallow saucer won’t hold enough water. Use a plastic storage tray or a deep catch tray instead.
Step 2 — Thread the wick through the drainage hole. Cut a cotton rope 25–30 cm (10–12 in) long. Push one end up through the bottom drainage hole of your pot so 8–10 cm (3–4 in) sticks out below the pot. The rest drapes into the soil.
Step 3 — Repot if needed, anchoring the wick. If the plant is already potted, use a skewer to push the wick up through the existing drainage hole and then up into the root zone — aim for the centre of the root ball, about 5 cm (2 in) deep. For a fresh pot, coil the soil-end of the wick in the middle before filling with potting mix.
Step 4 — Set the pot on the deep saucer. Pour water into the saucer — fill it to about 3 cm (1.2 in) deep. The wick hanging below the pot will rest in the water.
Step 5 — Elevate the pot slightly (optional but recommended). Set the pot on two small pebbles or pot feet so the bottom of the pot doesn’t sit flat in water. This keeps airflow around the root zone.
Step 6 — Maintain. Refill the saucer when it empties. Never let the saucer run dry for more than a day or two — once a wick dries out completely it can be slow to re-prime.
Method 3: Dual-pot method (inner pot inside a reservoir pot)
This is the most scalable method and the closest to commercial self-watering planters. It works well for larger plants and longer reservoir capacity.
What it’s good for: pothos, peace lily, spider plant, herbs in a kitchen garden — any plant you want to go 1 to 3 weeks without attention.
Step-by-step
Step 1 — Choose your two containers. You need an inner pot with drainage holes (terracotta, nursery plastic, or any standard pot) and an outer container at least 5–8 cm (2–3 in) wider and taller with no drainage holes. The gap between them becomes the reservoir.
Good outer container options: a large ceramic pot without drainage, a plastic storage bin, a watertight wooden box lined with plastic sheeting.
Step 2 — Build a platform inside the outer container. The inner pot must sit elevated above the water level at the bottom of the outer container. Stack a few flat stones, an inverted small saucer, or cut a piece of plastic mesh to the right height — aim for the inner pot’s base to sit 3–5 cm (1.2–2 in) above the floor of the outer container.
Step 3 — Add the wick. Thread a cotton wick through the drainage hole of the inner pot. When the inner pot sits on its platform, the wick should hang down and reach the water at the bottom of the outer container. Cut the wick so it touches the reservoir floor.
Step 4 — Plant the inner pot. Fill the inner pot with perlite-mixed potting soil, plant your chosen plant, and firm the soil around the wick.
Step 5 — Add a fill tube (optional but useful). Cut a short piece of PVC pipe or a wide straw to reach from the top of the outer container down to the reservoir floor. This is your fill tube — you pour water down it to refill the reservoir without disturbing the soil or roots. If you skip the tube, just pour water carefully down the gap between the two pots.
Step 6 — Fill and monitor. Pour water through the fill tube until you can see it at the base (about 3–5 cm / 1.2–2 in deep to start). Mark a fill line on the outer container with tape. Refill when the water level drops to 1 cm (½ in).
Best plants for self-watering planters
Self-watering systems work best with plants that like consistent moisture. These are the top performers:
| Plant | Why it works |
|---|---|
| Pothos | Thrives in evenly moist soil; forgiving of minor fluctuations |
| Peace lily | Moisture-lover that wilts dramatically when dry — wicking keeps it happy |
| Basil | Drinks heavily and hates irregular watering; self-watering stops tip burn |
| Mint | Aggressive grower that loves steady moisture; contained in a reservoir pot |
| Cilantro | Bolts when stressed by dry-wet swings; constant moisture delays bolting |
| Spider plant | Tolerates consistent moisture well; roots fill the inner pot and drink steadily |
| Ferns (Boston, maidenhair) | Need constant humidity at the root zone — perfect sub-irrigation candidates |
| Strawberries | Produce better fruit with steady water; dual-pot method suits balcony containers |
Plants that do NOT suit self-watering planters
Avoid these species — the constant moisture at the root zone will rot them:
- Succulents and cacti — need complete dry-out between waterings. Self-watering kills them within weeks.
- Rosemary — Mediterranean herb that demands dry, well-drained soil. Constant wick moisture causes root rot fast.
- Lavender — same as rosemary; wet roots are fatal.
- Snake plant (Sansevieria) — highly drought-tolerant; sitting near a reservoir encourages root rot.
- ZZ plant — stores water in its rhizomes; does not want supplemental moisture from below.
- Orchids — need a defined wet/dry cycle and excellent airflow at the root zone. Self-watering disrupts both.
Refill frequency guide
| Setup | Reservoir size | Average refill interval |
|---|---|---|
| Two-bottle (soda bottle) | ~500 ml (17 fl oz) | Every 5–7 days |
| Wick-in-pot with deep saucer | 250–500 ml (8–17 fl oz) | Every 4–7 days |
| Dual-pot (medium) | 1–2 L (34–68 fl oz) | Every 10–14 days |
| Dual-pot (large) | 3–5 L (100–170 fl oz) | Every 2–4 weeks |
Factors that speed up reservoir consumption: high temperatures, bright direct sun, fast-growing plants, terracotta inner pots (which lose water through the walls), and low indoor humidity.
Factors that slow it down: lower light, dormant season, plastic inner pots, and slow-growing plants.
Troubleshooting
| Symptom | Likely cause | Fix |
|---|---|---|
| Mold on the soil surface | Surface stays too damp with low airflow | Top-dress with 1 cm (½ in) of perlite or sand; improve air circulation |
| Algae in the reservoir | Light reaching the water | Wrap reservoir in dark tape or foil; use an opaque outer container |
| Wick not drawing water | Wick dried out completely or too thin | Re-wet the wick by soaking in water for 10 minutes; replace with a thicker rope |
| Leaves yellowing, soil soggy | Root rot from over-wet soil | Reduce reservoir depth; add perlite to soil; check that wick isn’t submerged too deep |
| Reservoir empties too fast | Plant is root-bound, or wick diameter is too large | Repot into a larger container; reduce wick thickness |
| Reservoir stays full, plant wilting | Wick isn’t making contact with water | Check wick length — it must reach the water, not hover above it |
| White crust on soil | Mineral buildup from hard tap water | Flush soil from the top with filtered water monthly; switch to rainwater |
Watch: DIY self-watering planter video guide
A visual walkthrough makes the wick-threading step much clearer than text alone. Search YouTube for “DIY self-watering planter two-bottle method” for a short tutorial that pairs well with the steps above.
Common mistakes to avoid
- Wick too thin. Thin thread can’t move enough water for anything bigger than a seedling. Use a rope at least 0.5 cm (¼ in) thick.
- Filling the reservoir to the brim. Roots that sit in standing water turn anaerobic within days. Keep 2–3 cm (1 in) of air between the waterline and the soil cup.
- Using the wrong plant. Self-watering planters are not universal. Succulents, rosemary, and cacti will rot — check the plant list above before building.
- Forgetting to block light. Clear reservoirs exposed to sunlight grow green algae within a week. Wrap them.
- Letting the wick dry out. A dried wick loses its capillary bridge. Once the reservoir empties, refill it immediately and give the wick a soak to re-prime it.
- Dense soil with no perlite. Compacted potting soil chokes the wick and prevents capillary flow. Always mix in at least 15–20% coarse perlite.
Related reading
- How to grow basil indoors — basil is one of the best self-watering planter crops; pair this guide with that one for the best results.
- How to fix root rot — if moisture has already got ahead of you, here’s how to rescue the plant.
- How to take care of a succulent plant — succulents need the opposite approach; read this before putting the wrong plant in your new planter.
- Track your reservoir refill schedule and set custom watering reminders with the free Tazart plant care app.
A note on conditions
Results vary based on your indoor humidity, temperature, pot material, and the thirst of your specific plant. A pothos in a warm south-facing window drinks two to three times more than the same plant in a cool north-facing room. Check the reservoir weekly for the first month to learn your plant’s rhythm, then adjust your refill schedule from there.
Highly recommended
The supplies that make this guide work


Tazart is an Amazon Associate — we earn from qualifying purchases at no extra cost to you. Thank you for helping us keep these guides free.
Frequently asked questions
How does a self-watering planter work?
A self-watering planter uses capillary action — the same force that pulls water up a paper towel — to move water from a reservoir at the bottom up into the soil through a wick or a porous soil bridge. The plant roots draw moisture upward as they need it, so the soil stays evenly damp rather than swinging between soaked and bone dry.
What is the best wick material for a self-watering planter?
Thick braided cotton rope or cotton twine is the most reliable wick material for a DIY self-watering planter. Aim for a wick at least 0.5 cm (¼ in) thick so it can move enough water. Synthetic polyester cord works too but moves water slightly more slowly. Avoid thin thread — it clogs or dries out quickly.
How often do you refill a self-watering planter reservoir?
Refill frequency depends on pot size, plant type, and season. A small 500 ml (17 fl oz) bottle reservoir typically lasts 5 to 10 days in moderate indoor conditions. A large 2 L (½ gal) dual-pot reservoir can last 2 to 4 weeks. Check the water level once a week until you know your plant's rhythm, then adjust from there.
Can succulents go in self-watering planters?
No. Succulents, cacti, and drought-tolerant herbs like rosemary need the soil to dry out completely between waterings. A self-watering planter keeps moisture constant in the root zone, which triggers root rot in these plants within weeks. Stick to moisture-loving species like pothos, peace lily, and basil.
Why is my self-watering planter growing mold?
Mold on the soil surface usually means the reservoir is keeping the very top layer too wet in a low-airflow spot. Scrape off the mold, top-dress with a thin layer of perlite or dry sand to improve surface ventilation, and move the planter somewhere with better air circulation. The reservoir itself can grow algae if light reaches it — wrap it in dark tape or foil.
Do self-watering planters cause root rot?
Not in moisture-loving plants if the system is set up correctly. Root rot in self-watering planters almost always has one of three causes: using the wrong plant (succulents, cacti, rosemary), the wick sitting in stagnant anaerobic water that never refreshes, or a reservoir that is permanently flooded to the rim with no air gap. Leave at least 2–3 cm (1 in) of air between the water surface and the bottom of the soil cup.
How long will a self-watering planter keep a plant alive while I'm on vacation?
A well-sized reservoir can keep a medium houseplant alive for 1 to 3 weeks without any attention — making self-watering planters popular for vacation care. For a 2-week trip, use the largest reservoir you can fit (at least 1.5 L / 50 fl oz) and top it up fully just before you leave.