Edible
How to Grow Mushrooms at Home (Beginner's Complete Guide)
Grow oyster, lion's mane, or shiitake mushrooms at home from a kit or substrate. Exact humidity, fruiting, and harvest steps for multiple flushes from one block.
On this page
- Quick answer
- Which mushroom should you grow first?
- The grow kit method: the cheapest entry point
- Substrate options (when you move beyond kits)
- Sterile technique: why it matters
- Fruiting conditions: the three variables that matter
- The monotub method (overview)
- Contamination identification
- Harvesting: twist, do not cut
- Multiple flushes: getting the most from one block
- Common beginner mistakes
- Watch: How to Grow Mushrooms at Home
- Tazart tip: track your flushes
- Getting started: the short version
Watch the visual walkthrough
How to Grow Mushrooms from Start to Finish in a Monotub
In this video I show you how to grow mushrooms from start to finish in a monotub. Check out my new How to Grow Mushroom ...
Growing culinary mushrooms at home is one of the most satisfying things you can do in a kitchen — and one of the few crops you can harvest in under two weeks from a standing start.
The learning curve is steeper than growing herbs but shorter than people expect. The key variables are only three: the right substrate, sterile handling, and correct fruiting conditions. Get those right and your block will produce multiple harvests. Get them wrong in one specific way — contamination — and the whole grow fails fast and visibly.
This guide covers every beginner decision, from species choice to your first harvest, with a clear explanation of why each step matters.
Quick answer
Start with a pearl oyster mushroom (Pleurotus ostreatus) grow kit. Cut the bag open at the marked point, place the block in indirect light at 18–24°C (65–75°F), and mist the exposed surface 2–4 times daily to maintain 85–95% relative humidity. Fan briefly at each misting to provide fresh air. Expect pins within 5–10 days and a first harvest in 10–14 days. Soak the spent block overnight in cold water and repeat for 2–4 total flushes.
Which mushroom should you grow first?
Not all culinary mushrooms are equally forgiving. Here is an honest ranking for home growers:
| Species | Difficulty | Substrate | Fruiting temp | Time to first flush |
|---|---|---|---|---|
| Pearl oyster (Pleurotus ostreatus) | Easiest | Straw, coffee grounds, cardboard | 15–24°C (60–75°F) | 10–14 days from kit |
| Pink oyster (Pleurotus djamor) | Easy | Same as pearl oyster | 21–30°C (70–85°F) | 10–14 days from kit |
| Lion’s mane (Hericium erinaceus) | Easy–moderate | Hardwood sawdust | 18–24°C (65–75°F) | 14–21 days from kit |
| Shiitake (Lentinula edodes) | Moderate | Hardwood logs or supplemented sawdust | 10–21°C (50–70°F) | 6–12 weeks from inoculation |
| White button (Agaricus bisporus) | Moderate–hard | Composted horse manure + casing layer | 15–18°C (60–65°F) | 3–4 weeks from inoculation |
Start with pearl oyster. It grows fast, handles temperature swings, fruits on almost any lignocellulosic material, and produces clusters large enough that you will not miss the harvest window.
The grow kit method: the cheapest entry point
A grow kit is a fully colonized block of substrate — the mycelium has already done the slow work of spreading through the material. You are only responsible for the fruiting stage.
Why kits make sense for beginners:
- No pasteurization or pressure cooking required
- No sterile inoculation — the contamination-prone step is already done
- You get visual feedback on what healthy mycelium and healthy pins look like before you ever try a scratch grow
- The whole process from unboxing to first harvest is 10–14 days
What a kit actually is: typically a 1–3 kg (2–6 lb) block of hardwood sawdust or straw, fully colonized with oyster or lion’s mane mycelium, sealed in a polypropylene bag with a filter patch. You buy it when it is fully white with mycelium and ready to initiate fruiting.
Substrate options (when you move beyond kits)
Once you understand fruiting, you can grow from scratch by inoculating unpasteurized or pasteurized substrate with purchased mushroom spawn (colonized grain or sawdust). Each substrate suits different species:
Straw (wheat, rice, oat)
The standard substrate for oyster mushrooms. Cheap, widely available, and easy to pasteurize. Oyster mycelium colonizes straw in 1–2 weeks at 21°C (70°F).
Pasteurizing straw: Submerge chopped straw (10–15 cm / 4–6 in lengths) in water at 65–82°C (150–180°F) for 60–90 minutes. Use a large pot on the stove or add boiling water to a heat-safe bucket. Drain, let cool to below 27°C (80°F), then inoculate.
Sawdust and hardwood pellets
The substrate of choice for lion’s mane and shiitake. Use oak, maple, beech, or alder pellets — never treated, painted, or conifer wood, which contains oils toxic to mycelium.
Hardwood sawdust must be sterilized (not just pasteurized) for species like shiitake and lion’s mane that colonize slowly. Sterilization requires a pressure cooker at 121°C (250°F) / 15 PSI for 2.5 hours to kill Trichoderma spores. This is the step most beginners skip — and the reason most scratch grows fail.
Spent coffee grounds
The best free substrate for oyster mushrooms. Fresh grounds are already pasteurized by the brewing process and high in nitrogen. Use them within 24 hours of brewing to prevent mold. Mix 5 parts grounds with 1 part grain spawn by volume, pack into a container, and colonize at room temperature. The mycelium typically colonizes fully in 10–14 days.
Cardboard
A minimal-effort substrate for pink or pearl oyster mushrooms. Soak corrugated cardboard (removing any tape or staples), drain, and layer with grain spawn. Not high-yielding but useful for understanding colonization on a small scale.
Sterile technique: why it matters
Mushroom mycelium and contaminant molds like Trichoderma compete for exactly the same food source. The mycelium has a head start when you inoculate — but only if contaminant spores are not already present in the substrate or introduced during inoculation.
Minimum sterile technique for home grows:
- Work on a clean wiped-down surface
- Wash hands thoroughly; wear gloves if handling grain spawn
- Never sneeze or cough over open substrate
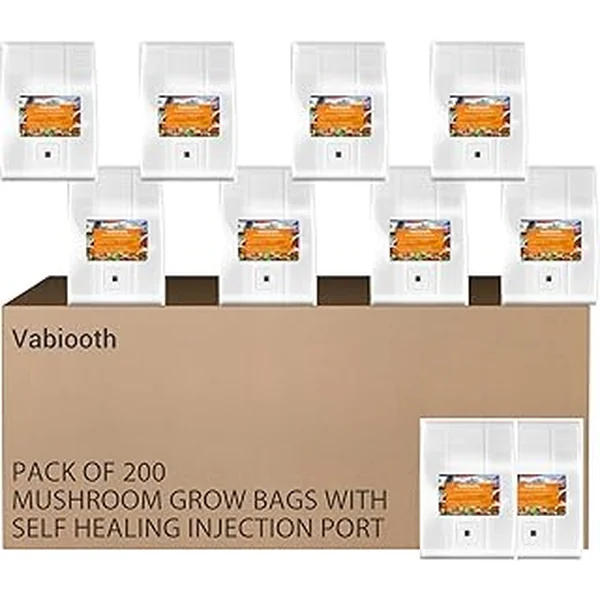
- Use substrate that has been pasteurized (straw) or sterilized (hardwood, grain)
- Seal bags immediately after inoculating
- Work quickly — every second the substrate is open is a contamination risk
For grain spawn inoculations, experienced growers work in front of a still-air box (a plastic tub with two arm holes, open end down) or a flow hood. Neither is required for straw grows, where oyster mycelium colonizes so aggressively that it outcompetes most contaminants.
Fruiting conditions: the three variables that matter
Once your block is fully colonized (solid white all the way through), it needs three environmental signals to start producing pins:
1. Humidity: 80–95% relative humidity
Below 70% RH, caps crack and pins abort. Above 95% with no fresh air exchange, bacterial blotch develops — white caps turn brown and slimy.
Practical methods:
- Misting: Spray the exposed substrate surface and surrounding air with clean water 2–4 times daily. Never blast pins directly — mist the air around them.
- Humidity tent: Drape a clear plastic bag loosely over the block, leaving a gap at the bottom for fresh air.
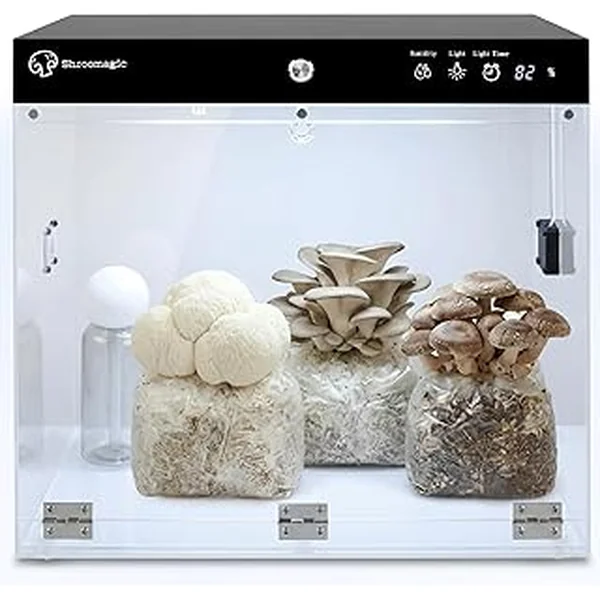
- Greenhouse shelf: A shelving unit covered with a clear plastic sheet, with a small ultrasonic humidifier inside, maintains consistent RH with minimal daily intervention.
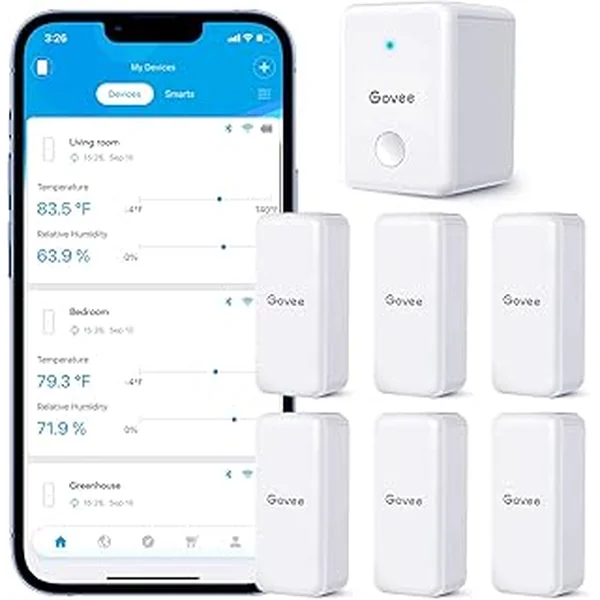
A hygrometer ($10–15 from any hardware store) is essential. Most beginners significantly under-mist without one.
2. Fresh air exchange: 4–8 exchanges per hour
CO2 is produced by the mycelium as it respires. High CO2 concentration (above roughly 1,000 ppm) suppresses pinning and causes distorted growth — long thin caps with small heads on oyster, elongated spines on lion’s mane.
Practical method: Fan the block or open the tent for 10–30 seconds at each misting session. That brief flush of fresh air is enough for most home setups.
3. Indirect light: 12 hours per day
Mushrooms do not photosynthesize — they do not need light to grow. But light acts as a directional signal. Oyster mushrooms exposed to light orient their caps toward the source and grow in normal open clusters. Grown in total darkness, oyster mushrooms produce long distorted stems with tiny caps.
Any ambient room light is adequate. A north-facing windowsill or a room with standard overhead lighting for 10–12 hours a day is fine. Direct sunlight dries the substrate surface too fast.
The monotub method (overview)
The monotub is a popular setup for growers who want larger yields from a single grain-colonized bulk substrate without buying multiple kits.
How it works: Fill a clear 50–75 L (13–20 gal) storage tote with colonized grain spawn mixed into bulk substrate (coconut coir or pasteurized straw) at roughly 1:4 by volume. Fit the lid with polyfill-stuffed air holes for passive FAE. Colonize 7–14 days in the dark, then introduce indirect light, mist 2–3 times daily, and leave a small lid gap. Harvest clusters at the rim before caps flatten.
Attempt the monotub after successfully fruiting at least one commercial kit — contamination risk during the bulk phase is higher than with a sealed block.
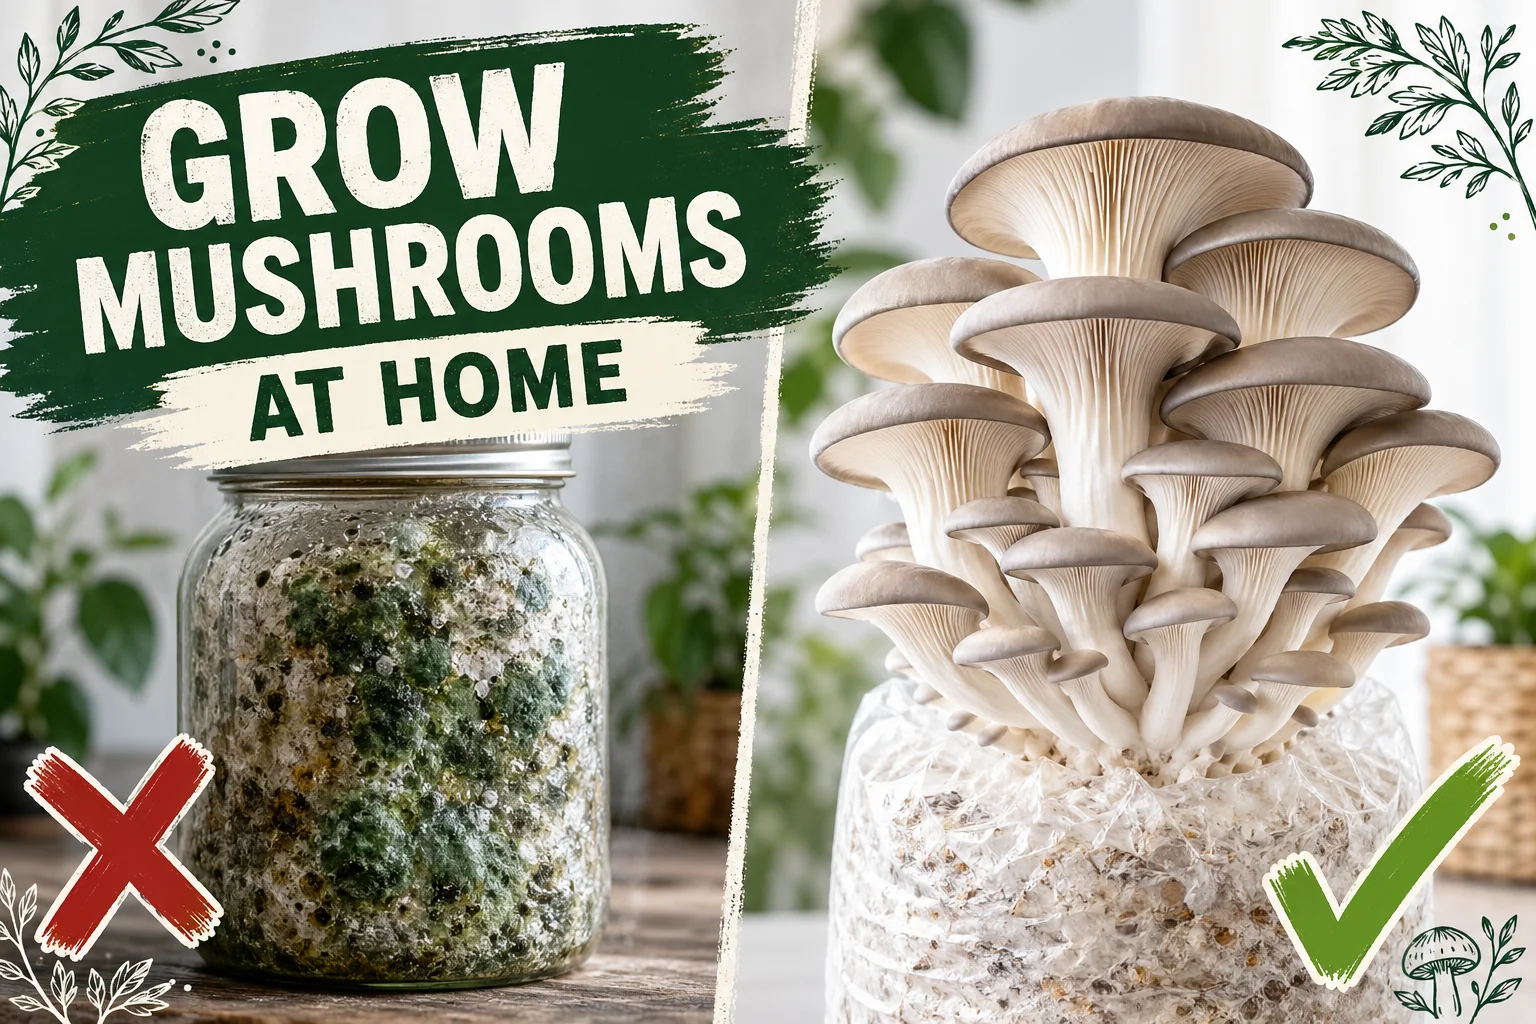
Contamination identification
Learn to recognize problems immediately — waiting two days to act means the contamination spreads and the grow is lost.
| What you see | Cause | Action |
|---|---|---|
| Bright or dark green patches | Trichoderma mold — most common contaminant | Bag and discard immediately outdoors. Do not open. |
| Yellow or orange slimy blobs | Bacterial contamination | Discard. Increase FAE and reduce misting frequency on next grow. |
| Black fuzzy spots | Aspergillus or Rhizopus mold | Discard. Usually caused by non-sterile substrate or inoculation. |
| Pink or red patches | Bacterial blotch (Pseudomonas) | Discard. Caused by direct water spray on pins or insufficient FAE. |
| Healthy white/cream/grey | Mycelium — normal | Continue fruiting conditions. |
Critical rule: Any unusual smell — sour, ammonia, musty — paired with discoloration means contamination. Trust your nose.
Harvesting: twist, do not cut
Harvest timing makes a significant difference in flavor, yield, and next flush potential.
For oyster mushrooms: Harvest when the largest caps are 5–12 cm (2–5 in) across and the edges are still slightly downturned. Once the edges flatten and wave outward, the mushrooms start releasing white spore powder — edible, but an indicator of over-ripeness. The flavor is best just before this point.
Technique: Grip the entire cluster at its base where it meets the substrate. Twist a quarter turn and pull firmly. The whole cluster should come free cleanly. Do not cut — a stub of stem left behind creates a rot point that can invite bacterial contamination before the next flush.
For lion’s mane: Harvest when the fruiting body is solid white all the way through and the spines are 1–2 cm (0.5–1 in) long. A yellow tinge means the tissue has begun to oxidize — still edible but noticeably bitter. Cut at the base with a clean knife.
For shiitake: Harvest when caps have opened to 60–70% of full size and the veil beneath is still partially intact. Fully opened shiitake with an exposed gill surface store poorly.
Multiple flushes: getting the most from one block
Most fully colonized blocks will produce 2–4 flushes of mushrooms. Yields drop with each flush as the substrate nutrition is consumed.
Between-flush protocol:
- Remove all mushroom stubs and any soft tissue from the harvest site — a toothbrush or cloth works well.
- Submerge the block fully in cold tap water (10–18°C / 50–65°F) for 6–12 hours. This rehydrates the substrate and the temperature shock can help trigger the next flush.
- Return the block to fruiting conditions.
- Expect pins within 3–10 days, though some blocks skip a day or two before initiating.
Retire the block when:
- No pins appear after 14 days of correct fruiting conditions
- The block turns green (Trichoderma contamination)
- The substrate smells sour or ammonia-like
Spent blocks make excellent garden mulch or worm bin material — the spent mycelium is rich in nitrogen and breaks down quickly.
Common beginner mistakes
1. Not misting enough. Below 80% RH, forming pins dry out and abort. Mist more frequently or add a humidity tent.
2. Misting directly onto pins. Water pooling on caps causes bacterial blotch — brown slimy patches. Mist the air and substrate surface, not the pins.
3. No fresh air exchange. Without FAE, CO2 builds up and pins grow deformed (long stems, tiny caps) or never form. Fan briefly at every misting.
4. Skipping pasteurization or sterilization. Raw straw or sawdust is full of competing mold spores. Pasteurize straw; sterilize hardwood and grain.
5. Working in a contaminated environment. Inoculating near compost, dusty shelving, or during kitchen traffic dramatically raises contamination risk. Work in the cleanest spot available.
6. Harvesting too late. Fully opened oyster caps shed white spore powder that coats your grow area and can irritate airways. Harvest just before cap edges flatten.
Watch: How to Grow Mushrooms at Home
This visual guide pairs well with the steps above — helpful for understanding what healthy colonization and pinning look like before your first grow.
(Video will appear here once the YouTube resolver runs.)
Tazart tip: track your flushes
Log the date of first pin, harvest date, and yield weight for each flush. Two or three grows of data makes it easy to spot whether your setup is too dry, too warm, or needs more FAE. The Tazart app is built around the same observation habit — track, note what changes, refine.
Getting started: the short version
For a first grow you need three things: a pearl oyster kit, a spray bottle, and a hygrometer. Cut the bag, mist 2–4 times daily, fan briefly at each misting, and harvest in 10–14 days. Add a pressure cooker and grain spawn when you are ready to move beyond kits.
Highly recommended
The supplies that make this guide work
Tazart is an Amazon Associate — we earn from qualifying purchases at no extra cost to you. Thank you for helping us keep these guides free.
Frequently asked questions
What is the easiest mushroom to grow at home?
Pearl oyster mushroom (Pleurotus ostreatus) is the undisputed beginner choice. It colonizes straw or coffee grounds fast (7–14 days), pins reliably at 15–24°C (60–75°F), tolerates beginner-level humidity management, and fruits in huge clusters that are hard to miss. A basic grow kit gives you a harvestable flush in as little as 10 days with no equipment beyond a spray bottle. Lion's mane and shiitake are excellent second grows once you understand fruiting conditions.
How long does it take to grow mushrooms at home?
With a ready-to-fruit grow kit, you can harvest your first flush in 10–14 days after initiating fruiting. Starting from scratch — pasteurizing substrate, inoculating with spawn, and waiting for full colonization — takes 3–6 weeks before the first pins appear, depending on species and ambient temperature. Oyster mushrooms are the fastest; shiitake can take 6–12 weeks from inoculation to first flush when grown on hardwood logs.
Do I need a grow kit to grow mushrooms at home?
No — but a kit is the best first step. It eliminates the two hardest variables (substrate preparation and sterile inoculation) and lets you focus on fruiting conditions: humidity, fresh air, and indirect light. Once you understand what healthy mycelium and pinning look like, move to scratch grows using straw, sawdust, or grain as substrate with purchased mushroom spawn.
How do I know if my mushroom block is contaminated?
Green patches (any shade, from lime to dark forest green) mean Trichoderma mold — the most common and destructive mushroom contaminant. Yellow or orange slimy blobs are bacterial contamination. Black spots are usually Aspergillus. Any color other than white, cream, or pale grey mycelium is a contamination warning. Isolate the block immediately in a sealed bag and discard it outdoors — do not open it indoors, as the spores will colonize your next grow.
How many times can I harvest from one mushroom block?
Most oyster mushroom blocks produce 2–4 flushes before the substrate is exhausted. Lion's mane blocks give 2–3 flushes. Shiitake blocks on supplemented sawdust typically produce 3–5 flushes over several months. Between flushes, soak the block in cold water for 6–12 hours to rehydrate it, then resume misting. Yields drop with each flush — expect the first flush to be the largest, and the third to be noticeably smaller.
What humidity do mushrooms need to fruit?
Most culinary mushrooms need 80–95% relative humidity (RH) in the fruiting environment to develop pins and grow properly. Below 70% RH, pins abort and forming caps crack or dry out. Above 95% RH with no fresh air exchange, bacterial blotch can develop. The practical target for oyster and lion's mane is 85–95% RH with 4–8 air exchanges per hour. A cheap hygrometer, a humidity tent made from a clear plastic bag, and a spray bottle misted 2–4 times a day are enough for most home setups.
Can I grow mushrooms on coffee grounds?
Yes — spent coffee grounds are one of the best free substrates for oyster mushrooms. They are already pasteurized by the brewing process, nutrient-rich, and the right moisture level when fresh. Collect grounds, let them cool to room temperature, mix with oyster mushroom grain spawn at a 5:1 ratio (5 parts grounds to 1 part spawn by volume), pack loosely into a container, and wait 1–2 weeks for colonization. Use grounds within 24 hours of brewing — older grounds grow mold before the mycelium can establish.