Edible
How to Grow Arugula Indoors (Cut-and-Come-Again Guide)
Grow peppery arugula indoors year-round. Best tray size, sowing, light, watering, succession planting every 2–3 weeks, and cut-and-come-again harvest tips.
On this page
- Quick answer
- Why arugula is ideal for indoor growing
- What you need
- Step-by-step: growing arugula indoors
- Succession planting: the key to continuous indoor arugula
- Cut-and-come-again harvest
- Care schedule at a glance
- Fertilizing
- Common problems and fixes
- Troubleshooting at a glance
- Watch: how to grow arugula indoors
- Related reading
- A note on conditions
Watch the visual walkthrough
How to Grow Arugula Microgreens Fast and Easy
Get free seeds, shipping, and returns: https://www.epicgardening.com/greenhouse/ Arugula microgreens are the most popular ...
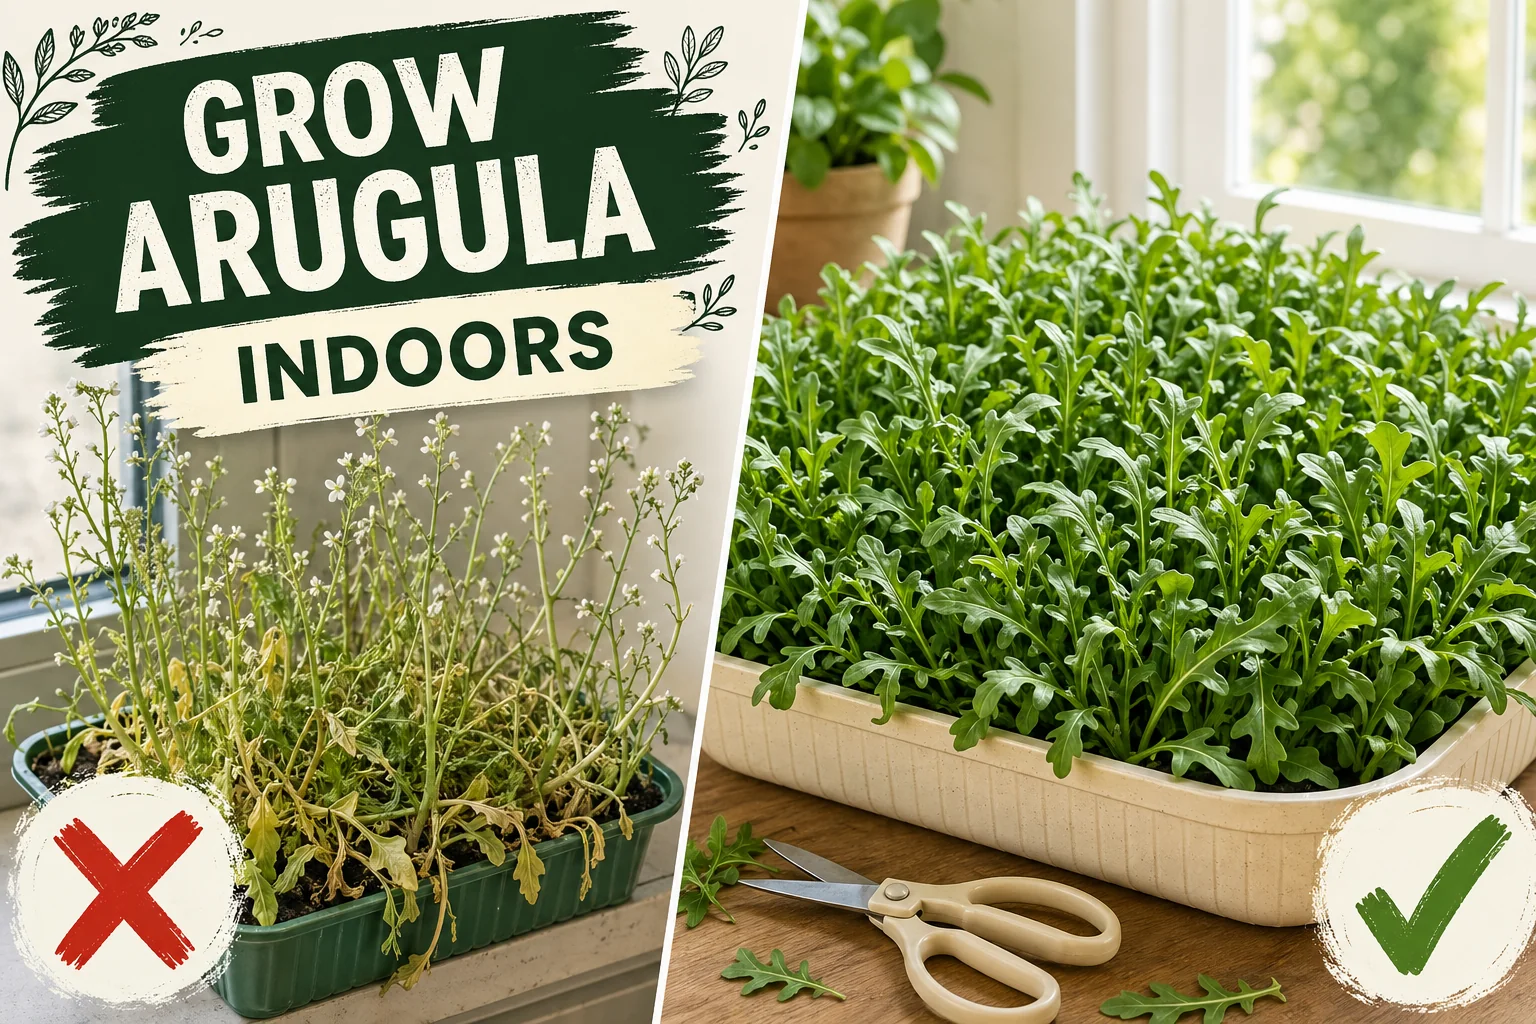
Arugula (Eruca sativa) is one of the fastest and most rewarding edible plants you can grow indoors. Seeds germinate in five days, baby leaves are ready in three weeks, and a wide shallow tray on the windowsill — or under a basic grow light — produces cut-and-come-again harvests for six to eight weeks straight.
The catch: arugula hates heat and bolts fast the moment conditions turn warm. Get the temperature and light right and it grows almost effortlessly. This guide covers everything — tray size, sowing, light, water, succession planting, and how to harvest without killing the plant.
Quick answer
Broadcast arugula seeds across a wide shallow tray at least 7 cm (3 in) deep, filled with vegetable potting mix. Sow every 2–3 weeks for continuous harvest. Give 4–6 hours of direct sun or 12 hours of LED grow light. Keep temperatures between 10–21°C (50–70°F). Water when the top 1–2 cm (0.5 in) of soil dries out. Harvest baby leaves at 5–10 cm (2–4 in) tall with scissors, leaving 2–3 cm (1 in) of growth above the soil. Repeat every 7–10 days for 3–5 cuts per tray.
Why arugula is ideal for indoor growing
Most edibles grown indoors need warm conditions, strong light, or both. Arugula is the exception. It is a cool-season annual that actively prefers the cooler indoor spots most growers write off — north-facing windows, unheated utility rooms, cool hallways. Where basil struggles, arugula thrives.
Its root system is also genuinely shallow. The main roots reach only 5–8 cm (2–3 in) deep, which means a flat seed tray that is barely wider than a dinner plate produces a meaningful harvest. You do not need pots, you do not need deep containers, and you do not need a greenhouse.
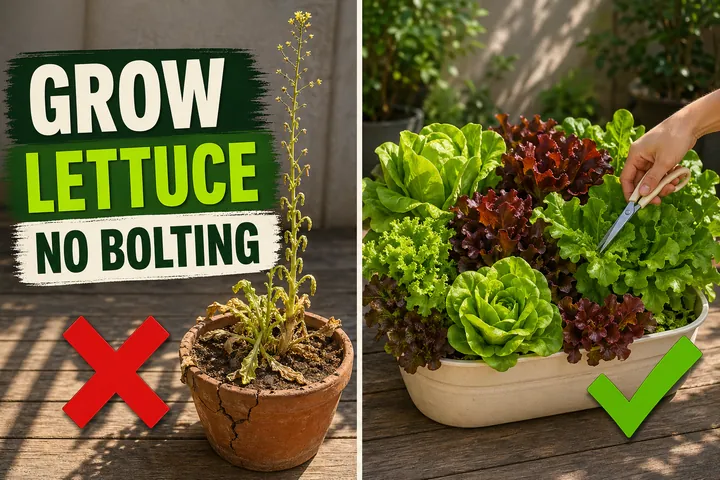
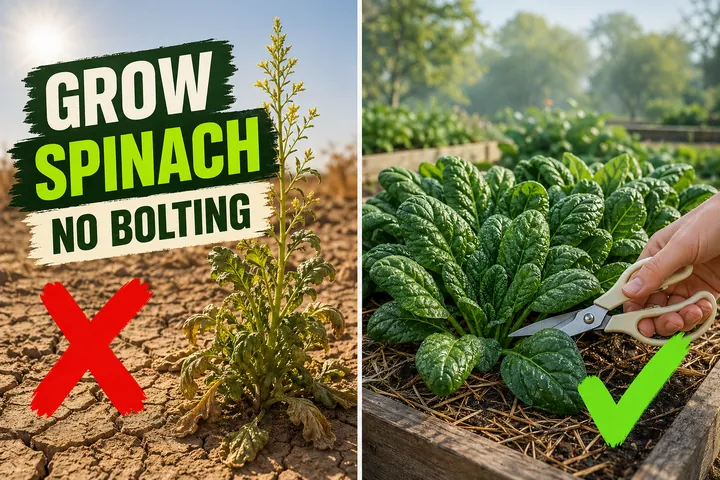
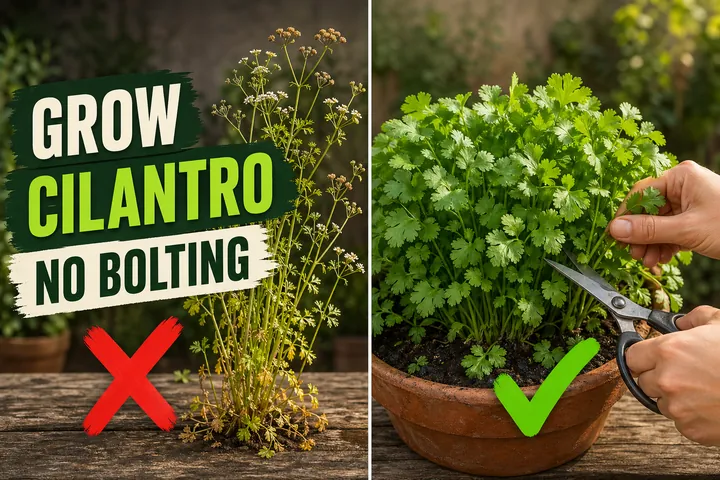
The main management job is preventing bolting — the switch from leaf production to flowering — which happens when arugula gets too hot or too much light. Do that and one tray gives you three to five full harvests before you need to resow.
What you need
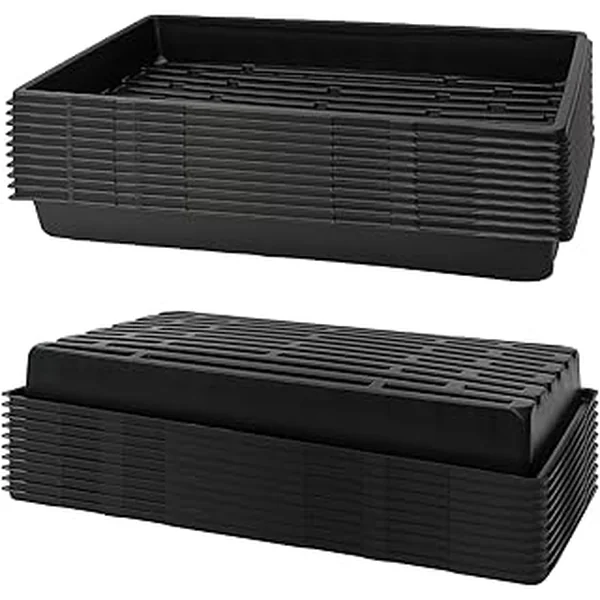
- One wide shallow tray or window box, at least 40 cm (16 in) wide and 7–10 cm (3–4 in) deep, with drainage holes
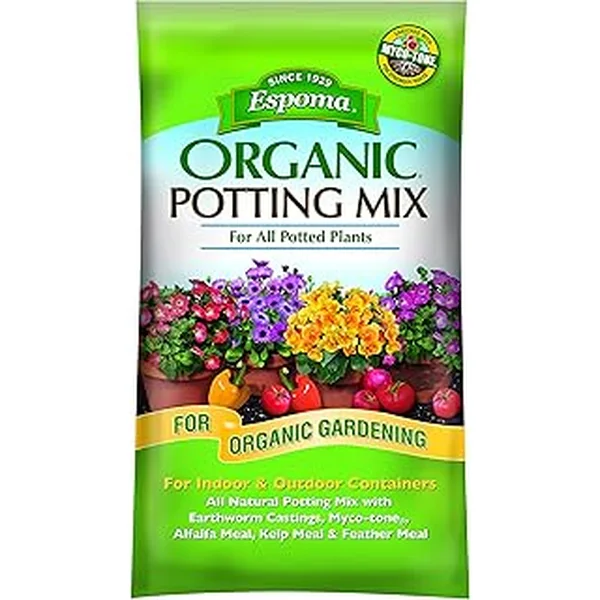
- Light vegetable or all-purpose potting mix — not garden soil
- Arugula seeds: standard (Eruca sativa) or wild rocket (Diplotaxis tenuifolia, slower bolting, more peppery)
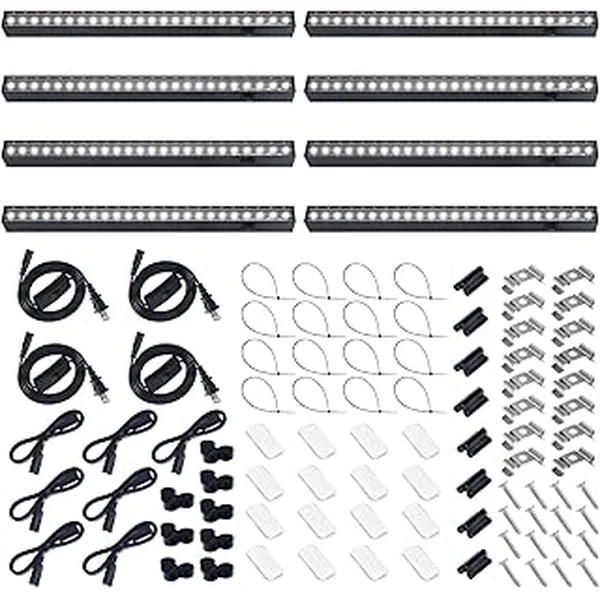
- A bright window with 4–6 hours of light, or a full-spectrum LED grow light bar
- A spray bottle or fine-rose watering can
- Clean scissors for harvesting
No pollinators, no staking, no greenhouse, no grow tent needed.
Step-by-step: growing arugula indoors
1. Choose the right tray
Width beats depth for arugula. A wide, flat seed tray — 40–60 cm (16–24 in) long, 7–10 cm (3–4 in) deep — holds dozens of plants and stays significantly cooler than a deep narrow pot, which matters because cool roots slow bolting.
Standard seed trays, window boxes, and even food-grade baking pans with drainage holes drilled in the base all work. Avoid pots deeper than 15 cm (6 in) — that extra depth is wasted, dries slowly, and concentrates heat.
Drainage holes are not optional. A tray that holds standing water will rot arugula at the base within days.
2. Fill with potting mix
Pour vegetable potting mix into the tray until it sits 1–2 cm (0.5 in) below the rim. Tap the tray once on the counter to settle the mix, but do not press it down — arugula seedlings push through loose soil easily but struggle in compact, airless mix.
Skip garden soil. In containers, garden soil compacts under repeated watering, loses its air pockets, and stays wet far too long — all three of which are arugula killers indoors.
3. Broadcast or row-sow the seeds
Two sowing approaches work equally well:
Broadcast (quickest): scatter seeds evenly across the whole surface, one seed roughly every 3–4 cm (1–1.5 in). Cover with a thin 5 mm (¼ in) layer of potting mix. Water gently with a spray bottle or a fine-rose watering can so seeds are not displaced.
Row sow (easier to harvest): make shallow furrows 1 cm (0.5 in) deep and 10 cm (4 in) apart across the tray. Drop seeds 2–3 cm (1 in) apart along each furrow. Cover and water as above. Row-sown arugula is easier to harvest with scissors without accidentally cutting the regrowth crown.
Seeds germinate in 5–7 days at 15–20°C (60–68°F). Below 10°C (50°F), germination slows to 10–14 days but still succeeds. Above 25°C (77°F), germination rate drops sharply.
4. Place in the right light
Arugula needs 4–6 hours of direct sunlight or the equivalent from a grow light. That is less than basil or tomatoes — which is exactly what makes it a practical indoor crop.
Windowsill options by direction:
- East-facing window: ideal — gentle morning light, cool afternoon. Best year-round for keeping arugula slow and tender.
- South-facing window: plenty of light. In summer, the heat can trigger early bolting — shade cloth or a sheer curtain cuts the heat without losing the light.
- North-facing window: grows slower, milder arugula. Leaves stay tender longer. Harvest is a week later but often preferred for salad quality.
- West-facing window: warm afternoon sun can cause heat stress in summer. Move the tray back from the glass or diffuse the light.
Grow light option: a full-spectrum LED bar 20–30 cm (8–12 in) above the tray, running on a 12-hour timer, replaces window light entirely. This is the most reliable method for windowless kitchens or winter growing. Keep the timer at 12 hours — more than 14 hours of light is a bolting trigger for arugula.
5. Keep temperatures cool
Target 10–21°C (50–70°F) for the tray. This is the single most important variable for slow, productive arugula.
Arugula bolts above 24°C (75°F). In most northern homes this means the kitchen counter near the oven is a poor spot, a south window in July is marginal, and a cool bedroom or utility room windowsill is often the best location in summer.
In winter, the same cool preference works in your favour — arugula stays productive in conditions that would stall basil or cilantro.
6. Water by feel
Check the top 1–2 cm (0.5 in) of soil daily. When it feels dry to the touch, water until you see drips from the drainage holes, then let it drain fully.
Shallow trays dry out fast — often every 1–2 days under a grow light or in dry winter heating, every 2–3 days in a cool spot. Avoid a fixed schedule and check instead.
Two warning signs:
- Wilting with dry soil — water immediately; arugula in dry soil bolts fast and the leaves go very sharp and bitter.
- Yellowing at the base with damp soil — overwatering; let the tray dry more fully before the next water.
7. Thin seedlings (optional but helpful)
If you sowed densely, thin to 3–5 cm (1–2 in) spacing once seedlings have their first true leaves. Snip thinnings at soil level with scissors — the thinnings are edible, lightly peppery microgreens.
Thinning is not strictly required if you plan to harvest as baby leaves at the baby-leaf stage (5–10 cm / 2–4 in), since dense sowing is fine for that style. If you want full-size mature leaves, thin for better airflow.
Succession planting: the key to continuous indoor arugula
One tray of arugula lasts roughly 6–8 weeks before it bolts or exhausts itself. To never run out, start a new tray every 2–3 weeks — called succession planting.
Once three or four trays are rolling in rotation, one is always at the fresh baby-leaf stage while older trays are giving their second or third cut. The total setup takes about 30 minutes of sowing time per month and produces far more arugula than most households use.
A plant care tracking app like Tazart makes succession schedules easy to manage — set a recurring reminder every 18 days and it tracks each tray’s age and harvest due dates automatically.
Cut-and-come-again harvest
The cut-and-come-again method is the reason one tray stays productive for weeks rather than days.
How to do it:
Use clean scissors to cut 2–3 cm (1 in) above soil level, leaving the small central growing point and the lowest leaf cluster intact. Work across the whole tray in one harvest session. The plant regrows from the central crown and is ready to harvest again in 7–10 days.
Expect 3–5 cuts per tray in cool conditions before the plants tire out and the regrowth becomes thin and peppery-hot.
Harvesting tips:
- Harvest baby leaves at 5–10 cm (2–4 in) tall for the mildest, most tender leaves — these are the arugula you find in premium salad bags.
- Harvest in the morning when leaves are crisp and full of moisture.
- Never pull the whole plant — you destroy the regrowth crown and lose all future cuts.
- Once leaves grow beyond 15 cm (6 in), they become tougher and more intensely peppery — still edible, just better for cooking than raw salad.
When a tray is done: when the regrowth comes in thin, spindly, or the plants start sending up a central stalk, the tray is past its best. Compost the plants, wash the tray, and sow a fresh batch.
Care schedule at a glance
| Task | Timing |
|---|---|
| Water | When top 1–2 cm (0.5 in) is dry — often daily in warm or grow-light setups |
| First harvest | 21–30 days from sowing (baby leaves at 5–10 cm / 2–4 in) |
| Subsequent harvests | Every 7–10 days using cut-and-come-again method |
| Fertilize | Half-strength liquid fertilizer every 14 days after the first cut |
| Start new tray | Every 2–3 weeks for continuous supply |
| Rotate tray | Quarter turn every 3–4 days for even growth under a window |
Fertilizing
Fresh potting mix carries enough nutrients for the first 3–4 weeks — no fertilizer needed during germination and early growth.
After the first harvest, feed with a half-strength balanced liquid fertilizer every 14 days. A formula with slightly elevated nitrogen supports fast leaf regrowth. Liquid fertilizers work better than granular for shallow trays because the nutrients reach the roots immediately.
Avoid over-fertilizing. Arugula fed too much nitrogen grows fast but loses the peppery bite that makes it interesting — and the leaves are softer and more prone to disease.
Common problems and fixes
Bolting (plant sends up a central flower stalk): heat above 24°C (75°F) or too many hours of light are the causes. Reduce temperature, limit grow light to 12 hours, and move the tray to a cooler spot. Once bolting begins on a plant, harvest all remaining leaves immediately — they are still edible but the tray will not produce usable regrowth.
Very bitter, sharp-tasting leaves: arugula is naturally peppery, but extreme bitterness signals heat stress or drought stress. Keep temperatures below 21°C (70°F), water consistently, and harvest at the baby-leaf stage before leaves mature fully.
Leggy, pale seedlings: not enough light. Move to a brighter window or add a grow light. Arugula that stretches in low light has fewer leaves, weaker flavor, and bolts earlier.
Flea beetles (tiny holes in leaves): outdoors, flea beetles are arugula’s most common pest. Indoors they are rare, but not impossible if insects enter through open windows. Cover the tray with a fine mesh fabric or move it away from windows left open without screens.
Damping off (seedlings collapse at soil level): overwatered soil or poor drainage. Sow in fresh potting mix, ensure the tray has drainage holes, and let the surface dry slightly between waterings. Re-sow in a clean tray.
Slow germination: room temperature below 10°C (50°F) slows germination to 10–14 days. It will still happen — arugula is cold-tolerant. If you see nothing at 14 days in cold conditions, check soil moisture and add a heat mat set to 18°C (65°F) beneath the tray to speed things along.
Troubleshooting at a glance
| Symptom | Likely cause | Fix |
|---|---|---|
| Central stalk shooting up | Bolting from heat or long days | Harvest all leaves now; move to a cooler spot; limit light to 12 hrs |
| Very bitter leaves | Heat stress or drought | Lower temperature, water more consistently, harvest younger |
| Pale yellowing seedlings | Low light | Move to brighter window or add grow light bar 20–30 cm (8–12 in) above |
| Soggy stem base, plants collapsing | Root rot from overwatering | Let tray dry out; improve drainage; re-sow in fresh mix |
| Tiny round holes in leaves | Flea beetles | Cover tray with fine mesh; move away from open windows |
| Very thin regrowth after cuts | Tray exhausted | Compost plants; re-sow fresh seeds |
| Seeds not germinating after 10 days | Temperature too cold or seeds too old | Check soil is above 10°C (50°F); use fresh seeds; try a heat mat |
Watch: how to grow arugula indoors
A visual walkthrough pairs well with the steps above. If you’re a visual learner, search YouTube for growing arugula indoors cut and come again and pick a tutorial that shows the tray setup and harvest technique — then come back here for the succession schedule and timing.
Related reading
- How to grow lettuce in containers — arugula and lettuce share the same cool-season tray setup. Mix them in one wide container for a salad-ready blend.
- How to grow spinach — the other cool-weather leaf green with almost identical timing and light needs. A third tray for variety.
- Cilantro plant care — another fast-bolting cool-season crop; the succession planting strategies overlap directly.
- Track your sowing schedule and watering reminders for every tray with the free Tazart plant care app — it adjusts the schedule to your local conditions and notifies you when each tray is due for its next cut or resowing.
A note on conditions
Every home is different. Light angle, room temperature, tray size, potting mix, season, and indoor humidity all change how fast arugula grows and how quickly it bolts. The timings above are reliable starting points — watch what your first tray actually does and adjust from there. Cool and slightly dim conditions nearly always outperform warm and bright ones with arugula. That is the one principle worth remembering above all others.
Highly recommended
The supplies that make this guide work
Tazart is an Amazon Associate — we earn from qualifying purchases at no extra cost to you. Thank you for helping us keep these guides free.
Frequently asked questions
How long does arugula take to grow indoors?
Arugula germinates in 5–7 days at 15–20°C (60–68°F) and reaches baby-leaf harvest size in 21–30 days from sowing. Full-size leaves take 35–40 days. The cut-and-come-again method then extends a single tray for another 3–5 weeks before it tires out or bolts. Start a fresh tray every 2–3 weeks and you have a continuous indoor supply.
How much light does arugula need indoors?
Arugula grows on 4–6 hours of direct sunlight, less than most edibles. A bright east- or south-facing windowsill works in spring and summer. From October to March in most northern homes, natural light is too weak and too short — a full-spectrum LED grow light run for 12 hours a day keeps arugula compact, dark green, and slow to bolt. Under low light, arugula stretches, goes pale, and bolts weeks early.
How often should I water arugula indoors?
Check the top 1–2 cm (0.5 in) of soil daily. Water when it feels dry to the touch — shallow trays dry out faster than deep pots. In most indoor setups that means watering every 1–2 days. Pour water gently until it drips from the drainage holes, then let it drain. Arugula that stays waterlogged rots at the base; arugula that dries out completely bolts fast and tastes very sharp.
Why is my indoor arugula bolting?
The two triggers are heat and light duration. Arugula bolts when daytime temperatures exceed 24°C (75°F) or when it receives more than 14 hours of light per day. Indoors, a hot sunny south window in summer can trigger bolting in 3–4 weeks. Fixes: move the tray to a cooler spot (under 21°C / 70°F is ideal), limit grow-light hours to 12 per day, and harvest young leaves frequently — leaving the plant to grow large makes it bolt faster.
Can arugula grow without direct sunlight indoors?
Yes. Arugula tolerates indirect bright light better than most herbs. A north-facing window with good ambient light will grow slower arugula than a south window but the leaves stay tender and mild longer, which many people prefer. Under purely artificial light — a decent LED grow light bar at 12 hours daily — arugula grows reliably without any window at all, making it one of the easiest crops for windowless kitchens or pantries.
How do I harvest arugula cut-and-come-again?
Use clean scissors to cut leaves about 2–3 cm (1 in) above the soil surface, leaving the small central growing point and the lowest leaf cluster untouched. The plant regrows from that central point and is ready to cut again in 7–10 days. Repeat 3–5 times before the tray runs out of steam. Never pull the whole plant — you lose all future regrowth. Harvest baby leaves at 5–10 cm (2–4 in) long for the mildest, most tender flavor.
How deep does a tray need to be to grow arugula indoors?
Arugula has shallow roots — 5–8 cm (2–3 in) deep at most. A tray or container just 7–10 cm (3–4 in) deep is plenty. Width and surface area matter more than depth: a 40 cm (16 in) wide tray fits 4–5 times more plants than a small pot and stays cooler, which slows bolting. Any wider container with drainage holes works — baking pans with holes drilled in the base are a classic low-cost option.
Do I need to fertilize indoor arugula?
A good vegetable potting mix has enough nutrients for the first 3–4 weeks. After the first cut-and-come-again harvest, a half-strength liquid fertilizer every 14 days helps the tray regrow vigorously. Use a balanced formula or one slightly higher in nitrogen — arugula is a leafy green and needs nitrogen for fast regrowth. Avoid over-fertilizing: too much nitrogen makes arugula grow fast but can reduce the characteristic peppery bite.