Edible
How Deep to Plant Tomatoes (Deeper Than You Think)
Plant tomatoes deeper than their nursery pot — bury 2/3 of the stem so adventitious roots form along it. Standard depth is 4–6 inches; use the trench method for leggy
On this page
Watch the visual walkthrough
How Deep Should You Plant Tomatoes? | Tips for a Strong Root System
How deep should you plant tomatoes -- as deep as you can! Our tomato seedlings have gotten a little taller than we normally like, ...
Most gardeners transplant tomatoes at the same depth they came out of the nursery pot. That is the single most common tomato planting mistake — and fixing it takes about two minutes.
Tomatoes are one of the rare vegetables that form roots along any buried portion of their stem. Nodes that would have sat in the air above the soil become root-producing tissue the moment you cover them with moist earth. The deeper you plant, the larger the root system, the more water and nutrients the plant can access, and the more anchored it is in summer storms.
This guide covers exactly how deep to go, what to do with tall leggy seedlings, container planting, and the soil prep that makes it all work.
Quick answer
Plant tomatoes 4–6 inches (10–15 cm) deeper than their nursery pot — enough to bury 2/3 of the stem below the soil line. Strip the lower leaves first. For tall or leggy seedlings, use the trench method: lay the stem at a 30–45 degree angle in a shallow horizontal trench 3–4 inches deep, with only the top foliage cluster above ground. Roots form along the buried stem within 5–7 days in warm soil.
Why deeper is better: adventitious roots
Tomato stems carry small bumps called stem nodes or root initials — pre-formed root tissue that is waiting for soil contact. The moment a node is buried in moist soil above 60°F (16°C), it begins generating adventitious roots: genuine, functional roots that integrate into the main root system within days.
This is not a trick or a gardening myth. It is a documented trait of Solanum lycopersicum supported by university extension research from Penn State, UC ANR, and Iowa State. No other common vegetable garden plant — not peppers, not squash, not cucumbers — does this as reliably.
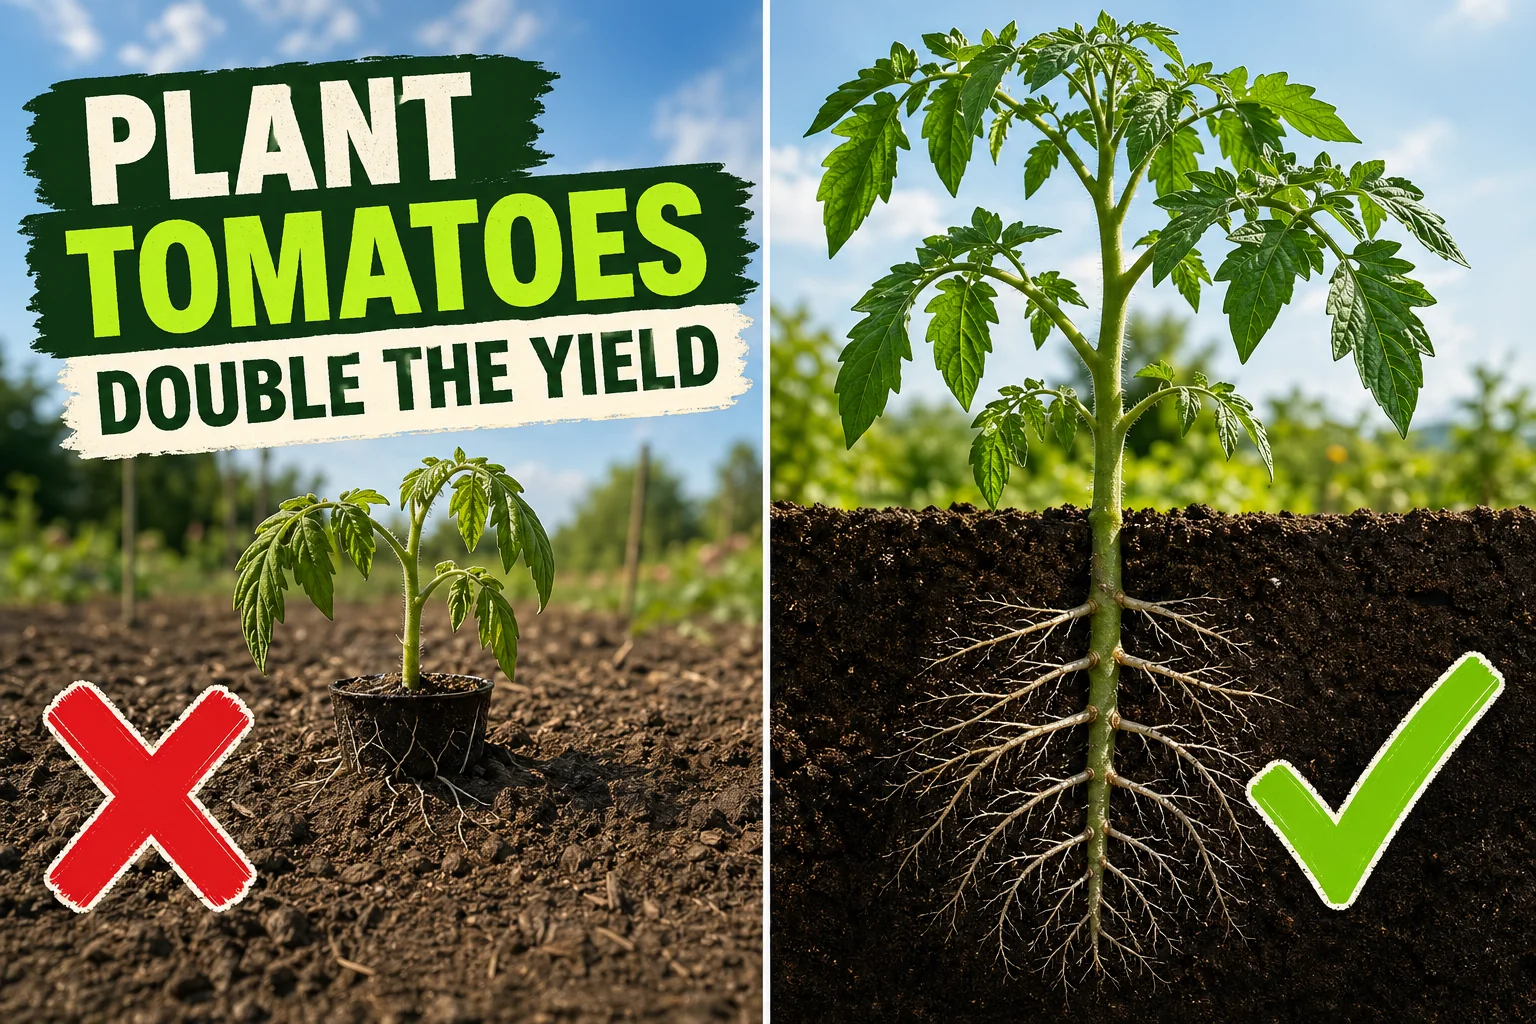
The practical result: a tomato planted 6 inches deeper than its pot has twice or three times the root mass of a shallowly planted one by midsummer. That translates directly to:
- Drought tolerance — deeper roots reach subsoil moisture during dry spells
- Nutrient access — more root surface area absorbs more phosphorus and calcium
- Wind resistance — a deep root anchor keeps tall indeterminate plants from toppling
- Less blossom-end rot — consistent calcium uptake from a larger root system
Standard transplant depth
For a typical 6-inch (15 cm) nursery transplant or a home-grown seedling of similar size, the process is straightforward.
- Strip the lowest 2–3 sets of leaves from the stem cleanly with scissors.
- Dig a hole 4–6 inches deeper than the root ball.
- Set the plant so the lowest remaining leaves sit just above the soil line.
- Backfill with amended soil and firm gently.
The bare stem section you buried — which was just stem a moment ago — will begin growing roots within a week.
Depth by seedling size:
| Seedling height | Hole depth below pot | Stem buried |
|---|---|---|
| 4–6 in (10–15 cm) | 3–4 in (8–10 cm) | 2–3 in (5–8 cm) |
| 6–10 in (15–25 cm) | 4–6 in (10–15 cm) | 4–6 in (10–15 cm) |
| 10–16 in (25–40 cm) | Use trench method | 6–10 in (15–25 cm) |
Trench method for tall and leggy seedlings
If your seedling is tall, lanky, or has been stretching toward a weak window for weeks, a vertical hole isn’t practical — you’d have to dig 12 inches straight down to bury the stem properly, and in many garden beds you’d hit clay, hardpan, or a root zone before that.
The trench method solves this by burying the stem horizontally instead.
How to do it:
- Strip all leaves from the stem except the top 4–6 inches of foliage.
- Dig a trench 3–4 inches (8–10 cm) deep. Make it long enough to lay the bare stem flat with the root ball at one end.
- Lay the plant in the trench at a 30–45 degree angle, root ball at the deeper end, leafy tip pointing up above the soil line.
- Backfill carefully, firming the soil over the stem without bending the exposed tip.
- Water in with 1–2 gallons per plant.
The buried stem grows roots all along its length. The exposed tip curves upward toward light within 2–4 days — a process called gravitropism — and the plant looks completely normal within a week. Nobody looking at it from above would know the main stem is running sideways underground.
The trench method works for any seedling, but it is specifically designed for plants that grew leggy indoors from insufficient light. Instead of composting a $4 nursery transplant with a 12-inch floppy stem, you turn the extra stem length into root real estate.
Container planting depth
Container tomatoes follow the same principle, but the pot sets the upper limit on how deep you can go.
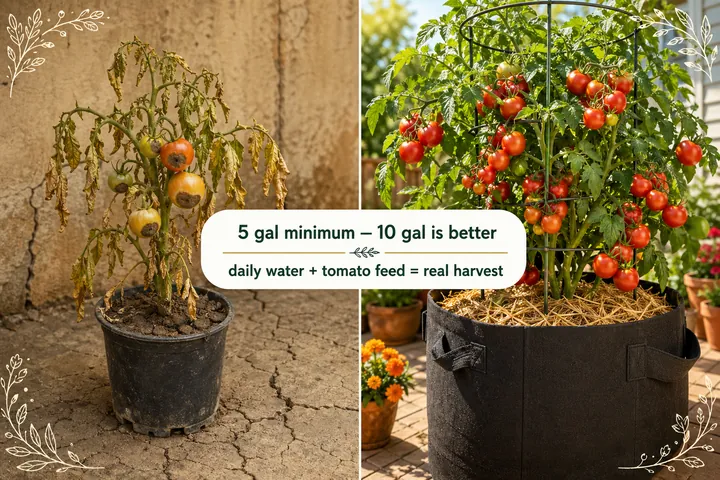
Minimum pot size: 5 gallons (19 L) for determinate and patio types, 7–10 gallons (26–38 L) for indeterminate slicers and heirlooms. Anything smaller than 5 gallons doesn’t give enough vertical depth to bury the stem meaningfully AND leave room for the root ball and ongoing root expansion.
How to deep-plant in a container:
- Fill the pot 1/3 full with potting mix.
- Strip the lower leaves from the stem.
- Set the root ball on the mix and add more mix around it, burying the bare stem up to the lowest remaining leaves.
- Leave 1–2 inches of headspace at the top for watering.
The buried stem section will root into the potting mix just as it does in garden soil. In containers, this extra root mass is especially valuable because container soil dries out faster and has less total nutrient reserve than a garden bed.
One container-specific note: avoid burying the stem against the drainage holes at the bottom. If your root ball sits so low that the stem nodes are right at the drainage holes, elevate slightly with a 1-inch layer of coarse gravel before adding mix.
Soil prep before deep planting
A buried stem only produces roots if the surrounding soil is loose, moist, and warm. Compacted, dry, or cold soil produces little or no adventitious root response.
Before you plant:
- Loosen deeply. Work the soil to a depth of 12 inches (30 cm) with a fork or broadfork. If you’re using the trench method, the trench itself should have loose walls — don’t leave glazed, compacted sides.
- Add compost. Mix a 2–3 inch layer of finished compost into the planting zone. Compost improves moisture retention, which is the environmental trigger for adventitious root formation.
- Check soil temperature. Use a probe thermometer at 4 inches depth. Below 60°F (16°C), root formation is slow and transplant shock is severe. The sweet spot is 65–75°F (18–24°C).
- Fertilize the hole, not the stem. A tablespoon of balanced granular organic fertilizer mixed into the backfill soil (not placed directly against the root ball) feeds the new root system as it develops. High-nitrogen fertilizers at transplant can push leaf growth at the expense of root development — use a balanced formula (10-10-10 or similar) at planting, switching to a lower-nitrogen tomato formula once flowers appear.
Watering after deep planting
Deep planting is most effective when the soil surrounding the buried stem stays consistently moist for the first 2–3 weeks. Moist soil maintains contact with the stem nodes; dry soil breaks that contact and root initiation slows or stops.
Week 1–2 after transplant:
- Water daily if the top 2 inches of soil feel dry.
- Direct water at the base of the stem, not over the foliage.
- Apply 1–2 gallons per plant per watering session in warm weather.
Week 3 onward:
- Water deeply 2–3 times per week, less if you’ve had rain.
- Allow the top 1–2 inches to dry between waterings — the deep root system is now established and can handle brief dry spells.
- A 3–4 inch (8–10 cm) straw mulch layer is the most effective single tool for maintaining soil moisture and moderating soil temperature around the stem.
Avoid overwatering in the first week. Waterlogged soil around the buried stem can cause the nodes to rot before they root. The goal is “consistently moist,” not saturated.
Common mistakes
- Planting at pot depth. This is by far the most common error. Every tomato you plant should go in deeper than it came. There is no downside to deep planting in tomatoes.
- Not stripping the leaves before burial. Buried leaves rot and can introduce fungal disease into the stem. Always remove every leaf from the section you plan to bury — leave only the top cluster above ground.
- Planting in cold soil. Below 60°F (16°C), adventitious roots form slowly and the buried stem is more susceptible to rot. Check soil temperature before transplanting, not just air temperature.
- Overwatering the first week. Moist is not the same as wet. Waterlogged soil around the buried stem rots the nodes before they can root. Let the top inch of soil dry slightly between waterings.
- Skipping mulch. Mulch does two jobs at deep-planting time: it holds the soil moisture that triggers root formation and it moderates soil temperature. A dry, hot, bare soil surface is the worst environment for a newly buried stem.
- Burying the stem in compacted soil without loosening. The buried stem needs to make intimate contact with loose, crumbly soil. A glazed trench wall won’t trigger rooting. Always fork the planting area thoroughly before digging.
- Installing cages or stakes too late. The point of deep planting is to grow a massive root system. Driving a stake into that root system 4 weeks after transplant defeats part of the purpose. Set your support before or at transplanting.
Related reading
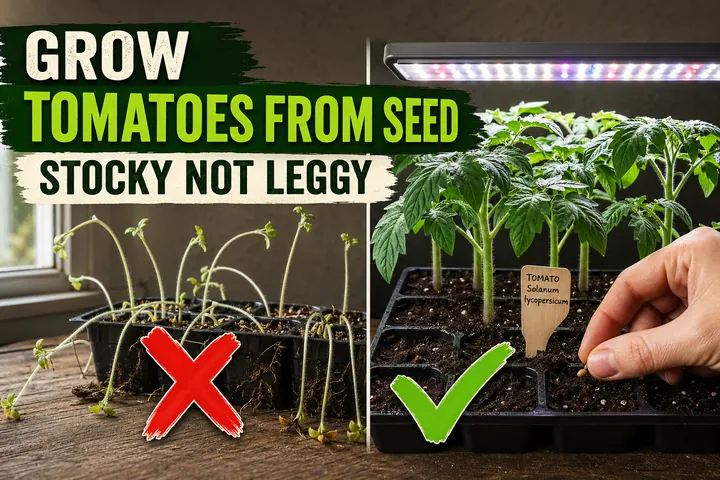
- How to grow tomatoes from seed (indoor start to harvest) — the full seed-to-transplant guide, including how to produce stocky seedlings that are ideal candidates for deep planting.
- How to grow tomatoes in pots (containers and small spaces) — container-specific guidance on pot size, potting mix, and feeding to pair with the deep planting technique above.
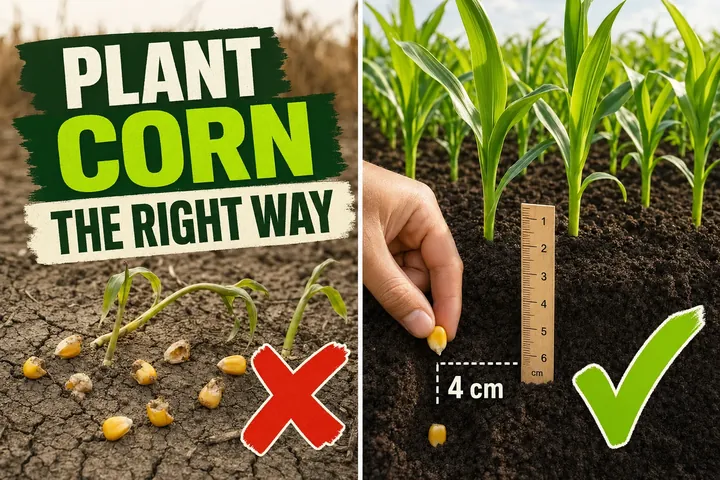
- How deep to plant corn — planting depth rules for the other big summer crop, with a very different logic: corn goes shallow in cool soil and deeper only in dry heat.
- Track every transplant date, watering session, and feeding with the free Tazart plant care app — it adjusts the watering schedule for your local weather and reminds you when the new root system is ready for its first feed.
A note on conditions
Soil type, climate, seedling size, and pot depth all affect how deep you can practically go. The 4–6 inch standard is a starting point — if your seedling is larger or leggier, go deeper. If your raised bed is only 8 inches deep and sits over concrete, use the trench method to maximize stem contact within your available soil depth. Adapt the technique to what your garden actually has, then watch how much faster deep-planted tomatoes establish compared to shallowly planted ones. The difference shows up clearly by week three.
Highly recommended
The supplies that make this guide work


Tazart is an Amazon Associate — we earn from qualifying purchases at no extra cost to you. Thank you for helping us keep these guides free.
Frequently asked questions
How deep should you plant tomatoes?
Plant tomatoes 4–6 inches (10–15 cm) deeper than their nursery pot, or bury 2/3 of the stem below the soil line. Tomatoes are one of the few vegetables that form roots along any buried stem node, so the deeper you plant, the larger and more drought-resistant the root system becomes.
Should you bury the tomato stem when planting?
Yes — actively burying the stem is the single best thing you can do at transplant time. Strip the lowest 2–3 sets of leaves and plant the stem up to just below the remaining foliage. Every buried node grows adventitious roots that strengthen the plant and improve water and nutrient uptake all season.
What is the trench method for planting tomatoes?
The trench method is used for tall or leggy seedlings whose stem can't be buried vertically without hitting the subsoil or a hardpan layer. Dig a shallow horizontal trench 3–4 inches (8–10 cm) deep, lay the stem at an angle, and backfill so only the top 4–6 inches of foliage sticks out. The stem curves upward within days as the plant grows toward the sun.
How do you plant leggy tomato seedlings?
Use the trench method: dig a trench 3–4 inches (8–10 cm) deep and slightly longer than the stem you want to bury. Remove all leaves from the stem except the top cluster, lay the plant at a 30–45 degree angle with the root ball at the deep end and the leafy tip above the soil, then backfill. Roots form all along the buried stem within a week.
How deep do you plant tomatoes in a container?
In a container, aim to bury the bottom 1/3 to 1/2 of the stem — typically 4–6 inches — but your pot depth limits this. Use at least a 5-gallon (19 L) pot so there is enough vertical space below the root ball for the buried stem and new roots. A 7–10 gallon pot is better for indeterminate varieties.
Why do tomatoes root from the stem?
Tomato stems naturally produce adventitious roots — roots that form on non-root tissue — from the small bumps visible along the stem called root initials or stem nodes. This is a species trait of Solanum lycopersicum and is why tomatoes thrive when planted on their side or deeply buried, while most other vegetables would rot.
Does deep planting work for all tomato varieties?
Yes — both determinate and indeterminate tomato varieties benefit from deep planting. The adventitious root response is a species-wide trait. Container-friendly patio types benefit as much as tall indeterminate slicers, as long as the pot is large enough to give the buried stem room to develop roots.
How long after deep planting do the stem roots appear?
New adventitious roots begin forming within 5–7 days of burial in warm soil (above 60°F / 16°C). By 2–3 weeks after transplant, the buried stem section should have a dense new root mass. You can confirm by gently watering around the base — healthy transplants show new top growth as the new root system establishes.